
Related Manuals for Prism Medical UK transactive tra


Summary of Contents for Prism Medical UK transactive tra
- Page 1 Technical Manual Troubleshooting Repairs Replacements Freeway Healthcare, Integra 200, St Asaph Business Park, St Asaph, Denbighshire, North Wales, LL17 0LJ, Tel: 01745 536 780 Fax: 01745 582 532...
-
Page 2: Table Of Contents
Technical manual August 2009 Transactive-Xtra Table of Contents Symptoms and Problems Finding the Problem – Before Getting Inside Pneumatic Systems Electrical Systems Mechanical Systems Basic Instruction Sheets B1 - Getting Access to the Transactive-Xtra Pneumatic Instruction Sheets P1 - Replace Hand Control & Airline Tubing – Air Leak Test P2 - Replace Grommet P3 - Faulty Main and Auxiliary PCB Air Switches Electrical Instruction Sheets... -
Page 3: Symptoms And Problems
Technical manual August 2009 SYMPTOMS AND PROBLEMS Finding the Problem – Before Getting Inside Please note that the majority of technical problems that can occur with the Transactive-Xtra occur with external system components. The following are the key components to check before removing any lift cover: •... -
Page 4: Pneumatic Systems
Technical manual August 2009 Pneumatic Systems The pneumatically operated functions control on/off, up, down and, where applicable, the side-to- side traversing motion of the hoist. A methodical check of the pneumatic system starts from the hand control and works forward through the pneumatic switches on the circuit board. 1. -
Page 5: Electrical Systems
Technical manual August 2009 Electrical Systems Ensure that the batteries are charged. Turn the hoist on & look at the LCD reading to check the battery charge level. If the batteries are not charged, put them on charge before servicing the equipment or connect a fresh set of batteries. - Page 6 Technical manual August 2009 Electrical Systems Auxiliary PCB’s on main PCB Charger PCB Auxiliary Traverse Motor Cable Charger output cable Charging beak cable Front side of main PCB Charger PCB output cable Power Switch Cable Battery Cable Display Limit Switch Rev: 01/08/09 Page:...
- Page 7 Technical manual August 2009 Electrical Systems If the batteries and circuit boards appear in order, no air leak is found and no fault is found with the wiring • Proceed to check that the lift and traversing motors are functioning by removing the motor and battery leads and running jumper cables from the motor leads to the battery leads.
-
Page 8: Mechanical Systems
Technical manual August 2009 Mechanical Systems If the hoist goes down to the end of the strap and then goes up again with the up and down functions reversed, the “slack strap” safety feature is not working: • Because the roller assembly inside the tape switch assembly is stuck and is therefore not activating the micro switch. - Page 9 Technical manual August 2009 Mechanical Systems • Because of a wiring problem. Check the wiring from tape switch assembly to the main circuit board. • Because the Microswitch is malfunctioning. Replace the switch or re-align it. The hoist traverses poorly at specific points in the track system Identify the points of blockage: •...
- Page 10 Technical manual August 2009 Mechanical Systems The charger system does not work The hoist charger system has six components: a switched fused spur, Transformer, charging station end stop, charger plates, wiring harness and circuit board. • Check to see that power is coming into the transformer: this can be done by measuring the output voltage across the 2 stainless steel strips with a multimeter.
-
Page 11: Basic Instruction Sheets
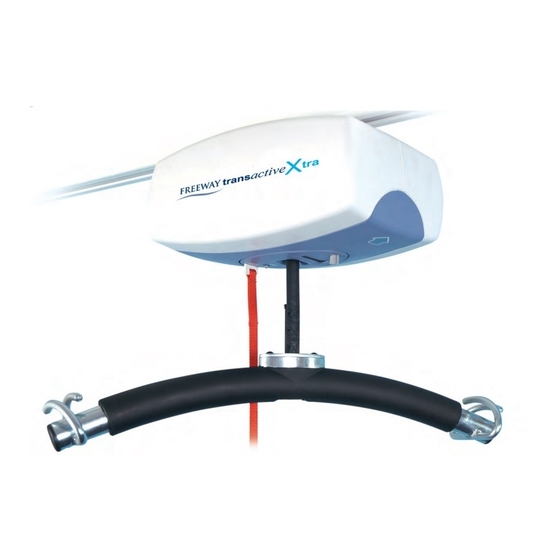
Technical manual August 2009 BASIC INSTRUCTION SHEETS B1 - Getting Access to the Transactive-Xtra IMPORTANT NOTE: Service hoist in a clean, dust free environment. Extreme care must be exercised when removing the cover. Electric shock can occur. Use support blocks to keep hoist balanced while servicing. Disconnect the hand control airline tubing from the black grommet on the hoist unit. - Page 12 Technical manual August 2009 Disconnect Batteries Remove side cover bottom screws Remove side covers Remove side cover top screws Remove airline Detach bottom cover at one short Repeat on opposite side & pull off side tab cover along length of the hoist Rev: 01/08/09 Page:...
-
Page 13: Pneumatic Instruction Sheets
Technical manual August 2009 PNEUMATIC INSTRUCTION SHEETS P1 - Replace Hand Control & Airline Tubing - Air Leak Test IMPORTANT NOTE: If an air leak is suspected, it is important to check the entire pneumatic system for air leaks. There are NO serviceable parts inside the pneumatic Hand Control. Separate the Airline tubing from the black grommet on the hoist unit. -
Page 14: P2 - Replace Grommet
Technical manual August 2009 P2 - Replace Grommet IMPORTANT NOTE: There are NO serviceable parts inside the pneumatic Hand Control. If an air leak is suspected but there is no detected failure from test P1, there may be an air leak at the hoist grommet because the airline pins do not fit tightly. -
Page 15: P3 - Faulty Main And Auxiliary Pcb Air Switches
Technical manual August 2009 P3 – Faulty Main and Auxiliary PCB Air Switches IMPORTANT NOTE: There are no serviceable parts on the Main and Auxiliary PCB. These air switches are not serviceable and the whole board must be replaced if they fail. As this is part of the pneumatic system, it is important that all connections are airtight. -
Page 16: Electrical Instruction Sheets
Technical manual August 2009 ELECTRICAL INSTRUCTON SHEETS E1 - Test and/or Replace Batteries IMPORTANT NOTE: Sealed Lead Acid batteries must be handled with extreme care. Any leakage or warpage of the battery cover indicates battery failure. Replace immediately. 1. If the indicator light (LED) on the control panel turns RED and an audible alarm sounds, the batteries may not have sufficient power to operate the hoist under load. - Page 17 Technical manual August 2009 8. Connect the SEPARATE BLACK wire across the inside RED and BLACK battery terminals. Reconnect the (+) and (-) wire harness wires to the matching terminals on the batteries. Disconnect batteries Replace batteries Rev: 01/08/09 Page:...
-
Page 18: E2 - Replace Main And Auxiliary Pcb (Printed Circuit Board)
Technical manual August 2009 E2 - Replace Main and Auxiliary PCB (Printed Circuit Board) IMPORTANT NOTE: Use extreme caution when servicing the hoist. The PCB should be handled with care. Use of proper E.S.D. protection to prevent damage to the circuit board is highly recommended. - Page 19 Technical manual August 2009 E3 - Repair/Replace Charging station and End Stop IMPORTANT NOTE: There are no serviceable parts in the Transactive-Xtra transformer. Use extreme caution when performing internal servicing on the hoist. Ensure that the charger has been disconnected from the power supply before starting. REPAIR Charging station The Charging station consists of the end stop components and the charging spring clips.
- Page 20 Technical manual August 2009 E4 - Repair Charging beak Contact Strips and Wire Harness (LED) IMPORTANT NOTE: Use extreme caution when performing internal servicing on the hoist. Ensure that the battery has been disconnected before starting. The original copper charger contact strips can become corroded in very humid and acidic environments such as pools and spas.
-
Page 21: E5 - Adjust/Replace Up/Down Micro Switch Assembly
Technical manual August 2009 E5 - Adjust/Replace UP/DOWN Micro Switch Assembly IMPORTANT NOTE: Use extreme caution when performing internal servicing on the hoist. Ensure that the battery has been disconnected before starting. The UP/DOWN micro switch assembly controls numerous safety functions and maintains an absolute control over the polarity logic of the entire system. - Page 22 Technical manual August 2009 13. Reassemble hoist and test. Remove display panel Remove battery bracket Remove “battery sidewall” frame Remove opposite “battery Remove fastener on bottom Remove fastener on bottom sidewall” frame fasteners panel on PCB side panel on gearbox side Slide off panel with strap Test Switches Cut cable ties to free switch...
-
Page 23: E6 - Repair/Replace Emergency Shut-Off With Pull Cord
Technical manual August 2009 E6 – Repair/Replace Emergency Shut-Off with Pull Cord IMPORTANT NOTE: Use extreme caution when performing internal servicing on the hoist. Ensure that the battery has been disconnected before starting. The Emergency Shut-Off/Down with Pull Cord is a safety function that either cuts all power coming from the battery to the rest of the hoist or allows the hoist to emergency lower. -
Page 24: Mechanical Instruction Sheets
Technical manual August 2009 MECHANICAL INSTRUCTION SHEETS M1 - Replace Lifting Strap – Frayed, Stress Streaks, Length IMPORTANT NOTE: Use extreme caution when performing internal servicing on the hoist. Ensure that the battery has been disconnected before starting. Using the DOWN button on the hand control release the entire strap (until the lower limit switch engages and stops the strap). -
Page 25: M2 - Replace Trolley Wheels
Technical manual August 2009 M2 - Replace Trolley Wheels IMPORTANT NOTE: Ensure that the hoist is fully supported at all times. Take great care in protecting the PCB. There is a tendency to turn the hoist over, thus damaging or breaking the aluminum standoffs that support the PCB. -
Page 26: M3 - Replace Traversing Drive Motor, Traversing Gear And Traverse Idle Gear
Technical manual August 2009 M3 - Replace Traversing Drive Motor, Traversing Gear and Traverse Idle Gear IMPORTANT NOTE: Ensure that the hoist is fully supported at all times. Take great care in protecting the PCB. There is a tendency to turn the hoist over, thus damaging or breaking the aluminum standoffs that support the PCB. -
Page 27: Lcd Display & Programming Functionality
Technical manual August 2009 LCD Display & Programming Functionality • Default Display Modes: − The user can set either of the following as the ‘Default’ display mode: 1.– Battery Level (the factory setting for the Default Display Mode); or, 2.– Number of Lifts. −... - Page 28 Technical manual August 2009 LCD Display & Programming Functionality − In any ‘Default display mode’, if the unit is in the charging station the hoist will go into Charging Display Mode regardless what the user has selected as ‘Default Display Mode’.
- Page 29 Technical manual August 2009 LCD Display & Programming Functionality • Change Setting Mode : − To change one of the programmable settings, the user should press the ‘Up’ and ‘Down’ buttons simultaneously when a particular setting is being displayed. The display will then display the setting name and the setting itself. The setting will then display as reverse-highlighted (as in the following example) D i s p l a x y B A T...
- Page 30 Technical manual August 2009 LCD Display & Programming Functionality − If the hoist has the return-to-charge (“RTC”) feature, the following programming choices will also be available: 1.– RTC Max. Time 60 seconds (ii) 120 seconds (factory setting) (iii) 180 seconds (iv) 240 seconds 2.–...
- Page 31 Technical manual August 2009 LCD Display & Programming Functionality • Resting Hoist Counter 1. Ensure the power is off before beginning. 2. Place a shunt on pin #6, this is the RESET pin. 3. Power up the hoist system. 4. The shunt on the RESET pin must now be removed. (Note: This will not reset the counter recording the total number of lifts performed by the unit.) (Note that the area marked in the following main PCB photo is the program pins’...
-
Page 32: Tool List
Technical manual August 2009 Tool List The hoist has been designed to minimize the tools required for servicing. Common and swappable components provides for efficient servicing. The following is a list of tools required for basic repairs and servicing: a) Circlip pliers f) Terminal screwdriver b) 2mm T bar Allen key g) Flat nose Pliers... - Page 33 Technical manual August 2009 Rev: 01/08/09 Page:...
- Page 34 Technical manual August 2009 Rev: 01/08/09 Page:...
- Page 35 Technical manual August 2009 Rev: 01/08/09 Page:...
-
Page 36: Service Parts List
Technical manual August 2009 Service Parts List (Transactive-Xtra) Circuit Boards 613890 Aux. Controller 613880C Charger PCB 613880 Main Rev: 01/08/09 Page:... - Page 37 Technical manual August 2009 Transactive Extra (Technical Information) Cover Assembly Rev: 01/08/09 Page:...
- Page 38 Technical manual August 2009 Transactive Extra (Technical Information) Battery and Board Assembly Rev: 01/08/09 Page:...
- Page 39 Technical manual August 2009 Transactive Extra Technical Information) Top Plate Assembly Rev: 01/08/09 Page:...
- Page 40 Technical manual August 2009 Transactive Extra Technical Information) Left Plate Assembly Rev: 01/08/09 Page:...
- Page 41 Technical manual August 2009 Transactive Extra Technical Information) Motor Plate Assembly Rev: 01/08/09 Page:...
- Page 42 Technical manual August 2009 Transactive Extra Technical Information) Tape Gear Assembly Rev: 01/08/09 Page:...
- Page 43 Technical manual August 2009 Transactive Extra Technical Information) Bottom Plate Assembly Rev: 01/08/09 Page:...
- Page 44 Technical manual August 2009 Transactive Extra Technical Information) Charger endstop Assembly Rev: 01/08/09 Page:...
- Page 45 Technical manual August 2009 Transactive Extra Technical Information) Low Height Carry Bar Assembly Rev: 01/08/09 Page:...
Need help?
Do you have a question about the transactive tra and is the answer not in the manual?
Questions and answers