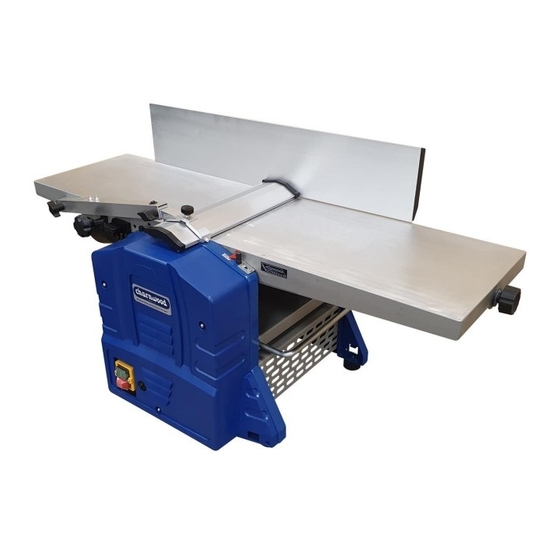
Summary of Contents for Charnwood PT250
- Page 1 10” x 5” PLANER THICKNESSER OWNERS MANUAL MODEL: PT250 Charnwood, Cedar Court, Walker Road, Hilltop Industrial Estate, Bardon, Leicestershire, LE67 1TU Tel. 01530 516 926 Fax. 01530 516 929 email: sales@charnwood.net website: www.charnwood.net...
-
Page 2: General Safety Rules
GENERAL SAFETY RULES WARNING: Do not attempt to operate the machine until you have read thoroughly and understood completely all instructions, rules, etc. contained in this manual. Failure to comply may result in accidents involving fire, electric shock, or serious personal injury. Keep this owner's manual and review frequently for continuous safe operation. - Page 3 Risk of Injury! Wear Eye Wear Ear Never reach into Protection Protection a running cutterblock Charnwood PT250 Specification Voltage and frequency 240V at 50hz. Motor (Carbon brush) 1500w (2hp) Planer width 252mm (10”) Maximum planing cut...
- Page 4 Rating Description Hobby: Suitable for Weekend DIY'ers and woodworking enthusiasts. Generally lighter weight machines with lower power ratings and smaller tooling capacities. Typically only ever used by one person for short periods of time or longer periods of time infrequently. Machinery should be well maintained in a clean, dry environment such as a home workshop, garage or timber shed.
- Page 5 Place the machine upright Locate two tapped holes on the side edge of the table Fit the fence to the table, using the two M5 x 20mm cap head bolts and washers. Fit the bridge guard arm pivot bolt Screw the pivot bolt, with washer fitted, from the inside of the table, until the full length of the thread projects beyond the edge of the table.
- Page 6 Fit the bridge guard support arm onto the bridge arm pivot bolt. Secure the guard by screwing the wing nut onto the threaded bolt. Insert the locking knob, with washer fitted, through the curved slot in the bridge arm. Set the bridge guard arm to the desired angle and tighten.
- Page 7 Thicknessing Operations Remove the fence The extraction hood is then fixed on top of the outfeed table and locked in place using the two locking latches. Fit the crank handle onto the shaft located at the side of the infeed table. Rotating this crank handle raises or lowers the height of the thicknessing table.
- Page 8 Starting And Stopping To turn on, press the green button. Wait for the knives to reach their maximum speed of rotation before commencing with the cut. The machine is fitted with an NVR (No Voltage Release) switch. This type of switch is designed so that if the machine is disconnected from the mains whilst running and then reconnected, the motor will not automatically restart.
- Page 9 Position the bridge guard so it covers any exposed part of the knives. Use the push pads to hold the work piece firmly down against the table, feed the work piece across the knives, onto the out-feed table. When working with very thin material, set the bridge guard all the way across to the fence.
-
Page 10: General Guide
The out-feed end of the thicknesser bed has a pull-out support that can be extended to support the work piece as it emerges. General Guide When faced with a rough sawn piece of timber which requires planing on all 4 sides and taking down to a specific finished dimension, follow this guide: •... - Page 11 Knife Removal and Replacement Disconnect from the power supply before starting any maintenance. Out-feed table Cutter block Locking bar bolts Knife Locking bar In-feed table Using the 4mm allen key provided undo the 5 locking bolts (turn anticlockwise) Lift out the locking bar and knife. Place the new knife into the cutter block.
-
Page 12: Troubleshooting
Place the knife height setting jig on the out-feed table with the curved section sitting over the knife and cutter block. Using the Hex key, Adjust the blades if needed so that they just touch the curved section of the setting jig. Tighten the 5 locking bar bolts and ensure it is firmly locked in place. -
Page 13: Declaration Of Conformity
Declaration of Conformity Charnwood Declare that Woodworking Planer & Thicknesser, Model PT250 Conforms with the following EU Directives: Machinery Directive 2006/42/EC EMC Directive 2014/30/EU Conforms with the following UK Regulations: Supply of Machinery (Safety) Regulations 2008 Electromagnetic Compatibility Regulations 2016 And further conforms to the machinery example for which the EC type examination Certificate No. - Page 14 Charnwood PT250 Parts Diagram...
- Page 15 Charnwood PT250 Parts List...
- Page 16 Updated June 2021 Charnwood, Cedar Court, Walker Road, Hilltop Industrial Estate, Bardon, Leicestershire, LE67 1TU Tel. 01530 516 926 Fax. 01530 516 929 email: sales@charnwood.net website: www.charnwood.net...


Need help?
Do you have a question about the PT250 and is the answer not in the manual?
Questions and answers