
Related Manuals for Westinghouse iGen2200c


Summary of Contents for Westinghouse iGen2200c
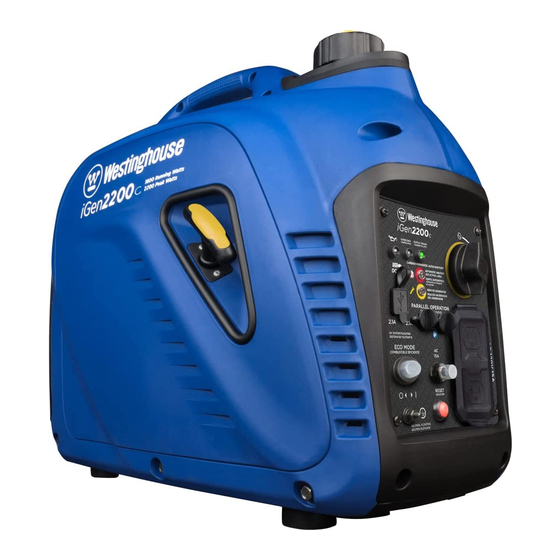
- Page 1 USER MANUAL iGen2200c Digital Inverter Generator 1800 Running Watts | 2200 Peak Watts DO NOT RETURN THIS PRODUCT TO THE STORE If you have questions or need assistance, please call customer service at 855-944-3571.
-
Page 2: Table Of Contents
The illustrations used in this manual are intended as representative reference views only. We reserve the right to make any specification or design change without notice. 2 | Westinghouse Outdoor Power Equipment, LLC... -
Page 3: Specifications
For Your Records * Ethanol content of 10% or less. DO NOT use E15 or E85. Date of Purchase: Model Number: Serial Number: Place of Purchase: IMPORTANT: Keep your purchase receipt for trouble-free warranty coverage. Westinghouse Outdoor Power Equipment, LLC | 3... -
Page 4: Safety
Generator exhaust contains carbon monoxide. This is a poison you cannot see or smell. NEVER use inside a home Only use OUTSIDE and far or garage, EVEN IF doors away from windows, doors, and windows are open. and vents. 4 | Westinghouse Outdoor Power Equipment, LLC... -
Page 5: Safety Instructions
Protect the generator from all hazardous weather conditions. Moisture or ice can cause a short circuit or other malfunction in the electrical circuit. Westinghouse Outdoor Power Equipment, LLC | 5... -
Page 6: General Safety Precautions
• Never remove the fuel cap when the generator is running. Shut off the engine and allow the unit to cool 6 | Westinghouse Outdoor Power Equipment, LLC... -
Page 7: Safety Labels And Decals
SAFETY SAFETY LABELS AND DECALS Westinghouse Outdoor Power Equipment, LLC | 7... -
Page 8: Co Sensor
A CO sensor Call emergency services. You may have carbon monoxide fault can only be diagnosed and repaired poisoning. by an authorized Westinghouse service center. ACTION LABEL 8 | Westinghouse Outdoor Power Equipment, LLC... -
Page 9: Components
Engine Service Cover: Cover provides access to the engine, air cleaner, and carburetor. Fuel Cap: Add unleaded fuel here. Model Information Label: Provides voltage/amps, and power rating information. Westinghouse Outdoor Power Equipment, LLC | 9... -
Page 10: Control Panel Components
Indicates the generator is circuit in a connected appliance. producing electrical power at the receptacles. 12. Ground Terminal: The ground terminal is used to externally ground the generator. 10 | Westinghouse Outdoor Power Equipment, LLC... -
Page 11: Assembly
5W-30 Synthetic unleaded gasoline containing up to 10% ethanol. °F °C -28.9 -17.8 -6.7 15.6 26.7 37.8 48.9 Ambient temperature 1. On a level surface, remove the engine service cover and oil dipstick. Westinghouse Outdoor Power Equipment, LLC | 11... -
Page 12: Filling The Fuel Tank
5. Install the fuel cap. Tighten securely. NOTICE Fuel can damage paint and plastic. Use caution when filling the fuel tank. Damage caused by spilled fuel is not covered under warranty. 12 | Westinghouse Outdoor Power Equipment, LLC... -
Page 13: Operation
High Altitude Carburetor Kit Part# 202801 muffler. DO NOT contain generators during operation. Westinghouse Outdoor Power Equipment, LLC | 13... -
Page 14: Break-In Period
If the generator will be used on an infrequent or intermittent if warm from operation. basis (more than one month before next use), refer to the Storage sections of this manual for information regarding battery charging and fuel deterioration. 14 | Westinghouse Outdoor Power Equipment, LLC... -
Page 15: Eco Mode
See the wattage reference chart on the next page. 3. Estimate how many surge (starting) watts you will need. Westinghouse Outdoor Power Equipment, LLC | 15... -
Page 16: Power Management
• Make sure the electrical rating of the tool or appliance Tool or Appliance Running Starting does not exceed the rated power of the generator or the Watts* Watts* receptacle being used. Incandescent Lights (4 Quantity x 75 Watts) TV (Tube Type) 16 | Westinghouse Outdoor Power Equipment, LLC... -
Page 17: Parallel Operation
Fuel or oil can leak and damage to the generator A Westinghouse 507PC parallel cord (purchased may occur. separately) is required for parallel operation. This cord can be purchased from an authorized Westinghouse Generator dealer. Westinghouse Outdoor Power Equipment, LLC | 17... -
Page 18: Maintenance
Wash all exposed skin with soap and water. 4. Remove the foam air filter from the air cleaner housing and wash it by submerging the element in a solution 18 | Westinghouse Outdoor Power Equipment, LLC... -
Page 19: Engine Oil Level Check
Disconnect the spark plug wire from the spark plug and place the wire where it cannot contact the spark plug. 3. With a damp rag, clean around the oil dipstick. Remove the dipstick and wipe clean. Westinghouse Outdoor Power Equipment, LLC | 19... -
Page 20: Spark Plug Maintenance
NOTICE ALWAYS use the Westinghouse OEM or compatible non-resistor-type spark plug. Use of resistor-type spark plug can result in rough idling, misfire, or may prevent the engine from starting. -
Page 21: Storage
7. Reinstall the spark plug. Leave the spark plug boot disconnected to prevent accidental starting. 1. Remove the engine service cover. 8. Install the engine service cover. 2. Locate the drain hose extending from the bottom of the carburetor float bowl. Westinghouse Outdoor Power Equipment, LLC | 21... -
Page 22: Valve Clearance
Hold the rocker arm pivot and re-tighten the pivot adjusting nut to the specified torque. Torque: 106 inch-pound (12 N•m) 8. Perform this procedure for the other valve. 9. Install the gasket, rocker arm cover, and spark plug. TROUBLESHOOTING 22 | Westinghouse Outdoor Power Equipment, LLC... -
Page 23: Troubleshooting
No power at AC receptacles Replace or repair tool or appliance. Stop and Faulty power tool or appliance. restart the engine. Contact Westinghouse customer service toll- Faulty generator. free at 1 (855) 944-3571. Westinghouse Outdoor Power Equipment, LLC | 23... -
Page 24: Exploded View And Parts Lists Exploded View A
EXPLODED VIEW EXPLODED VIEW AND PARTS LISTS EXPLODED VIEW AND ENGINE PARTS LISTS EXPLODED VIEW A 24 | Westinghouse Outdoor Power Equipment, LLC... - Page 25 201802 AIR INLET SPRING LOWER SEAT 16.3 500018 HANDLE 201701 INTAKE VALVE 16.4 500017-231 HANDLE COVER 205901 EXHAUST VALVE 200301 CRANKSHAFT 206001 VALVE SPRING 209901 SEALED RUBBER 8.10 201801 INTAKE VALVE SPRING SEAT Westinghouse Outdoor Power Equipment, LLC | 25...
-
Page 26: Exploded View B
EXPLODED VIEW EXPLODED VIEW B 26 | Westinghouse Outdoor Power Equipment, LLC... - Page 27 SHORT CIRCUITING WIRE 91825 CROSS RECESSED PAN HEAD 14.6 94325 FLAT WASHER SCREW + GASKET COMBINATION 14.7 500456 PLUG 94003 TOOTH WASHER CONTROL PANEL ASSEMBLY 94006 SPLIT WASHER 15.1 504453 PANEL BACK COVER Westinghouse Outdoor Power Equipment, LLC | 27...
- Page 28 BOLT M6 23.2 599065 CO FLAME OUT ACTUATOR BASEBOARD ASSEMBLY 24.1 91325 BOLT M6 24.2 500045 LOCK CLIP M5 24.3 91330 BOLT M6 24.4 500034 FRAME ISOLATION RUBBER PAD 24.5 90027 NUT M6 28 | Westinghouse Outdoor Power Equipment, LLC...
-
Page 29: Schematic
SCHEMATICS SCHEMATIC SCHEMATIC Westinghouse Outdoor Power Equipment, LLC | 29...
Need help?
Do you have a question about the iGen2200c and is the answer not in the manual?
Questions and answers