
Subscribe to Our Youtube Channel
Related Manuals for SereneLife SLRWBK25


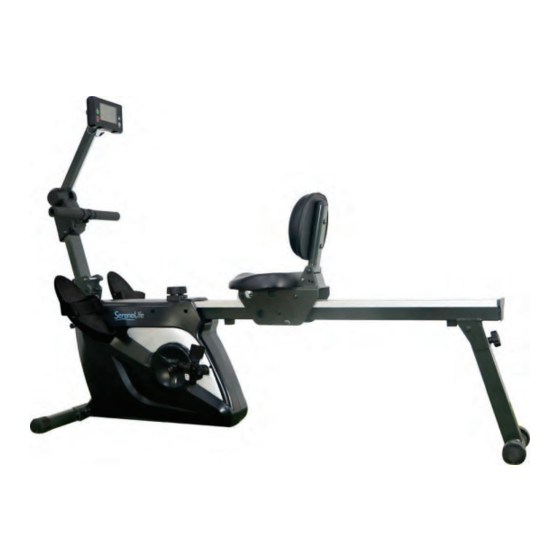
Summary of Contents for SereneLife SLRWBK25
- Page 1 SLRWBK25 Smart Rowing Machine Sports Training Row Machine w/ Auto Power-Off Battery Saving Function, Portable Folding Style...
-
Page 2: Important Safety Information
Please read this manual carefully before using the product, and keep it in a safe place for future reference. IMPORTANT SAFETY INFORMATION Please note the following safety precautions before exercising: 1. Read all instructions before assembly and operation. 2. Check all screws, nuts and other connections before using the bike. 3. -
Page 3: Exploded Drawing And Parts List
EXPLODED DRAWING AND PARTS LIST www.SereneLifeHome.com... - Page 4 Parts list Main frame absorber Front bottom tube Webbing cap slider seat weld Webbing Bolt M8*60 Monitor Washer D17 Monitor support Washer D8 Handlebar Feet cap with wheel Foam handlebar Cap (anti slider) Nut M10*1 Bolt M12*160 Axis Blade D10 pedals axis 6000RS magnetic board weld...
- Page 5 Bolt Screw M6*98 Scrw M10*95 Belt Tension controller Magnetic Washer Φ18*Φ5*1.5 Round magnetic Screw M5*50 Bolt M5*12 Brake frame Short bushing Tube Cap S17 Nut M10*1.25 Tube cap Magnetic board Tube cap Tube cap PC board 2 Sensor wire PC board 1 Washer Φ6.2*Φ16*1.5 Screw ST4.2*20 Crank cover...
- Page 6 Assembly Instructions 1. Preparatory Work: A. Make sure there is enough space before installation; B. Con rm all of the components are all-ready before installation. (refer to previous product exploded view which indicates the name and the location of the components); C.
- Page 7 Step 2: 1. Secure stepper (10) to main frame (1) with screw (9) as pic. 2. Secure L&R pedals (95L/R) to L&R crank (98L/R); secure bandage (96L/R) to L&R pedals (95L/R). (Attn: Lock R pedal (95R) clockwise, lock L pedal (95L) with counter clockwise. Lock well L/R pedals (95L), (95R). #9 M12*160 4pcs #B S17, 19 1pc ...
- Page 8 3. Lock well with screw (34) washer (131), slider weld (3), backrest weld (94), washer (131), nylon nut (23), cover cap (131). 4. Adjust suitable backrest positon when you use back rest function. Lock plug well (110) with suitable position, fixed backrest weld (94); Adjust suitable seat cushion (26) position, lock well plug handlebar (108) fix the slider seat (3).
- Page 9 Step 4: 1. Secure handlebar (44) to webbing xed set (40), secure the foam (45) to handle bar (44). 2. Connect monitor (42) with sensor wire (82), (142), loose screw (64) of monitor (42); lock well monitor (42) monitor support (43) with screw (64) as pic. #64 M5*12 4pcs #A 13, 14, 15 1pc www.SereneLifeHome.com...
-
Page 10: Display Information
EXERCISE MONITOR INSTRUCTION MANUAL DISPLAY INFORMATION BUTTONS 1. MODE: Press this button to changeover display or choose the window needs to be set. SET: To set value of time, count, distance and calories when not in scan mode. RESET: Press to reset time, count, distance and calories. FUNCTIONS 2. -
Page 11: Auto-Start-Stop
5. TIME Count the total time from exercise start to the end and the range is 0:00 ~ 99:59 Minute. 6. CALORIES (CAL): Count the total calories consumed from exercise start to the end and the range is 0.0 ~ 9999 CAL. 7. -
Page 12: Battery Replace
BATTERY REPLACE When the display becomes dim or illegible, remove the battery and replace with SIZE AAA UM4 R03. www.SereneLifeHome.com... - Page 13 The Warm Up Phase This stage helps get the blood owing around the body and the muscles working properly. It will also reduce the risk of cramp and muscle injury. It is advisable to do a few stretching exercises as shown below. Each stretch should be held for approximately 30 seconds, do not force or jerk your muscles into a stretch - if it hurts, STOP.
-
Page 14: Heart Rate
Exercise Stage This stage should last for a minimum of 12 minutes though most people start at about 15~20 minutes. After repeat it easily for several times, you can increase training strength. After exercising for a period of time, your heart beat will be close to the best position in the graph as below (Shaded part). - Page 15 Features: • Smart Fitness Rowing Machine • Compact Gym Exercise Rower Style • For Sports Training, Cardio Fitness, Weight Loss Fat Burning • Measures Time, Distance, Strides, Calories Burned • Digital LCD Display Computer Panel • Adjustable Resistance Rower Level Setting •...
- Page 16 Questions? Issues? We are here to help! Phone: (1) 718-535-1800 Email: support@pyleusa.com...
Need help?
Do you have a question about the SLRWBK25 and is the answer not in the manual?
Questions and answers