
Related Manuals for SereneLife SLRWMC10


Summary of Contents for SereneLife SLRWMC10
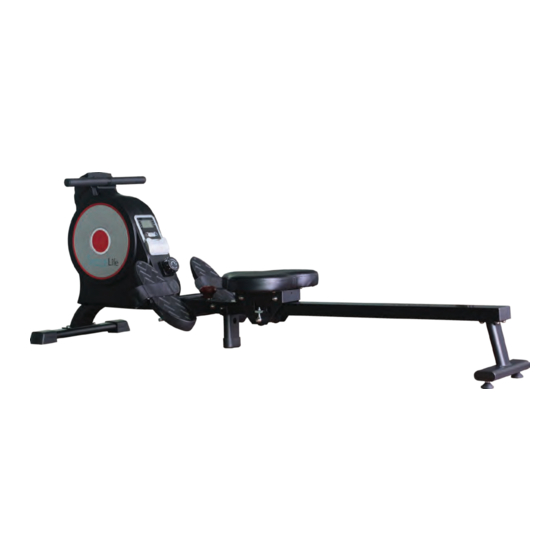
- Page 1 SLRWMC10 Smart Rowing Machine Sports Training Row Machine with Smartphone Fitness Monitoring App, Portable Folding Style...
- Page 2 MPORTANT! • Please read all instructions carefully before using this product. • Retain this manual for future reference. • The speci cations of this product may vary slightly from the illustrations and are subject to change without notice. IMPORTANT SAFETY NOTICE To ensure your safety and health, please use this equipment correctly.
- Page 3 6. Always use the equipment as indicated. If you nd any defective components while assembling or checking the equipment, or if you hear any unusual noises coming from the equipment during exercise, discontinue use of the equipment immediately and do not use until the problem has been recti ed. 7.
- Page 4 #54 M6*10 1pc. #56 M8*15*S6 4pcs. #81 M8*102 1pcs. #82 Φ8*100*105 1pc. #74 S6 1pcs. EXPLODED DIAGRAM www.SereneLifeHome.com...
- Page 5 PARTS LIST Description Spec. Main Frame Front Stabilizer Rear Support Magnet Frame Sliding Rail Handlebar 7L/R Seat Supporting L/R U Shape Bracket Chain Cover L Chain Cover R Tension Control L=210 Knob Plastic Lattice 27*7 Magnet Volute Spring Cover 118.5*11.8 Mesh Belt Wheel Φ35*110 Outer PC Board...
- Page 6 PARTS LIST Description Spec. Sensor Wire L370 Bearing Φ35*Φ10*11 Bearing Φ30*Φ17*7 Bearing 35*17*16 Bearing Φ26*Φ10*8 Bearing Φ22*Φ8*7 Bearing Steel Φ17*46 Inertial Wheel Φ240*25 2.5kg Magnet 25*10*5 2800 Inductor Seat Volute Spring t0.5*22*5080 Axle Sleeve Φ42*44.5 Bolt M12*160*S19 Fixing Axle for Pedal Φ12*440 Adjusting Screw M6 L45...
- Page 7 PARTS LIST Description Spec. M10*1*H8*S14 Screw ST4.2*20*Φ8 Screw ST4.2*16*Φ8 Φ8 Spring Washer Wave Washer d10*Φ15*0.3 C-clip C-clip Allen Wrench Spanner S13-14-15-17-19 Description Spec. Foot Leveler M8*35 PVC Shipping Tube Connecting Board Knob PP+Q235 Bolt M8*102 ф15*8*105 Pull Pin End cap www.SereneLifeHome.com...
- Page 8 ASSEMBLY INSTRUCTIONS STEP 1: Remove 2 Screws (No. 55) from - 74 Main Frame (No. 1) with Allen Wrench (No. 74), then remove 2 Washers (No. 60) and Shipping Tube (No. 78). NOTE: Don’t discard 2 Screws (No. 55) and 2 Washers (No. 60), because in Step 2, you need to use them again.
- Page 9 STEP 3: Attach Fixing Axle for Pedal (No. 47) into the bottom hole of Main Frame (No.1) using 1 Screw (No. 54). Secure and tighten with Spanner (No. 75). Attach 2 Bolts (No. 46) into the upper hole of Main Frame (No. 1) through Pedals (No.
- Page 10 STEP 5: Attach the Sliding Rail (No. 5) to Main Frame (No. 1) using Bolt (No. 81), 2 Washers (No. 60), and Nut (No. 64). Tighten and secure with Spanner (No. 75) and Allen Wrench (No. 74). Next, attach the top of the Sliding Rail (No. 5) to the Main Frame (No.1), insert the Pull Pin (No.
- Page 11 STEP 7: NOTE: The two upper buckles of Computer (No. 32) should be aligned to the two upper slots of computer seat of Main Frame (No. 1). Connect Sensor Wire (No. 34) with the wire of Computer (No. 32). Place Computer (No.
- Page 12 ADJUSTING THE BALANCE If you notice that the rower is unbalanced during use, you should adjust the foot levelers located beneath the rear support. Rotate Foot Levelers (No. 23) clock- wise until it sits level with the surface that the rower is on.
- Page 13 FOLDING THE ROWER Figure A CAUTION! Move with caution when you vertically fold the Sliding Rail (No. 5) as your head may touch the Rear Support (No. 14). Figure B Figure C When not in use, you can save space by folding the Sliding Rail (No. 5). Pull out the Pull Pin (No.
- Page 14 REPLACING THE BATTERIES Two AAA batteries are included in Computer (No. 32). To replace the batteries, remove Computer (No. 32) from Main Frame (No. 1), and disconnect the Sensor Wire (No. 34) and the wire of Computer (No. 32). Replace both batteries. Do not mix battery types and do not mix old and new batteries.
- Page 15 MOVING THE ROWER To move the rower, lift the rear support until the transportation wheels on the front stabilizer touch the ground. Once the wheels are on the ground, you can transport the rower to the desired location with ease EXERCISE COMPUTER Our computerized display console on the Magnetic Rowing Machine allows the user to tailor a personalized workout by monitoring their progress.
- Page 16 CAL (CALORIES): Counts the total calories burned from current workout. DIST (DISTANCE): Counts the total distance during your current workout. RPM (CN/M): Display the steps per minute while exercising. AUTO ON/OFF & AUTO START/STOP: The power will turn o automatically once there’s no signal for 4 minutes. The computer will reactivate once the rower is put into motion or when a computer key is pressed.
- Page 17 2.2. Connecting Equipment WIreless BT scanning is completed, sports show will automatically search your mobile phone near the sports equipment can be connected. 2.3. Connect successfully After a successful connection, can be selected according to the mode of exercise you need to. 3.
- Page 18 Finish your movement when you press the stop button, the motion show will save the record in your record in the history of the movement. SLRWMC10 Smart Rowing Machine Sports Training Row Machine with Smartphone Fitness Monitoring App, Portable Folding Style Features: •...
- Page 19 The ‘Fitshow’ App: • Train Smarter & Connect with Your Favorite Devices • Record, Collect and Review Exercise Data • Put Your Training Stats on Display & Challenge Friends • Ability to Share Health & Fitness Data via Social Media •...
Need help?
Do you have a question about the SLRWMC10 and is the answer not in the manual?
Questions and answers