Advertisement
Quick Links
Advertisement

Summary of Contents for Grabo Pro Lifter 20
-
Page 3: Functional Description And Specifications
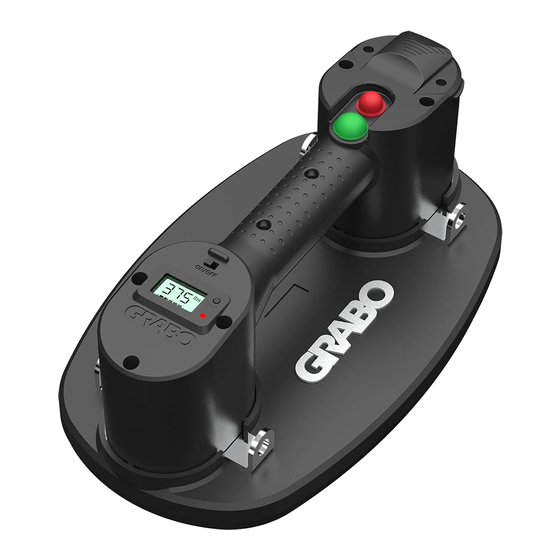
Functional Description and Specifications Intended Use The GRABO Pro Lifter 20 is a fully portable electric vacuum lifter, intended to lift, move, and place everything from stone pavers to tiles and drywall to furniture and large appliances. GRABO Pro features an inbuilt pressure sensor with an automatic start/stop pump. - Page 4 Technical Specifications GRABO Pro Lifter 20 Model NG-Pro-14.8-2Li Battery voltage 14.8V Li-ion Working voltage DC 14.8V Carry weight Max 375 lbs (170kg) (on perpendicular hold) Service life 100000+ times/800h+ Uninterrupted run-time on full battery charge No. of operating runs on a full battery...
- Page 5 Pressure to perpendicular lifting force conversion For a more accurate estimation, check the pressure gauge on your GRABO Pro and use the table below to convert pressure values to max lifting force values. (Parallel holding force values can be calculated using the P/P ratio provided above for different materials.)
- Page 6 Grabo Pro Safety ♦ The GRABO Pro is not designed or intended for climbing or securing people in any way. Using this product for climbing or any other unintended purpose may result in injury or death. ♦...
- Page 7 Connecting a Strap to the GRABO Pro A lifting strap can be purchased as a separate accessory. 1. Locate the four holes around the handle of the GRABO Pro. You can connect the strap to any two of these holes.
- Page 8 Replacing the Rubber Foam Seal 1. Remove the rubber foam seal that has become worn or damaged by pulling it out of the GRABO Pro. 2. Gently press the new rubber foam seal into position, ensuring that it fits snuggly and securely.
-
Page 9: Replacing The Filter
Replacing the filter 1. Turn the GRABO Pro upside down to reveal its suction pad. 2. Using the tip of a screwdriver remove the .75 inch circular plastic keeper and the filter (located underneath the motor). 3. Replace the filter and insert the plastic keeper to secure the... - Page 10 GRABO Pro for the first time. When the batteries are fully charged, which takes approximately two hours from empty, the GRABO Pro motor can run for up to 2 hours. Caution: Only use a battery charger designed for the batteries supplied with your GRABO Pro.
- Page 11 Caution: Using the GRABO Pro while the battery is low may result in injury and damage to the materials being lifted. Position the GRABO Pro flush against the surface of the item you want to lift. 3. When the power indicator switches from green to red, the vacuum gauge and the GRABO Pro is in ready mode.
- Page 12 ♦ When lifting any material ensure the vacuum pump remains on while lifting. 6. When you are done, press the red button to break the seal and release the item. Press the green button to stop the vacuum pump. 7. Press the measurement unit selector to change the pressure unit measurement from bar to psi and kg to lb.
-
Page 13: Troubleshooting
Troubleshooting If you have any questions about operating or troubleshooting the GRABO Pro, visit the FAQ and troubleshooting sections at www.GRABO.com... -
Page 14: Maintenance
Maintenance Servicing the GRABO Pro If your GRABO Pro is damaged or faulty, have it repaired by an authorized service technician. Caution: Under no circumstances should the Grabo Pro be opened for repairs or any other purpose by anyone other than an after-sales service technician authorized by Nemo Power Tools. - Page 16 Nemo Power Tools Ltd www.GRABO.com...


Need help?
Do you have a question about the Pro Lifter 20 and is the answer not in the manual?
Questions and answers