Shure DFR11EQ User Manual
Digital feedback reducer with windows software version 4
Hide thumbs
Also See for DFR11EQ:
- User manual (43 pages) ,
- Guía de referencia rápida (13 pages) ,
- Quick reference manual (13 pages)
Table of Contents
Advertisement
Quick Links
with Windows Software Version 4 for Equalizer and Delay
avec logiciel Windows version 4 pour égaliseur et délai
mit Windows Softwareversion 4 für Equalizer und Delay
Reductor digital de realimentación y ecualizador gráfico
con software Windows, versione 4, per equalizzatore
1997, Shure Brothers Inc.
27A8595 (QG)
*
Digitale Rückkopplungsreduzier–Stufe
*
con software Versión 4 compatible con Windows
Shure Brothers Incorporated
222 Hartrey Avenue
Evanston IL 60202-3696 U.S.A.
Model DFR11EQ Version 4 User Guide
Digital Feedback Reducer
Réducteur de Larsen numérique
*
para ecualizador y retardo
Attenuatore di retroazione digitale
*
Main Menu
DFR11EQ
e ritardo
Printed in U.S.A.
*
Advertisement
Table of Contents

Related Manuals for Shure DFR11EQ


Summary of Contents for Shure DFR11EQ
- Page 1 Main Menu Shure Brothers Incorporated 222 Hartrey Avenue Evanston IL 60202-3696 U.S.A. Model DFR11EQ Version 4 User Guide DFR11EQ Digital Feedback Reducer with Windows Software Version 4 for Equalizer and Delay Réducteur de Larsen numérique avec logiciel Windows version 4 pour égaliseur et délai Digitale Rückkopplungsreduzier–Stufe...
-
Page 2: Table Of Contents
............Trademark Notifications: Shure is a registered trademark of Shure Brothers, Inc. Windows is a registered trademark of Microsoft Corporation. -
Page 3: What's New In Version 4 Software
More Scenes... Unlike the Version 3 software, which is limited to 16 scenes stored in the DFR11EQ.INI file on the computer, the Version 4 software can store any number of scenes each in separate files. There is now a field for entering descriptions of scenes which appears in the Recall Scene function, so you can find the desired scene before loading. -
Page 4: Introduction
The feedback reducer functions on its own or under external computer control. The equalizer of the DFR11EQ can be set to act as either a graphic or parametric equalizer. Hardware Features... -
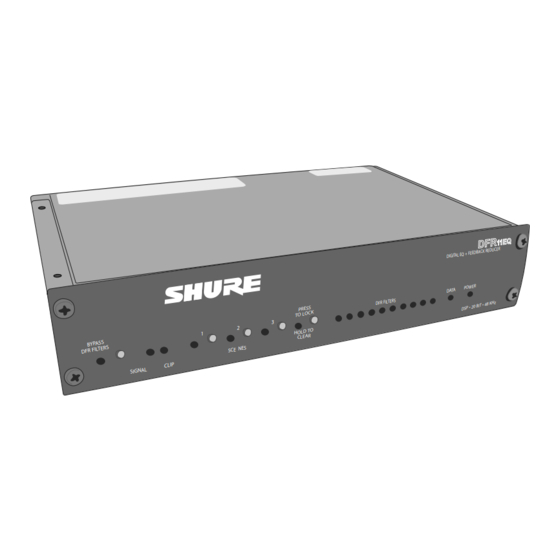
Page 5: The Dfr11Eq
For use with DFR11EQ software and for DSP firmware upgrades. Input Connector—Combined Shure Link Interface. Allows linking of up to 16 -Inch. Active balanced input can be used with balanced or unbalanced outputs. Can be switched DFR11EQs which may be accessed by computer. - Page 6 Shure Link Device ID When multiple DFR11EQ’s are linked, each one musty be assigned a unique Device ID, 0 through 15. DIP switches 1 through 4 on the rear panel are used to set the Device ID. To change the Device ID, align the switches according to the illustrations below.
-
Page 7: Dfr11Eq Theory
The system on the right shows how the DFR11EQ, when installed in the sound system, senses that loop and filters out the excess gain on that frequency. - Page 8 After all 10 notch filters are set and a new feedback frequency is detected, the DFR11EQ will remove the oldest set dynamic filter and re-deploy it at the new feedback frequency. The fixed filters remain unchanged. However, if feedback occurs at the same frequency as an existing dynamic or fixed filter, the existing filter will deepen.
-
Page 9: Setup For Feedback Control
The DFR11EQ adds extra insurance against feedback: the system is not expected to feed back, but if it does, the DFR11EQ is there to catch it. This set-up method is used for systems which already have sufficient gain-before-feedback, but need protection from the occasional stray feedback which can occur due to non-stationary microphones or user-adjustable gain controls. - Page 10 UPDATE position... When the HOLD/UPDATE DIP switch is in the UPDATE position (default), the DFR11EQ saves the feedback filters every time the unit is powered off. When the DFR11EQ is powered on again, the feedback filters will be at exactly the same settings as when the unit was powered down.
-
Page 11: Audio Connections
Main Menu Audio Connections The DFR11EQ should be placed where an equalizer would be in a signal path — it should be one of the final pieces of equipment a sound signal passes through before going to a power amplifier. - Page 12 Since monitor loudspeakers and microphones are usually in close proximity, the DFR11EQ can be connected to stabilize a monitor system. Place a DFR11EQ on the monitor output which goes to the monitor loudspeaker. For multiple monitor mixes, a DFR11EQ should be placed at the output of each monitor send.
-
Page 13: Version 4 Software
This section describes the Version 4 Windows-based computer interface software which allows you to utilize the full features of the Shure DFR11EQ. By connecting the DFR11EQ to your computer, you can access additional control features to customize the operating characteristics of the feedback filters. - Page 14 Accessing the Connected DFR1 1EQs To bring the networked DFR11EQ’s online, click on the CONNECT button of the DFR panel. Or, select the Connect option of the Communications drop-down menu of the main menu bar. The...
- Page 15 Version 4 software, click on CANCEL when prompted. You will still be able to access a DFR11EQ running on Version 3, but some of the newer options on the Version 4 software will not be available. These options will appear greyed out on the interface. See the illustration above.
-
Page 16: Overview
DFR11EQ. The Feedback Reducer section allows you to view and edit the frequency, depth, and Q (bandwidth) of individual Response Graph. -
Page 17: Feedback Reducer
Clicking on the DELAY button removes the delay from the audio path. The LED will illuminate and the sound will pass through unaffected by the delay. Mute Button and LED To mute the audio signal of the DFR11EQ, click on the MUTE button. The LED will illuminate and no sound will pass through. - Page 18 Click on the LOCK button to lock the filters at their current values. The LED illuminates when the lock is active. The DFR11EQ will not set any new filters or change the depth of any existing feedback filters. This is identical to the LOCK button and LED on the front panel of the DFR11EQ.
- Page 19 Hold/Update under Setup for Feedback Control. Setting Fixed and Dynamic Filters DFR11EQ feedback filters are set in one of two modes: Fixed or Dynamic. For definitions of these two modes, see DFR11EQ Theory. The DFR11EQ comes factory preset with 5 fixed and 5 dynamic filters.
-
Page 20: Equalizer
Main Menu EQUALIZER The Equalizer module of the DFR11EQ Version 4 software can be set to work as a parametric equalizer or as a graphic equalizer, according to your needs. There is an Equalizer Options window for you to set the equalizer type. - Page 21 True 1/3 Octave mode, so the peaks and troughs in the resulting response curve are more prominent. Adjusting Bands DFR11EQ graphic equalizer...
- Page 22 Main Menu Graphic Equalizer Fields and Buttons FREQ. — This field displays the frequency center of the selected filter. The buttons are inactive for graphic equalizer sliders, but is active for the high- and low-frequency sliders. TYPE — The Type field displays the type of equalizer filter: combining or true -octave.
-
Page 23: Parametric Equalizer
5. If a DFR11EQ is currently online, click on the CONTINUE button when the computer prompts, “The equalizer in the connected DFR11EQ will be reset to parametric mode...” The LEDs on the DFR11EQ will flash on and off several times while the code for the parametric equalizer is being loaded. - Page 24 Main Menu Adjusting Parametric Filters Adjusting a parametric filter is simple. Point and click on a filter. It will change colors to show that it is selected. Then, drag the filter to the desired frequency and level. A parametric filter can be used to cut or boost over a desired band- width.
- Page 25 EQ Bypass Deactivates Level Control (Default On) When this is active, the DFR11EQ will bypass the Level Control when the EQ Bypass is on. This feature allows you to compare the equalized and unequalized sound by using the EQ Bypass button...
-
Page 26: Delay
The DFR11EQ with Delay will hold that audio signal in memory, releasing it to the fill loudspeaker only when it is in time with the sound from the main loudspeaker, so the sound from both loudspeakers will arrive at the audience at the same time. - Page 27 LOUDSPEAKER MIXER Solution: The DFR11EQ Delay can be used to stall the signal to loudspeaker B just long enough so that when it does come out, it is in phase with the sound from the loudspeaker A. When in phase, the waves reinforce each other to maintain audio quality.
- Page 28 Setting Delay in Milliseconds (Default) Delay in milliseconds is the default for setting delay in Version 4 software. When set in milliseconds, you do not need to adjust the DFR11EQ for temperature. To set delay in milliseconds, click on the buttons, or type the amount in the DELAY field.
-
Page 29: Output Controls
Inverted polarity can cause phase cancellations in the audio. Using this option of the DFR11EQ Version 4 software, you can digitally invert the audio signal in order to compensate. This will save the time and expense spent in wiring customized cables. -
Page 30: Response Graph
Main Menu RESPONSE GRAPH This section describes how to use the Response Graph, which displays a response curve showing the effect of the DFR11EQ on the audio signal. Response Curves DFR Response Curves Clicking on the DFR button displays the feedback filter frequency response curve on the graph. -
Page 31: Snapshots
Main Menu Hide Response Curve Graph If you have finished working on the Response Curve Graph and need to free some space on the the Windows desktop, you can hide the graph. 1. Click on Options in the main menu bar. 2. -
Page 32: Shure Link Networks
2. Using the supplied 5-pin DIN cable, connect the Shure Link OUT of the first unit (the one connected directly to the computer) to the Shure Link IN of the next unit. Repeat this connection for each unit to be networked. -
Page 33: Maintenance
2. In the Device menu, click on the desired Device ID. The Device ID will appear beside the DFR11EQ heading in the title bar at the top of the main window, indicating that the unit with that Device ID will receive computer commands. -
Page 34: Customizing Graph Colors
7. Click on the OK button. NOTE: The Parametric option of the Color Options window will be disabled if the software is configured for graphic equalizer mode. Exiting the DFR11EQ Application To Exit 1. Click on File in the main menu bar. -
Page 35: Printing Dfr11Eq Settings
Main Menu Printing DFR11EQ Settings If you are documenting a sound system, the DFR11EQ Version 4 offers the option of printing out a hardcopy report showing the settings of a selected unit. To print out a hardcopy of this report: 1. -
Page 36: Appendix A. Specifications
-in. TRS: tip positive with respect to ring +6 dB to –18 dB per band Operating Voltage DFR11EQ: 108 to 132 Vac, 50/60 Hz, 50 mA max Q Range DFR11EQE: 216 to 264 Vac, 50/60 Hz, 25 mA max -octave to 2 octave... - Page 37 CERTIFICATIONS is no guarantee that interference will not occur in a particular installation. If this equipment does cause DFR11EQ: UL Listed and cUL Listed to UL 813 and harmful interference to radio or television reception, CSA C22.2 No. 1. Authorized under Verification which can be determined by turning the equipment off provision of FCC Part 15 as a Class B Digital Device.
-
Page 38: Appendix B. Rack Mounting The Dfr11Eq
Main Menu APPENDIX B. RACK MOUNTING THE DFR11EQ The DFR11EQ comes in a -rack chassis specially designed for sturdiness. The sagging and bending found in most -rack designs is eliminated — the brackets and straddle bars are designed to ensure that the units will be installed securely. -
Page 39: Appendix C. Connectors And Cables
Main Menu APPENDIX C. CONNECTORS AND CABLES NOTE: Except for the Shure Link cable, none of the cables shown come supplied with the DFR11EQ. Audio Connectors DFR11EQ Audio Input DFR11EQ Audio Output Connector: XLR (male) 1/4-inch Connector: XLR (female) 1/4-inch... - Page 40 -in. to -in. Balanced – SLEEVE RING TYPICAL APPLICA TIONS Mixer Line Out to DFR11EQ Input DFR11EQ Output to Amplifier Input DFR11EQ Output to Mixer Sub Return Mixer Send to DFR11EQ Input – Mixer Sub Send to DFR11EQ Input SLEEVE...
- Page 41 Main Menu XLR (female) to -in. Balanced PIN 2 PIN 1 TYPICAL APPLICA TIONS Mixer Line Out to DFR11EQ Input DFR11EQ Output to Amplifier Input DFR11EQ Output to Mixer Sub Return – PIN 3 Mixer Send to DFR11EQ Input SLEEVE –...
- Page 42 — 17 19 21 23 25 COMPUTER 25-PIN RS-232 CONNECTOR (MALE) 9-PIN MALE — TO DFR11EQ DFR11EQ RS-232 CONNECTOR FEMALE Shure Link Cable — 5-Pin DIN Cable (MIDI-compatible cable) FUNCTION PIN # — DATA SHIELD SHURE LINK IN DATA —...
-
Page 43: Appendix D. Keyboard Controls
Main Menu APPENDIX D. KEYBOARD CONTROLS There are a number of keyboard controls which you can use in instead of a mouse. General Controls HIGHLIGHT controls from left to right: HIGHLIGHT controls from right to left: PRESS a selected button: SAVE a scene: RECALL a scene: PRINT the settings of the current unit:... - Page 44 Main Menu Graphic Equalizer Controls HIGHLIGHT the sliders from left to right: RESET a selected slider: FINE ADJUST the gain of a selected slider: COARSE ADJUST the gain of a selected slider: Parametric Equalizer Controls RESET a selected parametric filter: CREATE a new parametric filter: FINE ADJUST the FREQUENCY of a parametric filter: COARSE ADJUST the FREQUENCY of a parametric filter:...
- Page 45 Main Menu NOTES...
Need help?
Do you have a question about the DFR11EQ and is the answer not in the manual?
Questions and answers