Do you have a question about the NS-RTM18WH8Q and is the answer not in the manual?
Questions and answers
Matt
April 11, 2025
need top left hung to reverse door
1 comments:
Mr. Anderson
April 11, 2025
To reverse the door on the Insignia NS-RTM18WH8Q refrigerator for the top left hinge, follow these steps:
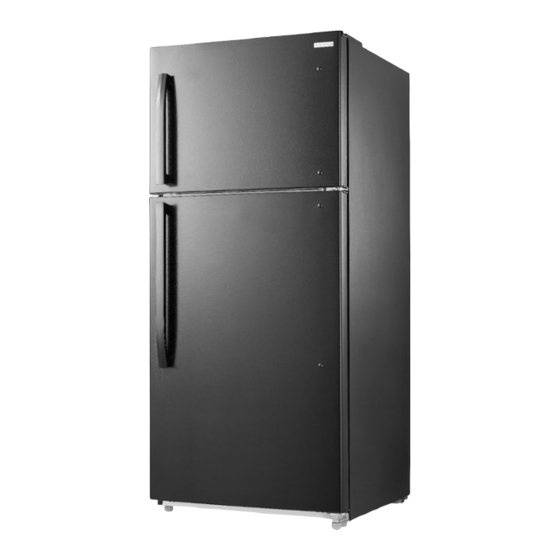
1. Unplug the Refrigerator and remove all food from the door shelves. 2. Remove Covers and Hinges: - Use a flat blade screwdriver to remove the left cover plate and the right top hinge cover. - Unscrew and remove the right top hinge. Keep the screws. 3. Remove the Doors: - Lift the freezer door up and off. - Unscrew the center hinge and remove it. - Lift the refrigerator door up and off. 4. Install Left-Side Hinges: - Use the hinge kit to install the top left hinge and center left hinge. - Attach the top left hinge to the left side of the cabinet. 5. Reattach Doors: - Place the refrigerator door on the bottom hinge pin. - Attach the center left hinge to hold the refrigerator door. - Place the freezer door on top and secure it with the top left hinge. 6. Cover Unused Holes: - Use extra hole caps and screw-hole covers to cover unused holes. 7. Plug in the Refrigerator and check door alignment.
Use the included Allen wrench, a standard screwdriver, and a Phillips screwdriver. Keep all removed parts to reuse. Have someone assist to avoid injury.
This answer is automatically generated
Joe
July 7, 2025
What is the part numbers for the 2 door racks at the lower part of the fridge door
Marina
May 11, 2025
when attempting to set the temperature, my options are light 1 or lights 2 and 5 together, or the red standby light. I have had it plugged in for 8 hours and it is still warm.
2 comments:
Mr. Anderson
May 20, 2025
When the Insignia NS-RTM18WH8Q shows the red standby light, it means the refrigerator and freezer cooling are turned off (standby mode). In this mode, temperature settings cannot be changed. You must press the SET button again to cancel standby mode and resume cooling before adjusting the temperature. The behavior of lights 1, 2, and 5 together is not explained in the provided information.
This answer is automatically generated
Marina
May 21, 2025
@Mr. Anderson correct, my options are either light 1 or lights 2 and 5 together. Because the behavior I’m describing is not listed in the provided information, I asked a question hoping someone had information that would be useful.


Need help?
Do you have a question about the NS-RTM18WH8Q and is the answer not in the manual?
Questions and answers
need top left hung to reverse door
To reverse the door on the Insignia NS-RTM18WH8Q refrigerator for the top left hinge, follow these steps:
1. Unplug the Refrigerator and remove all food from the door shelves.
2. Remove Covers and Hinges:
- Use a flat blade screwdriver to remove the left cover plate and the right top hinge cover.
- Unscrew and remove the right top hinge. Keep the screws.
3. Remove the Doors:
- Lift the freezer door up and off.
- Unscrew the center hinge and remove it.
- Lift the refrigerator door up and off.
4. Install Left-Side Hinges:
- Use the hinge kit to install the top left hinge and center left hinge.
- Attach the top left hinge to the left side of the cabinet.
5. Reattach Doors:
- Place the refrigerator door on the bottom hinge pin.
- Attach the center left hinge to hold the refrigerator door.
- Place the freezer door on top and secure it with the top left hinge.
6. Cover Unused Holes:
- Use extra hole caps and screw-hole covers to cover unused holes.
7. Plug in the Refrigerator and check door alignment.
Use the included Allen wrench, a standard screwdriver, and a Phillips screwdriver. Keep all removed parts to reuse. Have someone assist to avoid injury.
This answer is automatically generated
What is the part numbers for the 2 door racks at the lower part of the fridge door
when attempting to set the temperature, my options are light 1 or lights 2 and 5 together, or the red standby light. I have had it plugged in for 8 hours and it is still warm.
When the Insignia NS-RTM18WH8Q shows the red standby light, it means the refrigerator and freezer cooling are turned off (standby mode). In this mode, temperature settings cannot be changed. You must press the SET button again to cancel standby mode and resume cooling before adjusting the temperature. The behavior of lights 1, 2, and 5 together is not explained in the provided information.
This answer is automatically generated
@Mr. Anderson correct, my options are either light 1 or lights 2 and 5 together. Because the behavior I’m describing is not listed in the provided information, I asked a question hoping someone had information that would be useful.