
Related Manuals for Insignia NS-RTM12SS7L


Summary of Contents for Insignia NS-RTM12SS7L
- Page 1 USER GUIDE 9.9 and 11.5 Cu. Ft. Top Mount Refrigerator NS-RTM10WH7/NS-RTM10BK8/NS-RTM10WH7-C/ NS-RTM12SS7-C/NS-RTM12SS7L Before using your new product, please read these instructions to prevent any damage.
-
Page 2: Table Of Contents
ONE-YEAR LIMITED WARRANTY ........21 Introduction Congratulations on your purchase of a high-quality Insignia product. Your NS-RTM10WH7, NS-RTM10BK8, NS-RTM10WH7-C, NS-RTM12SS7-C, or NS-RTM12SS7L represents the state of the art in refrigerator design and is designed for reliable and trouble-free performance. -
Page 3: Important Safety Instructions
9.9 and 11.5 Cu. Ft. Top Mount Refrigerator Important Safety Instructions CAUTION RISK OF ELECTRIC SHOCK DO NOT OPEN This symbol indicates that dangerous voltage constituting a risk of electric shock is present within your refrigerator. This symbol indicates that there are important operating and maintenance instructions in the literature accompanying your refrigerator. - Page 4 Refer all servicing to qualified service personnel. Servicing is required when the appliance has been damaged in any way, such as the power-supply cord or plug is damaged, liquid has been spilled or objects have fallen into the appliance, the appliance has been exposed to rain or moisture, does not operate normally, or has been dropped.
-
Page 5: Grounding Requirement
9.9 and 11.5 Cu. Ft. Top Mount Refrigerator Do not use an extension cord with this appliance. If the power cord is too short, have a qualified electrician install an outlet near the appliance. Use of an extension cord can negatively affect the refrigerator’s performance. Grounding requirement This appliance must be grounded. -
Page 6: Main Components
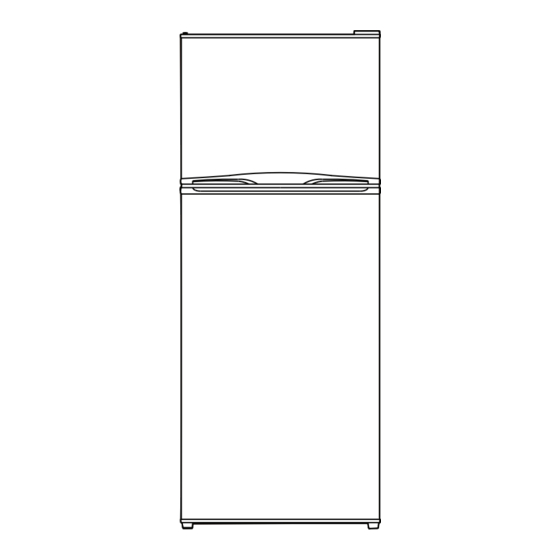
Main components Note: This illustration shows a right-opening refrigerator. Left-opening models are configured the same, except they open from right to left. Wire shelf Freezer door shelves Freezer control knob Refrigerator control panel w/LED Small bottle rack Can rack Glass shelves Gallon rack Large bottle Crispers... -
Page 7: Finding A Suitable Location
9.9 and 11.5 Cu. Ft. Top Mount Refrigerator Finding a suitable location • This refrigerator is designed to be free standing only. • Place your refrigerator on a floor that is strong enough to support the refrigerator when it is fully loaded. •... -
Page 8: Using Your Refrigerator
Using your refrigerator Setting the refrigerator temperature ITEM DESCRIPTION SET button Press to change the refrigerator setting from 1 (cold) to 5 (coldest). LED indicators Light to show the current refrigerator setting. • The first time you turn the refrigerator on, the control panel LEDs turn on for three seconds, then displays the current setting (default = 3). -
Page 9: Using The Freezer Compartment
9.9 and 11.5 Cu. Ft. Top Mount Refrigerator Using the freezer compartment • Place frozen food into the freezer as quickly as possible after purchase. • Follow package instructions regarding storage times. The storage life of frozen foods varies and the recommended storage time should not be exceeded. Reversing the door position Based on the location where you plan to use your refrigerator, you may find it more convenient to reverse the position of the door, to have it open from right to left instead of... - Page 10 Remove the top cap and the top hinge cover, then unscrew and remove the top hinge and shim. Keep the screws to reuse. Top hinge cover Top cap Top hinge Top hinge shim Lift the freezer door up and away from your refrigerator. www.insigniaproducts.com...
- Page 11 9.9 and 11.5 Cu. Ft. Top Mount Refrigerator Unscrew the two screws holding the center hinge, remove the hinge and center hinge shim, then lift the refrigerator door up and away from your refrigerator. Save the screws to reuse. Center hinge shim Center hinge Unscrew the two screws holding the bottom right hinge, then remove the bottom right hinge.
- Page 12 Remove the screw covers from the bottom left side of the refrigerator and use them to cover the screw holes on the bottom right side of the refrigerator. Attach the bottom left hinge with the screws you removed from the bottom right hinge.
- Page 13 9.9 and 11.5 Cu. Ft. Top Mount Refrigerator Place the refrigerator door on the bottom left hinge. Make sure that the door is aligned horizontally and vertically. Center hinge Center hinge shim www.insigniaproducts.com...
- Page 14 Attach the center hinge shim to the back of the center hinge, then align with holes on the left side of the refrigerator and secure it with the screws you removed from the right side. Center hinge shim Center hinge Place the freezer door on the center hinge.
-
Page 15: Maintaining Your Refrigerator
9.9 and 11.5 Cu. Ft. Top Mount Refrigerator Attach the top hinge and shim with the screws you removed previously, then replace the hinge cover and top cap. Hinge cover Top cap Top hinge Top hinge shim Maintaining your refrigerator Your refrigerator is designed for year-round use with only minimal cleaning and maintenance. -
Page 16: Changing The Interior Led Light
Changing the interior LED light Using a flat blade screwdriver or a fingertip, push in the latch to release the lamp cover, then remove it. Push in here LED light model: 50241001001C Lamp base: E12 Input rating: 115V AC 3.5 W Unscrew the LED light bulb from the lamp socket, then replace it with a new LED light bulb. -
Page 17: Troubleshooting
9.9 and 11.5 Cu. Ft. Top Mount Refrigerator • Let hot foods cool before placing them in the refrigerator. Overloading the refrigerator forces the compressor to run longer. Foods that freeze too slowly may lose quality or spoil. • Wrap foods properly and wipe containers dry before placing them in the refrigerator. - Page 18 PROBLEM POSSIBLE CAUSE POSSIBLE SOLUTION The compressor The door has been Make sure that the door is closed properly. turns on and off opened too often or Clean the door seal if necessary. frequently. was not closed properly. The door seal may be dirty.
- Page 19 9.9 and 11.5 Cu. Ft. Top Mount Refrigerator PROBLEM POSSIBLE CAUSE POSSIBLE SOLUTION Moisture is The door has been Make sure that the door is closed properly. building up in the opened too often or interior of the was not closed refrigerator.
-
Page 20: Specifications
Specifications Dimensions (WxDxH) 9.9 cu.ft. - 24 x 26.1 x 59.8 in. (61 x 66.3 x 151.9 cm) 11.5 cu.ft. - 24 x 28.9 x 59.8 in.(61 x 73.3 x 151.9 cm) Weight 9.9 cu.ft. - 121 lbs (55 kg) 11.5 cu.ft. -
Page 21: One-Year Limited Warranty
Product is determined to be defective by an authorized Insignia repair center or store personnel, Insignia will (at its sole option): (1) repair the Product with new or rebuilt parts; or (2) replace the Product at no charge with new or rebuilt comparable products or parts. Products and parts replaced under this warranty become the property of Insignia and are not returned to you. - Page 22 • Attempted repair by any person not authorized by Insignia to service the Product • Products sold “as is” or “with all faults” • Consumables, including but not limited to batteries (i.e. AA, AAA, C etc.) • Products where the factory applied serial number has been altered or removed •...
- Page 23 1-877-467-4289 (U.S. and Canada) or 01-800-926-3000 (Mexico) INSIGNIA is a trademark of Best Buy and its affiliated companies. Distributed by Best Buy Purchasing, LLC V5 ENGLISH 7601 Penn Ave South, Richfield, MN 55423 U.S.A. 20-0175 ©2020 Best Buy. All rights reserved.
Need help?
Do you have a question about the NS-RTM12SS7L and is the answer not in the manual?
Questions and answers