Advertisement
Quick Links
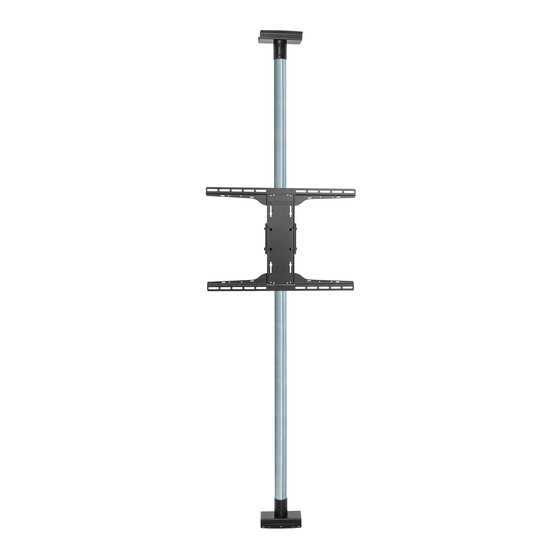
MOD-FCSKIT300-B
ENG
Compatible model/series*
ESP
Modelo/serie compatible*
FRN
Modèle/gamme compatible*
DEU
Kompatible Modelle/Serien*
NEL
Compatibel model/serie*
ITL
Modello/serie* compatibile
ČEŠ
Kompatibilní Model/série*
Kompatibilný Model/séria*
SLK
Modelos/séries compatíveis
POR
Uyumlu modeler/ seriler*
TÜR
MOD-FCSKIT300
39" - 75"
(99 - 191 cm)
MOD-ACF
132 lb
MAX
(60 kg)
1
2012-04-30
#:203-9116-7 2015-08-14
Advertisement

Subscribe to Our Youtube Channel
Related Manuals for peerless-AV MOD-FCSKIT300


Summary of Contents for peerless-AV MOD-FCSKIT300
- Page 1 MOD-FCSKIT300 MOD-FCSKIT300-B 39" - 75" 132 lb (99 - 191 cm) (60 kg) Compatible model/series* Modelo/serie compatible* Modèle/gamme compatible* Kompatible Modelle/Serien* Compatibel model/serie* MOD-ACF Modello/serie* compatibile ČEŠ Kompatibilní Model/série* Kompatibilný Model/séria* Modelos/séries compatíveis Uyumlu modeler/ seriler* TÜR 2012-04-30 #:203-9116-7 2015-08-14...
- Page 2 WARNING ENG - This product is designed to be installed on wood joist/beam or solid concrete ceilings. Hardware is included for wood joist/beam and solid concrete installation. Before installing make sure the supporting surface will support the combined load of the equipment and hardware. Screws must be tightly secured. Do not overtighten screws or damage can occur and product may fail.
- Page 3 AVVERTENZA ITL - Questo prodotto è indicato per l’installazione su soffi tti in calcestruzzo solido o a travi/traverse di legno. Sono compresi i dispositivi di fi ssaggio per l’installazione su calcestruzzo solido e a travi/traverse di legno. Prima di iniziare l’installazione, accertarsi che la superfi cie di supporto sia in grado di sorreggere il carico combinato unità/dispositivi di fi...
- Page 4 Symbols Símbolos Symboles Symbole Symbolen WARNING Simboli ADVERTENCIA Symboly ČEŠ Skip to step. ADVERTISSEMENT Symboly Continúe con el ACHTUNG Screws must get at least three Símbolos paso. WAARSCHUWING full turns and fi t snug. Semboller TÜR Passez à l’étape. AVVERTENZA Los tornillos tienen que dar, Weiter mit Schritt.
- Page 5 Tools Needed for Assembly. Herramientas necesarias para el ensamblaje. Outils nécessaires au montage. To properly tighten screws: Tighten until screw Für den Zusammenbau erforderliche Werkzeuge. head makes contact, then tighten another 1/2 Voor montage benodigd gereedschap. turn. Do not overtighten screws. Attrezzi necessari per l’assemblaggio.
- Page 6 Diely (predtým, ako začnete, pripravte si všetky diely zobrazené nižšie). Peças (antes de iniciar, certifi que-se de que tem todas as peças apresentadas em baixo). Parçalar (Başlamadan önce, aşağıda gösterilen bütün parçaların elinizde olduğundan emin olun). TÜR Parts List MOD-FCSKIT300 MOD-FCSKIT300-B Description Part # mounting plate...
- Page 7 A (2) B (1) mounting plate pole C (1) 5mm allen wrench D ( 8 ) E ( 8 ) 10mm concrete anchor 3" wood screw F ( 2 ) G ( 2 ) H (1) M8 x 55mm M10 x 10mm set screw 4mm allen wrench...
- Page 8 AA ( 4 ) BB ( 4 ) CC ( 4 ) DD ( 4 ) EE ( 4 ) M4 x 12mm M4 x 25mm M6 x 12mm M6 x 25mm M8 x 12mm II ( 8 ) FF ( 4 ) GG ( 4 ) HH ( 8 ) spacer...
- Page 9 CEILING TECHO X = Distance from fl oor to ceiling. PLAFOND X = Distancia desde el suelo hasta el techo. DECKE X = Distance entre le plancher et le plafond. PLAFOND X = Abstand vom Boden zur Decke. SOFFITTO X = Afstand van vloer tot plafond. STROP ČEŠ...
- Page 10 Wood joist/beam Concrete Ceiling Vigueta de madera Techo de concreto Solive de bois Plafond en béton Holzbalken Betondecke Houten dwarsbalk Plafond van beton Travetto di legno Soffi tto in calcestruzzo Dřevěný nosník Betonový strop ČEŠ ČEŠ Drevený nosník Betónový strop Trave de madeira Teto em betão Ahşap kiriş...
- Page 11 AVISO POR - Ao instalar suportes para teto Peerless numa trave ou viga de madeira cobertas com painéis de gesso, verifi que se as traves ou vigas têm um tamanho nominal mínimo de 50,8 mm x 101,6 mm. Não instale em pai- néis de gesso com mais de 170 mm.
- Page 12 2a-1 Use stud fi nder to locate and mark stud center lines. Marque las líneas centrales del montante. Marquez la ligne médiane du montant. Markieren Sie die Ständer-Mittellinien. Markeer het midden van de balken. Contrassegna le linee centrali dei montanti. ČEŠ...
- Page 13 2a-3 7/32" 3" (5.5mm) (76mm) Mounting hole must center on stud. El orifi cio debe quedar centrado en el montante. Le trou doit être centré sur le Drill mounting holes into supporting surface 7/32" montant. (3" (76mm) minimum depth required). (5.5mm) Das Loch muss am Ständer Taladre los agujeros de montaje en la superfi...
- Page 14 WARNING ENG - When installing Peerless ceiling mounts on a concrete ceiling, the ceiling must be at least 8" thick with a minimum compressive strength of 2000 psi. Never attach concrete expansion anchors to concrete covered with plaster, drywall, or other fi nishing material. ADVERTENCIA ESP - Cuando vaya a instalar soportes de techo de Peerless en techos de concreto, los techos tienen que tener, por lo menos, 8"...
- Page 15 2b-1 Mark mounting holes. Marque los orifi cios de montaje. Marquez les trous de fi xation. Markieren Sie die Montagelöcher. Markeer montagegaten. Contrassegna I fori di montaggio. Vyznačte montážní otvory. ČEŠ Vyznačte montážne otvory. Marque os furos de montagem. Montaj deliklerini işaretleyin. TÜR 2b-2 3/8"...
- Page 16 2b-3 Insert anchor fl ush to concrete. Inserte el anclaje a ras con el concreto. Insérez la cheville d’ancrage au ras du béton. Setzen Sie den Dübel bündig mit dem Beton abschließend ein. Breng anker aan gelijk met beton. Inserire il fermo a paro col calcestruzzo.
- Page 17 K (2) I (2) 1/4" (6mm) 1/4" (6mm) J (2) Tighten. Apretar. Serrer. Anziehen. Aandraaien. Stringere. Utáhněte. ČEŠ Utiahnite. Apertar. Sıkmak. TÜR 2012-04-30 #:203-9116-7 2015-08-14...
- Page 18 Tighten. Apretar. Serrer. Anziehen. Aandraaien. Stringere. Utáhněte. ČEŠ Utiahnite. Apertar. Sıkmak. TÜR 2012-04-30 #:203-9116-7 2015-08-14...
- Page 19 Level, mark mounting holes then refer to step 2a or 2b to secure mounting plate to fl oor. Nivele, marque los agujeros de montaje y consulte el paso 2a o 2b para fi jar la placa de montaje en el suelo. Mettez-la à...
- Page 20 X = 75-100mm X = 100-200mm 6b-1 X = 200-300mm 6c-1 X = 300-400mm 6d-1 2012-04-30 #:203-9116-7 2015-08-14...
- Page 21 Screws must get at least three full turns and fi t snug. Los tornillos tienen que dar, por lo menos, tres vueltas completas y quedar ajustados. Il faut effectuer au moins trois tours de vis complets et bien serrer les vis. Schrauben sind mindestens drei volle Umdrehungen einzudrehen und müssen fest anliegen.
- Page 22 6b-1 6c-1 6d-1 O (2) O (2) O (2) 6b-2 6c-2 6d-2 Do not tighten the screws. Do not tighten the screws. Do not tighten the screws. No apriete los tornillos. No apriete los tornillos. No apriete los tornillos. Ne serrez pas les vis. Ne serrez pas les vis.
- Page 23 Use of spacers and washers is optional. Uso de espaciadores y arandelas opcional. Facultatif utilisation d’entretoises de rondelles. Fakultativ verwendung von abstandhaltern und Waschmaschinen. Facultatief gebruik van tussenringen en ringen. Uso opzionale di distanziatori e rondelle. Voltitelné použití rozpěr distančních podložek. ČEŠ...
- Page 24 Q (4) 2012-04-30 #:203-9116-7 2015-08-14...
- Page 25 8a-1 Tilt limited by screen size. +5°/-5° La inclinación está limitada por el tamaño de la pantalla. Inclinaison limitée par la taille de l'écran. Die Neigung ist durch die Bildschirmgröße begrenzt. Kanteling beperkt op basis van schermafmeting. Inclinazione limitata dalla dimensione dello schermo.
- Page 26 8b-1 Optional. Remove top screws if screen interferes with attaching tilt plate. Opcional. Quite los tornillos superiores si la pantalla interfi ere con la fi jación la placa inclinable. Facultatif. Retirez les vis supérieures si l'écran empêche la fi xation de la plaque d'inclinaison. Fakultativ.
- Page 27 0.187" (4.7mm) Mark drill hole. Marque los orifi cios de montaje. Marquez les trous de fi xation. Markieren Sie die Montagelöcher. Markeer montagegaten. Contrassegna I fori di montaggio. Vyznačte montážní otvory. ČEŠ Vyznačte montážne otvory. Marque os furos de montagem. Montaj deliklerini işaretleyin.
- Page 28 Do not overtighten screws. No apriete de más los tornillos. Ne pas trop serrer les vis. Ziehen Sie die Schrauben nicht zu fest an. Draai de schroeven niet te strak aan. Non stringere troppo le viti. ČEŠ Šrouby neutahujte příliš silně. Skrutky neuťahujte príliš...
- Page 29 LIMITED FIVE-YEAR WARRANTY Peerless Industries, Inc. (“Peerless”) warrants to original end-users of Peerless products will be free from defects in material and ® workmanship, under normal use, for a period of fi ve years from the date of purchase by the original end-user (but in no case longer than six years after the date of the product's manufacture).
- Page 30 BESCHRÄNKTEN FÜNFJÄHRIGEN GARANTIE Peerless Industries, Inc. („Peerless”) übernimmt gegenüber den ursprünglichen Endnutzern von Peerless®-Produkten die Gewährleistung, dass diese unter normalen Einsatzbedingungen für fünf Jahre ab Datum des Kaufs durch den ursprünglichen Endnutzer (aber in keinem Fall länger als sechs Jahre nach Herstellungsdatum des Produkts) frei von Material- und Verarbeitungsfehlern sind. Peerless repariert oder ersetzt nach eigenem Ermessen ein Produkt, das dieser Garantie nicht entspricht, oder erstattet den Kaufpreis dafür.
- Page 31 OMEZENÁ PĚTILETÁ ZÁRUKA Peerless Industries, Inc. (“Peerless”) zaručuje původním koncovým uživatelům výrobků Peerless®, že budou bez vad na materiálu a provedení, za podmínky běžného používání, po dobu pěti let od data nákupu původním koncovým uživatelem (ale v žádném případě ne déle než...
- Page 32 Peerless’e herhangi bir yükümlülük yükleme yetkisine sahip değildir. Bu garanti size bazı özel yasal haklar vermektedir, ülkeden ülkeye değişen başka yasal haklarınız da olabilir Peerless-AV Peerless-AV Europe Peerless-AV de Mexico 2300 White Oak Circle Unit 3 Watford Interchange, Ave de las Industrias 413...
Need help?
Do you have a question about the MOD-FCSKIT300 and is the answer not in the manual?
Questions and answers