
Subscribe to Our Youtube Channel
Related Manuals for BiOptic Qsep1-Lite


Summary of Contents for BiOptic Qsep1-Lite
-
Page 1: Qsep 1 -Lite™ Instrument
Qsep Lite Operation Manual --- Hardware Revolution BiOptic Inc., 4F., No.108-3, Minquan Rd., Xindian Dist., New Taipei City 23141, Taiwan (R.O.C.) www.bioptic.com.tw... -
Page 2: Welcome
Copyright and Trademarks Copyright © BiOptic Inc. All rights reserved. Reproduction, adaptation, or translation of this manual is prohibited without prior written permission of BiOptic Inc., except as allowed under the copyright laws. ™ Series and ™ are registered trademarks of BiOptic Inc. -
Page 3: Table Of Contents
Contents Welcome ......................2 Copyright and Trademarks ..................2 Symbols of Qsep Series ................... 2 Limitation of Liability ..................5 Applications of Qsep -Lite ..................5 Packing List ......................5 Cautions ....................... 7 System Overview ..................9 1.1 Qsep -Lite™ Instrument ..................10 1.1.1 Qsep -Lite™... - Page 4 Operation Instruction ................29 L1 High Resolution Cartridge Kit ............29 L2 Standard Cartridge Kit ..............32 L3 Kilobase Cartridge Kit ............... 35 LR1 RNA Cartridge Kit ................38 LQ1 High Resolution Quantitative Cartridge Kit ........41 LQ2 Standard Quantitative Cartridge Kit ..........44...
-
Page 5: Limitation Of Liability
BEFORE ATTEMPTING TO OPERATE THE INSTRUMENT, READ ALL PRODUCT MANUALS AND FOLLOW THE INSTRUCTIONS. BiOptic Inc. assumes no liability whatsoever for any personal injury, property damage, or other loss resulting from not complying or familiar with the manuals, or improper operation of the devices. - Page 6 ™ for Q-Analyzer Qsep *Note: The Software key contains 8GB storage space, -Lite ™ Series Operation Manual, including Hardware version and Software Qsep version.
-
Page 7: Cautions
™ Series away from other electronic device and voltage sources. Qsep Keep Only the components and consumables provided by BiOptic Inc. are suggested to use. DO NOT perform the following actions: •... - Page 8 ™ Series are high-voltage Single-channel electrophoresis Qsep Warning: system. Please follow the operation manual and laboratory safety guidelines for system operation. Do not remove covers. For operation and safety questions, please contact BiOptic Inc. at the official website or with your local BiOptic representatives.
-
Page 9: System Overview
1. System Overview Qsep -Lite™ is a fully-automated CE system developed by BiOptic Inc., which uses pen-shaped disposable gel-cartridges to improve experiment efficiency. Time- consuming procedures such as gel preparation, sample loading, and capillary changing are no longer required. Further, the experiment result will be obtained Qsep easily with the fully- automated. -
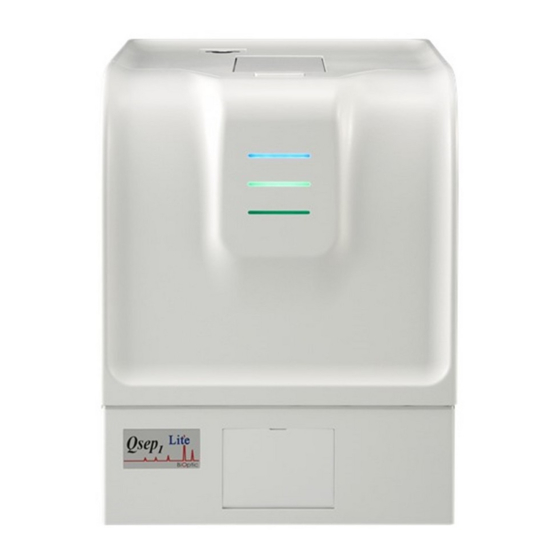
Page 10: Lite™ Front View
Lite™ Instrument Qsep Qsep 1.1.1 Lite™ Front View A. Indicator lamp The green light LED will flash when turn on the power switch and when connect to the software, the green light LED will breath. B. Cartridge Door C. Sample Door and Sample Tray... -
Page 11: Qsep -Lite™ Back View
Lite™ Back View Qsep 1.1.2 A. Power Connector B. Main Power switch C. Air flow Inlet Port: Connect to an external pump using an 1/8 inch tube. D. Cable Port Connect to a computer and the front green light LED will flash. -
Page 12: Qsep Lite ™ Top View
Lite ™ Top View Qsep 1.1.3 A. Cartridge door Lite Specifications Qsep ™ • Detection: Fluorescence • Separation Voltage: 1~8 kV • System Weight: 5.5kg • Dimension: 24x 21x 30 cm • System type: 1 channel portable system • Sample capacity: 1~12 samples... -
Page 13: System Requirements
1.3 System Requirements Minimum Recommended Windows 10 32 bit Windows 10 64 bit Intel Core i5 Intel Core i7 8G RAM 16G RAM 500 GB 1 TB PORT RJ45 x 1 RJ45 x 2 Screen Resolution 1280 x 800 1920 x 1080... -
Page 14: Installation Instruction
2. Installation Instruction A suitable operating environment is essential to ensuring the best performance of ™ Series. Qsep 2.1 Environment Requirements ⚫ ™ Series are 18°C~26°C (65°F ~78°F). Qsep The optimal operating temperature of ⚫ Qsep The optimal operating humidity of ™... -
Page 15: Power Considerations
2.2 Power Considerations Qsep The input voltage of -Lite™ instrument is 12V DC, and the maximum power is 80W. A suitable power adapter with cord, MEAN WELL GSM90B12-P1M, is included in the package (100~240V AC, 50~60Hz). The dimensions are 24cm(L)*21cm(W)*30cm(H) and weight of the instrument is 5.5Kg. Connect the air source within the range of 50psi~65psi. -
Page 16: Hardware Installation
2.3 Hardware Installation Qsep Place -Lite™ instrument on a stable platform, and ensure it is away from water Qsep and any other high-power electronic devices. -Lite™ need to be operated in a clean and well-ventilated environment. Remove the power adapter from the package and attach it with a suitable power cord. -
Page 17: Qsep -Lite™ Installation
-Lite™ Installation Qsep 2.3.1 2.3.1.1 System Unpacking... -
Page 18: System Installation
2.3.1.2 System Installation Qsep Follow the instructions below to install -Lite system Qair 1. Unpack . and tighten the air tube with connector and plug power cord Qair into Qair * Please check the label on the power cord. Qsep Qsep 2. - Page 19 Qsep Qair Qsep 4. Plug another side of air tube into -Lite. Turn on the -Lite. 5. Insert the software key to the computer. Double click on “Q-Analyzer for Qsep1- Lite-Setup.exe” in the Q-Analyzer folder to install the software. *Please install the newest software. 6.
- Page 20 Double click “Q-Analyzer for Qsep1-Lite” icon to open the software. Fill in the user information (set the password as 8 to 12-character password) and click OK. 7. Double click “Q-Analyzer for Qsep1-Lite” to open the software. Qsep *Computer must be connected with -Lite by Ethernet cable or with software key inserted.
-
Page 21: Cartridge Kit For Qsep
™ Qsep 3. Cartridge Kit for Lite 3.1 Cartridge Type Recommendation ◆ Qualitative Cartridge Kit Cartridge Type Application PCR product screening L1 High Resolution Cartridge Kit Restriction fragment length sizing range: 10-1000bp polymorphism (RFLP) best resolutions: 2-4 bp CHRISPR QC L2 Standard Cartridge Kit PCR product screening... -
Page 22: Cartridge Specifications
sizing range: 10-5000bp Restriction fragment length polymorphism best resolutions: 4-10 bp (RFLP) quantitative range: 0.2 ng/ μl to 50 ng/ μl input DNA 3.2 Cartridge Specifications ◆ Qualitative Cartridge Kit High Resolution Cartridge Kit (L1) Cat. No. C105202-L (2pcs) •... - Page 23 PCR product screening, Restriction fragment length polymorphism (RFLP) Kilobase Cartridge Kit (L3) Cat. No. C105206-L (2pcs) • Sample sizing range: 10-50,000bp • L.O.D of fragment: 0.5ng/μl* L.O.D of Smear: 5ng/μl** • Best Resolutions: 10-50bp • Analysis Time: 16 mins • Sample number (per cartridge): 200 runs •...
- Page 24 • Best Resolutions: 1-4bp • Analysis Time: 5 mins • Sample number (per cartridge): 200 runs • Required sample volume: 2μl • Shelf life: 6 months • Application: PCR product screening, Restriction fragment length polymorphism (RFLP), CHRISPR QC Quantitative Standard Cartridge Kit (LQ2) Cat.
-
Page 25: Cartridge Unpacking
3.3 Cartridge Unpacking To unpack the cartridge for the first use, follow the instructions below. 1. Open the cartridge shell and take out the cartridge vertically. 2. Insert the pin into the small hole of cartridge and press it all the way in. 3. -
Page 26: Cartridge Calibration
3.4 Cartridge Calibration In order to ensure the quality of the new cartridge, HV check and calibration is required before the initial use. 1. Prepare buffer and alignment marker or quantitative marker. Volume Volume Position: Reagent Position: Reagent (ul) (ul) S well: Separation buffer S well: Separation buffer P well: distilled water... - Page 27 3. Click “Park” to close the sample door. 4. Push the button to open the cartridge door and insert the cartridge. *Cartridge guiding groove must face front. 5. Click “Latch”. Please follow the instructions in “Main Control Panel” to do cartridge HV check and Calibration.
- Page 28 ➢ Calibration: The result needs to have two peaks and the signal and noise value must pass the threshold (green line).
-
Page 29: Operation Instruction
4. Operation Instruction 4.1 L1 High Resolution Cartridge Kit Preparation Prepare buffer, size marker mix, and sample mix. After preparation, allocate them at the corresponding position. Position: Reagent Volume (ul) S well: Separation buffer P well: distilled water C well: distilled water Size marker mix Volume (ul) Size Marker (C109200) - Page 30 3. Push the button to open the cartridge door and insert the cartridge. *Cartridge guiding groove must face front. 4. Click “Latch” and the cartridge information will be displayed. 5. Select method icon. 6. Click the well to select sample position. *Size Marker must rerun every 24 hours.
- Page 31 7. Confirm the analysis information and adjust the separation duration time (optional). Click “Run” to start analysis. 8. View the result and get sample size (bp).
-
Page 32: L2 Standard Cartridge Kit
4.2 L2 Standard Cartridge Kit Preparation Prepare buffer, size marker mix, and sample mix. After preparation, allocate them at the corresponding position. Position: Reagent Volume (ul) S well: Separation buffer P well: distilled water C well: distilled water Size marker mix Volume (ul) Size Marker (C109200) Alignment marker (20-1k) - Page 33 3. Push the button to open the cartridge door and insert the cartridge. *Cartridge guiding groove must face front. 4. Click “Latch” and the cartridge information will be displayed. 5. Select method icon. 6. Click the well to select sample position. *Size Marker must rerun every 24 hours.
- Page 34 7. Confirm the analysis information and adjust the separation duration time (optional). Click “Run” to start analysis. 8. View the result and get sample size (bp).
-
Page 35: L3 Kilobase Cartridge Kit
4.3 L3 Kilobase Cartridge Kit Preparation Prepare buffer, size marker mix, and sample mix. After preparation, allocate them at the corresponding position. Position: Reagent Volume (ul) S well: Separation buffer P well: distilled water C well: distilled water Size marker mix Volume (ul) Size Marker (C109200) Alignment marker (20-1k) - Page 36 11. Push the button to open the cartridge door and insert the cartridge. *Cartridge guiding groove must face front. 12. Click “Latch” and the cartridge information will be displayed. 13. Select method icon. 14. Click the well to select sample position. *Size Marker must rerun every 24 hours.
- Page 37 15. Confirm the analysis information and adjust the separation duration time (optional). Click “Run” to start analysis. 16. View the result and get sample size (bp).
-
Page 38: Lr1 Rna Cartridge Kit
4.4 LR1 RNA Cartridge Kit Preparation Prepare buffer, size marker mix, and sample mix. After preparation, allocate them at the corresponding position. Position: Reagent Volume (ul) S well: Separation buffer P well: distilled water C well: distilled water Sample mix Volume (ul) Sample Alignment marker... - Page 39 3. Push the button to open the cartridge door and insert the cartridge. *Cartridge guiding groove must face front. 4. Click “Latch” and the cartridge information will be displayed. 5. Select method icon. 6. Click the well to select sample position. 7.
- Page 40 8. View the result and self-scoring RNA quality number (RQN).
-
Page 41: Lq1 High Resolution Quantitative Cartridge Kit
4.5 LQ1 High Resolution Quantitative Cartridge Kit Preparation Prepare buffer, size marker mix, and sample mix. After preparation, allocate them at the corresponding position. Position: Reagent Volume (ul) S well: Separation buffer P well: distilled water C well: distilled water Size marker mix Volume (ul) Size Marker (C109200) - Page 42 3. Push the button to open the cartridge door and insert the cartridge. *Cartridge guiding groove must face front. 4. Click “Latch” and the cartridge information will be displayed. 5. Select method icon. 6. Click the well to select sample position. *Size Marker must rerun every 24 hours.
- Page 43 7. Confirm the analysis information and adjust the separation duration time (optional). Click “Run” to start analysis. 8. View the result and get sample size (bp).
-
Page 44: Lq2 Standard Quantitative Cartridge Kit
4.6 LQ2 Standard Quantitative Cartridge Kit Preparation Prepare buffer, size marker mix, and sample mix. After preparation, allocate them at the corresponding position. Position: Reagent Volume (ul) S well: Separation buffer P well: distilled water C well: distilled water Size marker mix Volume (ul) Size Marker (C109300) Quantitative marker (20-... - Page 45 3. Push the button to open the cartridge door and insert the cartridge. *Cartridge guiding groove must face front. 4. Click “Latch” and the cartridge information will be displayed. 5. Select method icon. 6. Click the well to select sample position. *Size Marker must rerun every 24 hours.
- Page 46 7. Confirm the analysis information and adjust the separation duration time (optional). Click “Run” to start analysis. 8. View the result and get sample size (bp).
Need help?
Do you have a question about the Qsep1-Lite and is the answer not in the manual?
Questions and answers