Table of Contents
Advertisement
Quick Links
Advertisement
Table of Contents

Related Manuals for tell ecoLINE PRO


Summary of Contents for tell ecoLINE PRO
- Page 1 PRO INSTALLATION AND APPLICATION MANUAL for device version v2.00 Document version 2.0 16.09.2020 Product models: ecoLINE PRO 2G.IN4.R1 ecoLINE PRO 3G.IN4.R1 ecoLINE PRO 3GA.IN4.R1 ecoLINE PRO 4G.IN4.R1 ecoLINE PRO 4GA.IN4.R1...
-
Page 2: Table Of Contents
Remote connecting to devices which are using the TEX-MVP protocol ...... 14 3.2.4 Remote connecting to devices which are using the TELLMon protocol ...... 15 ecoLINE PRO programming software usage and feature descriptions ........16 Connection menu ......................16 4.1.1 Viewing the settings options and configuring offline ............ - Page 3 Transparent serial port ......................40 Remote programming of alarm control panels ..............40 5.1.1 Paradox alarm systems ....................41 5.1.2 DSC alarm systems ....................45 5.1.3 Premier and Premier Elite alarm systems ..............48 5.1.4 Bentel alarm systems ....................51 5.1.5 Inim alarm systems .....................
-
Page 4: Ecoline Pro Operation
1 ecoLINE PRO operation 1.1 Key functions of the product The basic function of the ecoLINE PRO is forwarding reports of alarm control panels to remote monitoring station over the mobile Internet, using multiple protocols, as well as sending Push messages to users about these reports. -
Page 5: Remote Monitoring Application Overview
1.4 Remote monitoring application overview The ecoLINE PRO communicates with SIA DC-09 receivers, TELLMon receivers and TEX-MVP servers through the GSM service provider’s mobile switching center using the GPRS/UMTS/LTE network, and then through the Internet. After processing and conversion, the receiver forwards the received data packages through a serial port towards the monitoring PC that runs the alarm monitoring software. -
Page 6: Terminal Wiring And Putting Into Operation
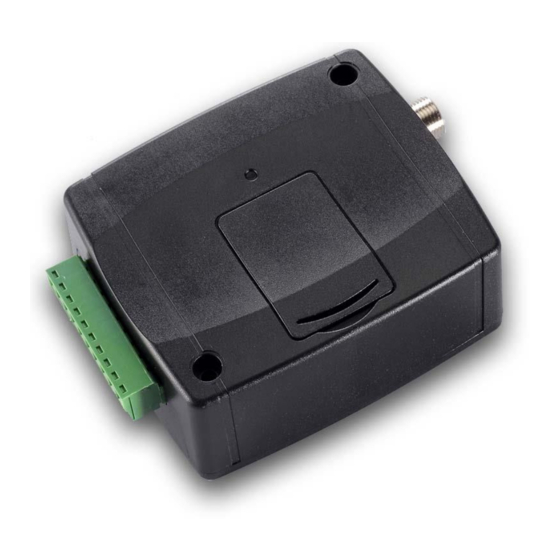
2 Terminal wiring and putting into operation 2.1 Input wiring For the inputs, the normally closed or normally open dry contact should be connected between the given input (IN1…IN4) and the negative of the power input (V-) or the COM terminal. If a normally open dry contact is used to activate the input, choose the NO (normally open) option in the given input’s settings. -
Page 7: Sim Card Holder
Insert the SIM card in the holder. The services to be activated on the SIM card installed into the ecoLINE PRO device should be chosen according to the services of the device. For communication with receivers and servers and use with the mobile application, it requires a SIM card with available mobile Internet, that may use either public or private APN. -
Page 8: Putting Into Operation
You can power up the device (12-24V DC). Make sure that the power source is sufficient for the operation of the ecoLINE PRO device. The nominal current consumption of the ecoLINE PRO device is 120mA, however it may increase up to 500mA during communication and output control. -
Page 9: Configuring The Ecoline Pro
By computer via USB, using the programming software. By computer over the Internet, using the programming software. The ecoLINE PRO programming software is compatible with the following operating systems: Windows 10 (32/64 bit) Earlier Windows operating systems are not supported by the software. -
Page 10: Configuring Directly Via Usb
3.2.1 Configuring directly via USB To start programming the device, follow the instructions below: Open the ecoLINE PRO programming software. Select the USB option in the “Connection type” menu, power up the device and connect it to the computer using a USB A-B cable. -
Page 11: Remote Connecting To Devices Via Cloud Service
3.2.2 Remote connecting to devices via cloud service This connection type can be used if the ecoLINE PRO device is connected to the cloud. A prerequisite for this is that the APN should be configured, and a SIM card with available... - Page 12 If cloud usage is enabled in the settings of the given device, the device keeps continuous connection with the cloud based server. In this case, skip the SMS sending process mentioned below. You can enable cloud usage in the “Functions and settings” menu. If cloud usage is disabled, the device will not keep continuous connection with the cloud, it will only connect upon request.
- Page 13 If the APN settings are not configured in the device, or if they are wrong, you can configure these using the following SMS commands: SMS command Specification device password,apn=APN# Configuring the APN Configuring the APN along with the device password,apn=APN,username,password# username and password belonging to it Example on the usage of the commands mentioned above:...
-
Page 14: Remote Connecting To Devices Which Are Using The Tex-Mvp Protocol
Server: the name of the server or receiver where the device is online. The server availabilities should be recorded in advance in the “Server register” menu. Device ID: the “TEX” identifier of the ecoLINE PRO to which you wish to connect to. The format of the “TEX” device identifier is: FFF (3 hexadecimal characters). -
Page 15: Remote Connecting To Devices Which Are Using The Tellmon Protocol
Receiver: the name of the receiver where the device is online. The receiver availabilities should be recorded in advance in the “Server register” menu. Device ID: the device identifier of the ecoLINE PRO device to which you wish to connect to. The format of this unique, burned-in during production and thereby unchangeable device identifier used for the TELLMon protocol is: FF:FF:FF:FF:FF:FF (6x2 hexadecimal characters). -
Page 16: Ecoline Pro Programming Software Usage And Feature Descriptions
4.1.1 Viewing the settings options and configuring offline Using the “Offline device selector” it is possible to view the settings options of the ecoLINE PRO device and to configure and save the settings in advance offline, without connecting the device. -
Page 17: Connection Type
4.1.2 Connection type In the “Connection type” menu the type of connection can be selected (USB or different options for connecting over the Internet), information can be seen about the connection process, and the installer and superadmin password can be changed. The default superadmin password is 1234. If you wish to use the installer level access as well, for this the password should be configured separately by clicking on the “Change Installer password”... -
Page 18: Device Register
Restore factory default settings: By clicking on this button, you can restore the factory default settings in the device. Restoring the factory default settings will erase the actual settings, therefore please save your settings if needed. The reset process may take more than 1 minute and involves a device restart. - Page 19 Function buttons available in the “Device register” menu: : update the records from database : quick remote connect to the selected device : add new device : clone entry (duplicate) : edit entry : delete entry Data stored by the device register: Device name: custom device name Server/Receiver: you can configure multiple remote availabilities for the same device (Cloud, TELLMon, TEX-MVP), according to what type of server or receiver the device connects...
-
Page 20: Server Register
4.1.4 Server register The server register is used for storing the contact details of the monitoring servers and receivers and to facilitate quick remote connecting to the devices. In the “Server register” menu you can record your monitoring servers and receivers, and then you can associate these with the devices in the “Device register”... -
Page 21: Device Settings Menu
4.2 Device settings menu You can configure the device settings in the submenus available in the “Device settings” menu. Changing the device settings: In order to change the device settings, reading the settings stored in the device is needed, which is done automatically after connecting to the device. However, you can also read the settings manually anytime by clicking on the “Read”... -
Page 22: General
4.2.1 General In this menu you can configure the general settings of the device. Available options: Reading the settings from the device: To read the settings from the device click on the “Read” button. This will read all settings in all menus. ... - Page 23 3G network usage is supported by the 3G(A).IN4.R1 and the 4G(A).IN4.R1 model of the ecoLINE PRO only! 4G network usage is supported by the 4G(A).IN4.R1 model only! Operator selection: using this drop-down menu, you can select a mobile operator available with the given SIM card.
- Page 24 Identification: User account ID: the user account ID necessary for Contact ID reporting to CMS. The events and, if using the TELLMon or TEX protocol, the supervision messages are also sent using the user account ID configured in this section. The device replaces the user account ID in the messages received from the connected alarm control panel automatically with the identifier configured here.
- Page 25 Internet. Configure the settings according to the requirements of the device (alarm control panel or other device) connected to the serial port of the ecoLINE PRO. Available options: baud rate, parity and stop bits.
-
Page 26: Inputs
4.2.2 Inputs In the “Inputs” menu you can configure the default state of the 4 contact inputs, input activation and restore sensitivity, the event code, partition and zone number used for reporting to a remote monitoring station, and you can also enable or disable reporting of input events to a monitoring station. - Page 27 Input type: the input can be normally open (NO), or normally closed (NC). When set to NO, event is generated when the input circuit is closed, while when set to NC, opening the input circuit generates an event. The input is closed when the given input IN1…IN4 is shorted to „V-”...
-
Page 28: Output
4.2.3 Output In this menu you can configure the control mode of the device’s relay output. The output can be solely controlled using the mobile application. When controlled by a user, the output will operate according to the configured control mode. The output can be used to arm and disarm the connected alarm system using the mobile application, if the given alarm system supports arming and disarming by an external dry contact. - Page 29 Control by mobile app: Output control mode: in this section you can configure the control mode of the output (or the selected output 1 or 2 in case of the IN4.R2 model). Available options: None: the output will not be used. ...
-
Page 30: Mobile Devices
In order to use the mobile application, it is necessary to enable cloud usage in the “Functions and permissions” menu. The device works with the ecoLINE PRO mobile app available for iOS devices in the AppStore and for Android on Google Play. - Page 31 QR code for mobile app registration: After installing the mobile application, you can associate the mobile app with the ecoLINE PRO device by reading this QR code in the mobile application and entering the registration password configured here. You can associate up to 20 mobile devices with the ecoLINE PRO.
-
Page 32: Functions And Permissions
“Delete” button. If you delete a mobile device, the application used on the given device will no longer access the ecoLINE PRO device. 4.2.5 Functions and permissions In this menu you can configure the installer access permissions, device lock and function settings. - Page 33 Installer access permissions: In this section you can enable or disable the installer’s access to protected settings (for the user who sings in with the installer password). The installer can change only settings options which are enabled in the list. Device locks: SIM card lock: if you enable this option, the device will register the ID of the SIM card installed, and will refuse to operate with any other SIM card until you disable this option.
-
Page 34: Device Status Menu
4.3 Device status menu 4.3.1 Status monitoring The “Status monitoring” menu provides information on actual system status. Please note that for faster communication, some of the options are not available when connected remotely. Status information loads and refreshes automatically only when connected through USB. In the window on the right side the system logs are shown, which provides information about the internal processes of the device and communication. - Page 35 Counters: Data traffic: data traffic since the device has last connected to the Internet. Device uptime: elapsed time since the device has been powered up. GSM uptime: elapsed time since the device has last connected to the GSM network. ...
-
Page 36: Event Monitoring
4.3.2 Event monitoring In this menu the device’s event log can be viewed and also enables you to monitor events and reporting progress online. The device stores last 100 events in its event log memory. You can see the events and the reporting status in the “Events” window, while other actions configured and performed by events are available in the “Actions”... - Page 37 When connected to the device remotely, the event log can be downloaded only, online monitoring is not available. Elements of the event log: #: the ordinal number of events. Date/time: event occurrence date and time. Event: the name of the event. ...
-
Page 38: Software Settings Menu
4.4 Software settings menu 4.4.1 Settings In the “Settings” menu you can change the user interface skin and language. Available options: Restore default layout: To restore the user interface default layout click on the “Restore default layout” button. User interface: Skin: the user interface skin can be changed using the dropdown-menu. -
Page 39: About
4.4.2 About The “About” menu shows the availabilities of the manufacturer, the version of the programming software and the path of the data folder where the software stores the logs. By clicking on the path link, the data folder will be opened in the file manager. -
Page 40: Transparent Serial Port
PRO device and the Remote Serial Client software. For this, the serial port of the ecoLINE PRO should be connected to the serial port of the alarm control panel, and the programming software of the alarm system connects to the virtual serial port created by the Remote Serial Client software. -
Page 41: Paradox Alarm Systems
TELL offers its own level driver interface produced for this purpose. Connect the serial port output of the level driver interface to the serial port of the ecoLINE PRO, then link the level driver interface with the alarm control panel using the supplied special cable, as shown in the figure above. - Page 42 Remote Serial Client software. This client software ensures the connection between the PC and the ecoLINE PRO device, as well as it creates a virtual serial port for the programming software of the alarm system.
- Page 43 Example for selecting the serial communication port in the Babyware programming software: For Spectra alarm control panels: Baud rate=9600 baud For EVO alarm control panels: Baud rate=57600 baud Start connecting: Then the programming software will open the serial port and will establish the connection with the alarm control panel.
- Page 44 After you have finished remote programming the alarm control panel, you can delete the created virtual serial port by clicking on the “Delete port” button.
-
Page 45: Dsc Alarm Systems
5.1.2 DSC alarm systems Installation: Connect the supplied special cable to the serial port of the ecoLINE PRO device as shown in the figure above, then plug it onto the alarm control panel. Software settings: Configure the serial port settings in the “Serial port” section of the “General” menu, in the... - Page 46 Create port: click on this button to create the configured virtual serial port, then select the created port in at the serial communication settings in the programming software of the alarm system. Please note that the ecoLINE PRO device should be online in order to create the virtual serial port.
- Page 47 Start connecting: Then the programming software will open the serial port and will establish the connection with the alarm control panel. After you finished remote programming the alarm control panel, you can delete the created virtual serial port by clicking on the “Delete port” button.
-
Page 48: Premier And Premier Elite Alarm Systems
TELL offers its own level driver interface produced for this purpose. Connect the serial port output of the level driver interface to the serial port of the ecoLINE PRO, then link the level driver interface with the alarm control panel using the supplied special cable, as shown in the figure above. - Page 49 Create port: click on this button to create the configured virtual serial port, then select the created port in at the serial communication settings in the programming software of the alarm system. Please note that the ecoLINE PRO device should be online in order to create the virtual serial port.
- Page 50 Example for selecting the serial communication port in the Wintex programming software: Then the programming software will open the serial port and will establish the connection with the alarm control panel. After you have finished remote programming the alarm control panel, you can delete the created virtual serial port by clicking on the “Delete port”...
-
Page 51: Bentel Alarm Systems
5.1.4 Bentel alarm systems Installation: Connect the supplied special cable to the serial port of the ecoLINE PRO device as shown in the figure above, then plug it onto the alarm control panel. Software settings: Configure the serial port settings in the “Serial port” section of the “General” menu, in the... - Page 52 Remote Serial Client software. This client software ensures the connection between the PC and the ecoLINE PRO device, as well as it creates a virtual serial port for the programming software of the alarm system.
- Page 53 Start connecting: Then the programming software will open the serial port and will establish the connection with the alarm control panel. After you finished remote programming the alarm control panel, you can delete the created virtual serial port by clicking on the “Delete port” button.
-
Page 54: Inim Alarm Systems
5.1.5 Inim alarm systems Installation: Connect the supplied special cable to the serial port of the ecoLINE PRO device as shown in the figure above, then plug it onto the alarm control panel. Software settings: Configure the serial port settings in the “Serial port” section of the “General” menu, in the... - Page 55 Remote Serial Client software. This client software ensures the connection between the PC and the ecoLINE PRO device, as well as it creates a virtual serial port for the programming software of the alarm system.
- Page 56 Example for selecting the serial communication port in the Ability Suite programming software, in the “Settings / Application settings” menu: Example for selecting the serial communication port in the Smart League programming software, in the “Settings / Application settings” menu:...
- Page 57 Start connecting with the Ability Suite programming software: Start connecting with the Smart League programming software: Then the programming software will open the serial port and will establish the connection with the alarm control panel.
-
Page 58: Arming And Disarming The Alarm Control Panel Through The Mobile Application
To use this feature, connect the relay output (OUT and COM) of the ecoLINE PRO to the alarm control panel’s input used for arming and disarming, set the given input in the alarm control panel to normally open (NO) pulse control, and then configure the control mode of the device’s output in the Output menu. -
Page 59: Updating The Firmware
7.2 Updating remotely over the internet It is also possible to remotely update the firmware of the ecoLINE PRO over the Internet, using the programming software. After establishing the remote connection, the steps for remote update... -
Page 60: Restoring The Factory Default Settings
9 Contents of the package ecoLINE PRO + terminal connector GSM antenna Installation and application manual Warranty card 10 About the manufacturer Company: T.E.L.L.
Need help?
Do you have a question about the ecoLINE PRO and is the answer not in the manual?
Questions and answers