MikroTik hEX Quick Start Manual
Hide thumbs
Also See for hEX:
- Quick start manual (5 pages) ,
- Quick manual (57 pages) ,
- Quick start manual (21 pages)
Table of Contents
Advertisement
Quick Links
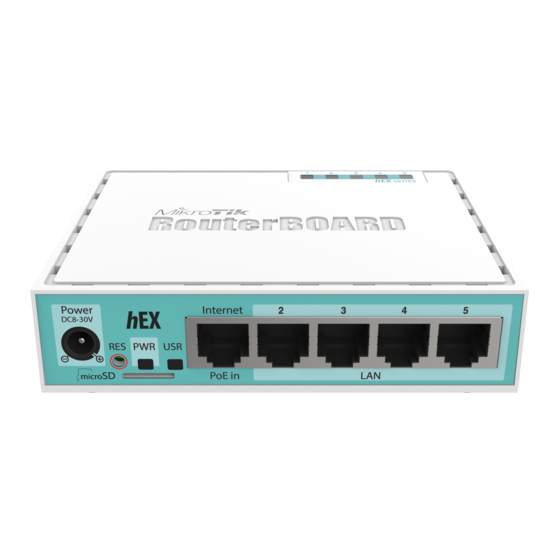
hEX
hEX is a powerful five port Gigabit Ethernet router for locations where wireless connectivity is not required.
First use
1. Choose your powering solution, please see
2. Connect your Internet cable to port 1 (labeled "Internet"), and local network computers to ports 2-5.
3. Connect your direct input power jack if not using POE, to start up the device.
4. If using POE please see section
5. The device will boot up and after short beep, the network will be available for connecting.
6. Set your computer IP configuration to automatic (DHCP).
7. Once connected to the network, open http://192.168.88.1 in your web browser to start configuration, since
there is no password by default, you will be logged in automatically.
8. We recommend clicking the "Check for updates" button and updating your RouterOS software to the latest
version to ensure the best performance and stability.
9. Set up your password in the screen that loads.
Mounting
This device is designed for use indoors by placing it on the flat surface or mounting on the wall, mounting points are
shown on the picture below, screws are not included in the package. Screws with size 4x25 mm fit nicely,
depending on your wall structure you can use dowels 6x30 mm and 6 mm drill bit if needed.
When mounting on the wall, please ensure that cable feed is pointing downwards. We recommend using Cat6
cable for our devices. The IP rating scale for this device is IPX0.
See mikrotik.com/products for the latest version of this document.
section for possibilities.
POE Adapter
on how to connect.
Document #49563 Modified on: 01.OKT.2019
Advertisement
Table of Contents

Related Manuals for MikroTik hEX


Summary of Contents for MikroTik hEX
- Page 1 Gigabit Ethernet router for locations where wireless connectivity is not required. First use 1. Choose your powering solution, please see Powering section for possibilities. 2. Connect your Internet cable to port 1 (labeled “Internet”), and local network computers to ports 2-5.
- Page 2 2. Connect an Ethernet cable from your LAN to the LAN port of the POE adapter, please mind arrows for data and power flow. 3. Connect the power cord to the adapter, and then plug the power cord into a power outlet. See mikrotik.com/products for the latest version of this document. Document #49563 Modified on: 01.OKT.2019...
- Page 3 The device supports RouterOS software version 6. The specific factory installed version number is indicated in the RouterOS menu /system resource. Other operating systems have not been tested. See mikrotik.com/products for the latest version of this document. Document #49563 Modified on: 01.OKT.2019...
- Page 4 L'exploitation est autorisée aux deux conditions suivantes: (1) l'appareil ne doit pas produire de brouillage, et (2) l'utilisateur de l'appareil doit accepter tout brouillage radioélectrique subi, même si le brouillage est susceptible d'en compromettre le fonctionnement. See mikrotik.com/products for the latest version of this document. Document #49563 Modified on: 01.OKT.2019...
- Page 5 BG С настоящото Mikrotīkls SIA декларира, че този тип радиосъоръжение RouterBOARD е в съответствие с Директива 2014/53/ЕС. Цялостният текст на ЕС декларацията за съответствие може да се намери на следния интернет адрес: https://mikrotik.com/products CS Tímto Mikrotīkls SIA prohlašuje, že typ rádiového zařízení RouterBOARD je v souladu se směrnicí 2014/53/EU. Úplné znění EU prohlášení o shodě...
- Page 6 эксплуатации: подключите адаптер питания чтобы включить устройство. Откройте 192.168.88.1 в своем веб- браузере для конфигурации. Дополнительная информация http://mt.lv/help-ru 的更多信息 CN. 说明书。 连接电源适配器以打开设备。 在Web 浏览器中打开192.168.88.1 进行配置。 有关http://mt.lv/help-zh See mikrotik.com/products for the latest version of this document. Document #49563 Modified on: 01.OKT.2019...
Need help?
Do you have a question about the hEX and is the answer not in the manual?
Questions and answers