DURAVIT SensoWash Slim 611000 00 2 10 2300 Operating Instructions Manual
Shower toilet unit
Hide thumbs
Also See for SensoWash Slim 611000 00 2 10 2300:
- Operating instructions manual (121 pages) ,
- Mounting instructions (12 pages) ,
- Mounting instructions (12 pages)

Related Manuals for DURAVIT SensoWash Slim 611000 00 2 10 2300


Summary of Contents for DURAVIT SensoWash Slim 611000 00 2 10 2300
- Page 1 Leben im Bad Living bathrooms SensoWash Slim ® 操作说明 电子坐便器 Shower toilet unit Operating instructions...
- Page 4 www.sensowash.cn...
-
Page 5: Table Of Contents
目录 1. 概览 ...................5 1.1 坐便器本体 ..............5 1.2 遥控器 ................5 2. 符号说明 ................5 3. 保证您的安全 ..............6 3.1 正常使用 ................ 6 3.2 安全说明 ................ 6 4. 操作基础知识 ..............8 4.1 遥控器 ................8 4.2 LED状态指示灯 .............. 9 5. 初始化操作 ................9 遥控器... - Page 6 7.2 喷管和喷头 ..............17 手动清洁喷管和喷头 ............ 17 喷管和喷头的自洁功能 ..........18 7.3 遥控器 ................. 18 8. 废弃物处理 ................18 9. 故障解答 ................19 10.技术参数 ................23 11.RoHS ................24...
-
Page 7: 坐便器本体
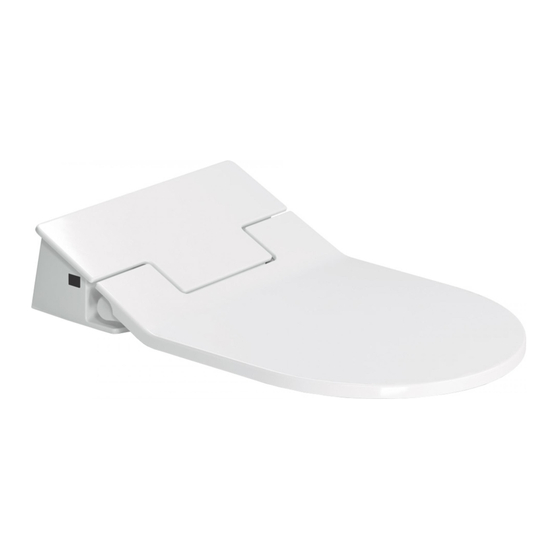
1. 概览 1.1 坐便器本体 1.2 遥控器 电源 红外发射器 LED状态指示灯 臀位清洗 臀位清洗 女士清洗 环境光感应器 舒适清洗 女士清洗 喷头位置 红外接收器 水温 夜灯 座圈温度 缓冲盖板机制 停止 座圈加热 电池盒 可在折页查阅相关参照图示。 2. 符号说明 表示如不避免可能会导致死亡或严重伤害的危险 警告 情况。 表示如不避免可能会导致轻微或中度伤害的危险 注意 情况。 用于表示与身体伤害无关的操作实践。 公告 此处有小提示。 > 此处要求您进行操作。 声音信号。 自动定时功能。... -
Page 8: 保证您的安全
3. 保证您的安全 ® 为确保您能尽情享受SensoWash ,请仔细阅读本操作说明,特别 是安全说明。请妥善保管本操作说明书,如产品需转交给他人使用 时,请务必附带本说明书。所有操作说明在印刷交付时均已根据设 备最新技术状况进行了确认。Duravit保留因进一步发展而作出更改 的权利。 3.1 正常使用 SensoWash Slim是一款附带臀位清洗和女士清洗以及其他舒适功 ® 能的清洗坐便器,可随时作为普通坐便器使用。它只能用于封闭空 间。任何其他使用方式都将视为不符合正常使用。对于非正常使 用,Duravit不承担任何责任。 3.2 安全说明 请仔细阅读并遵守以下安全说明! 用户要求 • 对于儿童、不了解本设备的人员,以及身体、感官、精神等方面 存在缺陷的人员,只有经过安全指导后或在其他人员监督下才可 使用本设备。 • 确保儿童不应玩耍本产品。 警告 健康伤害! 本产品必须接地。 > 对照安装说明操作。 仅在设备完全正常的情况下使用该设备 • 确保电源线没有损坏。 • 电源线不能被卡住或挤压。 • 请使电源线远离高温表面和锋利边缘。 • 在该设备无法正常工作时请勿使用它。... - Page 9 方可安装使用。 > 固定布线中必须按布线规则配有触点开距提供在过电压等级III条 件下全极断开的装置。 > 固定布线给电电缆规格为导线标称横截面积1-2.5mm (17-14 AWG)。 > 确认给电电缆接地端比火线(L)和零线(N)长10mm (⅜”)。 > 安装本产品前请确认电气接线盒必须已固定在墙上。 > 请勿坐在座盖上。请勿站在座盖上。请勿依靠在座盖上。 > 请勿连通任何废水、混水、工业水、海水或其他未处理或半处理 的水。 > 无论出于任何目的,请不要拆卸座圈和盖板。 > 不能损坏座圈表面。 > 如果座圈外表损坏,请立即联系Duravit客户服务热线。 > 开闭座圈和盖板时请勿用力过大。 ® • 如果将SensoWash 从温度较低的位置移到温度较高的位置,可能 出现冷凝湿气。此时请关闭设备数小时。 ® • 请勿将SensoWash 安装在可能结霜的房间内。室内温度不能低于 4°C。 ® • 请勿将明火、蜡烛、烟头或类似物品放在SensoWash 上。...
-
Page 10: 操作基础知识
• 错误修理可能造成事故、损坏和运行故障。 • 请勿使用Duravit未推荐您使用的附件。 电池的使用 注意 健康伤害! > 如果电池酸液泄漏,请不要接触皮肤、眼睛和粘膜。 > 如果不小心接触到酸液,请立即用大量清水冲洗受感染的部位并 立即看医生。 • 将电池放在小孩够不到的地方。如果吞咽电池,可能危及生命。 如果电池已被吞咽,请立即请求医疗救助。 • 请勿为电池充电,不得利用其它工具重新激活电池,禁止将电池 拆卸、投入火中或使其短路。 • 电池电量耗完后,请立即从遥控器中取出。否则液体可能泄露并 造成损坏。 • 请勿将新旧电池一起放入遥控器中。 • 在装入电池之前先清洁电池和触点。安装时注意电池的极性要放 置正确。 • 如果遥控器长时间不用,请将电池取出。 • 请勿将电池放在极端条件下:不要接触热源或接受暴晒。否则可 能发生泄漏。 4. 操作基础知识 4.1 遥控器 SensoWash ® 是通过遥控器操作的。设置也通过遥控器进行更改。 按下遥控器上的相应按键可激发相应功能。该按键会短暂亮起白色 背光。... -
Page 11: Led状态指示灯
> 将两粒CR2032的锂电池正极朝上放入 > 关闭“电池盒” 。 4.2 LED状态指示灯 红色常亮: SensoWash ® 处于“待机”模式,不可使用所有功能。 橙色常亮: SensoWash 处于“节能模式”,可使用所有功能。 ® 绿色常亮: SensoWash ® 处于“开机模式”,可使用所有功能。 绿色闪烁: SensoWash 正处于“初始化”,只有坐便盖本体上 ® 的“电源”按键 可用。 红色闪烁: 故障。断开主电源,并参照章节9继续操作。 5. 初始化操作 遥控器 > 按下“电池盒” 的锁打开它。 > 除去电池仓内的电池隔离片。 > 关闭“电池盒” 。 电源 > 接通主电源。 SensoWash 接通电源后将启动大约15秒的“初始化”。在此期... -
Page 12: 开启/关闭Sensowash
> 按下坐便盖本体上的“电源”按键 。 SensoWash ® 现在已开机。 “LED状态指示灯” 处于绿色常亮 可使用所有功能。 6. 操作 6.1 开启/关闭SensoWash ® > 按下坐便盖本体上的“电源”按键 ,开启SensoWash ® 。 LED状态指示灯显示绿色表示处于“开机模式”。 > 按下坐便盖本体上的“电源”按键 ,关闭SensoWash 。 ® LED状态指示灯显示红色表示处于“待机模式”。 6.2 清洗功能 SensoWash 在使用清洗功能之前和之后会自动清洗缩回的喷头。 ® 清洗功能在按下“停止”按键 后立即停止或定时2分钟后自动 停止。 激活/停用“臀位清洗” 轻柔、安全地冲洗臀位。 > 按“加号”键 “臀位清洗” > 按“停止”按 或“减号”... -
Page 13: 激活/停用"女士清洗
激活/停用“女士清洗” 额外的喷头出口可清洗女士私密部位。 > 按“加号”键 “女士清洗” > 按“停止”按 或“减号” 激活,喷管缓 键停止“女士清 键激活“女 慢伸出。 洗”或等待2分 士清洗”。 钟后自动停止。 或者按下坐便盖本体上的“女士清洗”按键 激活女士清洗功能。 再次按下坐便盖本体上的“女士清洗”按键 停止女士清洗或等 待2分钟后自动停止。 激活/停用“舒适清洗” 在使用清洗功能时喷管前后移动。 要求:臀位清洗或女士清洗功能已激活。 > 按“加号”键 “舒适清洗” > 按“减号”键停止“舒适清 激活“舒适清 功能已激活。 洗”功能。之前设置的功能 洗”功能。 (臀位清洗或女士清洗)仍 处于工作状态。2分钟后自动 停止。... -
Page 14: 调节喷水强度
调节喷水强度 喷水强度有3档设置: 低 > 中 > 高 要求:臀位清洗或女士清洗功能已激活且图标处于常亮状态。 > 按“加号” > 按“减号”键 键增加清洗 调低清洗强 强度。 度。 “女士清洗” 操作同上。 调节喷管位置 喷管位置有5档设置: < ––––––––––––––––––––––––––––––––––––––> 前 后 > 按右箭头使 > 按左箭头使 喷管向后 喷管向前 移。 移。... -
Page 15: 调节水温
调节水温 水温调节有4档设置: 关 > 低 > 中 > 高 > 按“水温”键 进行设置 6.3 座圈加热 调节座圈温度 座圈温度调节有4档设置: 关 > 低 > 中 > 高 > 按“座圈温 度”键进行设 置 要了解如何节能,请参见第6.4章“设置”。... -
Page 16: 设置夜灯
6.4 设置 设置夜灯 夜灯可以在夜晚照亮陶瓷内壁,即使座盖关闭也可见。 夜灯在自动模式下会根据环境亮度自行打开和关闭。 可通过3个模式分别设置夜灯: 开 > 自动 > 关 按以下按键组合进行夜灯模式的设置 > 按住“停 > 按下“女士 止”键。 清洗减号” 键。 节能模式 定时节能模式可以让您在想要的时间段内进行节能,比如说晚上。 当“定时节能模式”激活时,将在随后的8小时内停止座圈加热, 然后自动恢复座圈加热16小时。每天在同一时间重复此过程,直到 停用节能模式为止。 请在想要定时节能模式开始启用的时间点按下以下组合键激活定时 节能模式。 在设置过程中请一直按住“停止”键。... -
Page 17: 激活/停用确认音
> 按住“停 > 按下“座圈 止”键。 温度”键。 状态指示灯显示为绿色:关 状态指示灯显示为橙色:开 要更改“定时节能模式”的时间点,请先停用“定时节能模式”并 根据您所需的时间重新设置它。 要永久停用座圈加热,请参见第6.3章。 自动节能模式 如果48小时内SensoWash 所有功能都未使用,自动节能模式将自 ® 动激活。座圈加热现在停止。当使用任何SensoWash 功能时,自 ® 动节能模式将会自动退出,并且自动激活之前所有的设置。 激活/停用确认音 表示产品接收到相关指令。 按以下按键组合进行确认音的设置。 在设置过程中请一直按住“停止”键。 > 按下“女士 > 按住“停 清洗加号” 止”键。 键。... -
Page 18: 锁定/解锁遥控器
短暂确认音:开 较长确认音:关 锁定/解锁遥控器 通过遥控器设置锁定功能。激活此功能后,遥控器将无法使用。 在5秒内按下下列组合按键,锁定/解锁遥控。 在设置过程中请一直按住“停止”键。 > 按住“停 > 按下“喷头位 > 按下“喷头位 > 按下“水温” 置左箭头” 键。 止”键。 置右箭头” 键。 键。 > 按下“座圈温 度”键。 喷管位置和温度图标闪烁三次: 锁定 喷管位置和温度图标闪烁一次: 解锁... -
Page 19: 清洁和维护
7. 清洁和维护 7.1 座圈和盖板 由于清洁不当导致褪色变黄或喷漆剥离! 公告 > 请勿使用腐蚀性清洗剂或者含有氯或酸的清洗剂。 > 仅使用专用于此应用区域的清洗剂和设备。 > 按照清洗剂制造商的说明操作。 > 决不能混用清洁剂。 中性皂液是理想的日常清洁剂。 定期清洁坐便器本体,或在沾上污垢后立即清洁。如果不经常进行 清洁,污垢可能变得比较明显,从而形成顽固污垢。 7.2 喷管和喷头 手动清洁喷管和喷头 定期清洁喷管喷头,或在发现污垢后立即清洁。 如要拆下喷头进行清洁,请参照折页进行清洁。 > 按住“停 > 按下“臀位 > 用布、海绵或 > 按停止结束 止”键。 清洗加号” 者刷子和中性 清洁,或2分 键。 清洗剂清洁喷 钟后,喷管 头。 自动缩回。... -
Page 20: 喷管和喷头的自洁功能
喷管和喷头的自洁功能 喷管和喷头可自动清洗。 > 按住“停 > 按下“舒适 > 按“停止”按 止”键。 清洗加号” 键停止清洗或 键。 等待90秒后自 动停止。 喷管和喷头在使用前后自动进行清洁。 7.3 遥控器 > 使用柔软的湿布清洁遥控器和遥控器支架。 8. 废弃物处理 如果带有垃圾桶画叉的标志,则说明这类废弃物需要单独分 类到废弃电子电气设备中(WEEE)。电子电气设备可能包含危 险或有害物质。请勿将其作为未分类的生活垃圾丢弃。请将 其送至WEEE指定的回收点。如此一来,您可以为资源节约和环境 保护做出贡献。请与您的零售商或当地相关部门联系,获取更多信 息。 用完的电池必须正确进行处理。为此,在出售电池的商店及社区收 集站提供了带有相应标签的电池回收箱。 为避免可能的窒息伤害或危险,请勿让孩子玩塑料袋和产品包装。 请妥善保管此类包装材料或以环保的方式将其丢弃。如果可能,请 将包装材料一直保留至保修期结束。... -
Page 21: 故障解答
源。 坐便盖本体上 故障。 > 关闭SensoWash 。 ® 的“LED状态指 > 再次开启SensoWash 。 ® 示灯” 每3秒 如果仍然红色闪烁:拨打 Duravit客户服务热线。 闪烁红色两次。 坐便盖本体上 故障。 > 拨打Duravit客户服务热 的“LED状态指 线。 示灯” 每3秒 闪烁红色三次。 坐便盖本体上 故障。 > 关闭“水温” 。 的“LED状态指 > 激活任意清洗功能。 示灯” 每3秒 闪烁红色四次。 听到连续的确认 故障。 > 切断电源。... - Page 22 (“状态指示灯” 不亮)。 SensoWash > 切换到“开机”模 处于待 ® 式。 机模式(“状态指 示灯” 显示为红 色)。 漏水。 故障。 > 关闭水源主阀门。 > 断开电源。 > 拨打Duravit客户服 务热线。 遥控器 操作期间,遥控 电池电量低。 > 更换电池。 图标闪烁(而不 是常亮)。 遥控器不工作。 未装入电池。 > 装入电池。 电池电量用完。 > 更换电池。 电池正负极装反。 > 按正确方式装入电 池。 遥控被锁定(“喷...
- Page 23 臀位清洗/女士清洗 在臀位清洗和女 在臀位清洗和女士 这是正常的。 士清洗之间切换 清洗之间切换时, 所需的时间过 喷头需要缩回自洁 长。 后再伸出。 喷水强度太弱。 喷水强度已设置 > 将“喷水强度” 或 为“低”。 调为“中”或“ 高”。 进水软管变形。 > 拨打Duravit客户服 务热线。 水温不够高。 水温已设置为“ > 将“水温” 调为“ 关”或“低”。 中”或“高”。 水温太高。 “水温” 已经设置 > 将“水温” 调为“ 为“高”。 中”或“低”。 喷管突然停止喷 这是正常的。 该功能在2分钟后自...
- Page 24 问题 可能原因 解决方法 章节 夜灯功能 夜灯不亮。 夜灯已设置为“ 这是正常的。 关”模式。 > 将夜灯设置为“自 动”或“开”模式。 夜灯处于“自动” 这是正常的。 模式,环境光很 强。 夜灯一直处于打 夜灯已设置为“ 这是正常的。 开状态。 开”模式。 > 将夜灯设置为“自 动”或“开”模式。 这是正常的。 夜灯处于“自动” 模式,环境光很 弱。 环境光感应器窗口 > 清洁“环境光感应 不干净。 器” 窗口。 喷管的手动清洁功能 喷管自动缩回。 该功能在2分钟后自 这是正常的。 动停止。 喷管和喷头的自洁功能 缩回的喷管滴...
-
Page 25: 技术参数
额定电压 50/60Hz 频率 1080W 额定功率 6.8A 最大电流 温度范围 4 – 40°C • 工作温度 32 – 40°C • 水温 33 – 37°C • 座圈温度 0.07 – 0.75MPa 进水压力 (0.7 - 7.5bar) 0.35 - 0.60l/min 清洗水量 IP X4全方位防溅水保护 防护等级 质保 通用质保条款和条件请查阅 www.pro.duravit.com/gtc... -
Page 26: Rohs
多溴 镉 铅 汞 六价铬 二苯 联苯 (Cr, VI) (Cd) (Pb) (Hg) 醚 (PB- (PBBs) DEs) 零部件 铜合金部 件 印刷电路 板组件 : 表示该有害物质在该部件所有均值材料中的含量均在GB/T 26572-2011规定的限量要求以下。 : 表示该有害物质至少在该部件的某一均值材料中的含量超出 GB/T 26572-2011规定的限量要求。 本表格提供的信息是基于供应商提供的数据及Duravit公司的检测结 果。Duravit公司会继续努力通过改进技术来减少这些物质和元素的 使用。 根据中国电子行业标准SJ/T 11364-2014和相关的中国政府法规, 本产品及其某些内部或外部组件上可能带有环保使用期限标识。取 决于组件和组件制造商,产品以其组件上的使用期限标识可能有所 不同。组件上的使用期限标识优先于产品上任何与之相冲突的或不 同的环保使用期限标识。 本产品的“环保使用期限”如下图所示,只有在根据说明书所述的 正常情况下使用本产品时,“环保使用期限”才有效。 ... - Page 27 Contents 1. Brief overview ..............27 1.1 Toilet unit ..............27 1.2 Remote control ............27 2. Description of Symbols ............. 27 3. For your safety ..............28 3.1 Normal Use ..............28 3.2 Safety instructions ............28 4. Basics of operation ............31 4.1 Remote control .............31 4.2 Status LEDs ..............32 5.
- Page 28 7.2 Spray wand and nozzle ..........40 Manual cleaning of the spray wand and nozzle .....40 Self-cleaning of the spray wand and nozzle ....41 7.3 Remote control .............41 8. Disposal ................41 9. Troubleshooting support ..........42 10.Technical Data ..............47 11.RoHS ................
-
Page 29: Brief Overview
1. Brief overview 1.1 Toilet unit 1.2 Remote control Power Infrared transmitter Status LED Rearwash Rearwash Ladywash Ambient light sensor Comfortwash Ladywash Spray wand position Infrared receiver Water temperature Night light Seat temperature Soft closing mechanism Stop Seat heating Battery Compartment The overviews referred to are collected together on the fold out page. -
Page 30: For Your Safety
These operating instructions correspond to the device’s state of technology at the time of printing. Duravit reserves the right to make changes in terms of further development. 3.1 Normal Use... - Page 31 • Do NOT detach seat and lid for any purpose • Do NOT damage the surface of seat. • If the surface of the seat is damage, contact Duravit customer service hotline. • DO NOT open and close seat and lid with excessive force.
- Page 32 • Repairs must be carried out by qualified electricians or techni- cians. • Improperly performed repairs can lead to accidents, damage and malfunctions. • Do NOT use attachments not recommended by Duravit. Use of batteries CAUTION Health damage! • Avoid contact with skin, eyes and mucous membranes if battery acid has leaked.
-
Page 33: Basics Of Operation
dismantled, exposed to fire or short-circuited. • Always remove empty batteries from the remote control imme- diately. They may leak and cause damage. • Do not insert new and old batteries together in the remote control. • Clean the battery and contacts before inserting the battery. Note the proper polarity. -
Page 34: Status Leds
4.2 Status LEDs Red illuminated: SensoWash is in the „Standby mode“, all func- ® tions cannot be used. Orange illumina- SensoWash is in the „Energy saving mode“, all ® ted: functions can be used. Green illumina- SensoWash is in the „On mode“, all functions ®... -
Page 35: Operating
6. Operating 6.1 Switching the SensoWash on / off ® > Press “Power” on the seat unit to switch on SensoWash ® A green Status LED indicates “On mode”. > Press “Power” on the seat unit again to switch off SensoWash ®... -
Page 36: Activating / Deactivating "Comfortwash
> Press Plus Ladywash is > Press Stop to or Minus to active, the end Ladywash activate La- spray wand or after 2 min. dywash. extracts slowly auto stop. Alternatively press “Ladywash” on the seat unit to activate La- dywash. Press “Ladywash” on the seat unit again to stop Lady- wash or after 2 min. -
Page 37: Adjusting The Spray Wand Position
Requirement: Rearwash or Ladywash function is activated and the icon illuminated. > Press Plus to > Press Minus increase the to decrease Rearwash the Rearwash intensity. intensity. Same action for “Ladywash” Adjusting the spray wand position The spray wand position can be set individually to 5 different posi- tions: Front <... -
Page 38: Adjusting The Water Temperature
Adjusting the water temperature The water temperature can be individually adjusted in 4 levels: > > Medium > High > Press Water Temperature to cycle through. 6.3 Seat heating Adjusting the seat temperature The seat temperature can be individually adjusted in 4 levels: >... -
Page 39: Settings
6.4 Settings Adjusting the night light Illuminated inner bowl for night mode orientation, also visible with closed lid. In the Auto mode the night light will be switched on and off ac- cording to the surrounding brightness. The night light can be set individually in 3 modes: >... -
Page 40: Activating / Deactivating The Confirmation Tone
> Press and > Press Seat hold Stop. Temperaure. Status LED is illuminated green: Off Status LED is illuminated orange: On To change the point of time of the “Timed energy saving mode”, deactivate the “Timed energy saving mode” and set it again at your desired time . -
Page 41: Lock / Unlock The Remote Control
Short confirmation tone: Longer confirmation tone: Off Lock / unlock the remote control Blocking function via remote control. No function can be used while this function is activated. Press within 5 sec. the following button combination to lock / unlock the remote control. Therefore, the stop button has to be pressed constantly. -
Page 42: Cleaning And Care
7. Cleaning and Care 7.1 Seat and lid Yellow discolouration or paint delamination due NOTICE to incorrect cleaner! > Do not use abrasive cleaning agents or cleaning agents contain- ing chlorine or acid. > Only use cleaning agents and equipment which is intended for this area of application. -
Page 43: Self-Cleaning Of The Spray Wand And Nozzle
Self-cleaning of the spray wand and nozzle Spray wand and nozzle are cleaned automatically. > Press and > Press > Press stop to hold Stop. Comfortwash end cleaning Plus. or after 90 sec. auto stop. Spray wand and nozzle are cleaned automatically before and after each use. -
Page 44: Troubleshooting Support
3 hours and then reconnect it again. If your unit does still not work properly after following the instructions mentioned below, contact Duravit customer service hotline. Have the article and serial number ready. These can be found on the nameplate on the back of the operating instructions. - Page 45 Problem Potential cause Solution The “Status Malfunction. > Contact LED” on the Duravit customer unit flashes service hotline. red three times each 3 seconds. The “Status Malfunction. > Turn off “Water LED” on the temperature” unit flashes red > Activate any shower four times each function.
- Page 46 Problem Potential cause Solution Remote control Icons on remote The batteries > Change the control flash du- are low. batteries. ring operation. (instead of bee- ing illuminated) The remote No batteries > Insert batteries. control does not are inserted. work. The batteries >...
- Page 47 Problem Potential cause Solution The water spray The water spray > Adjust the “Water intensity is too intensity has been spray intensity” weak. set to „Low“. and/or to „Medi- um“ or „High“. The water supply > Contact your hose has buckled. installer.
- Page 48 Problem Potential cause Solution The seat tem- The „Seat tempe- > Adjust the „Seat perature is too rature“ has been temperature“ high. set to „High“. „Medium“ or „Low“. Night light function The night light The night light has This is normal. does not come been set to Off >...
-
Page 49: Technical Data
(0.7 - 7.5 bar) Water consumption in spray mode 0.35 - 0.60 l/min Protection degree IP X4 Protection against water spray from all sides Warranty Our warranty terms can be found in our General Terms and Conditions (GTC) at www.pro.duravit.com/gtc. -
Page 50: Rohs
GB/T 26572-2011. The information provided in the table above is based on data provided by the supplier and test results of Duravit. Duravit will continue to improve technology to reduce the use of these subs- tances and elements. - Page 51 Duravit AG 杜拉维特(中国)洁具有限公司 P.O. Box 240 重庆市江津区珞璜工业园B区园区大道88号 +86 21 61542410 Werderstr. 36 客服电话 周一至周五 9:00-12:00; 13:00-17:00 78132 Hornberg info@cn.duravit.com Germany www.duravit.cn Phone +49 78 33 70 0 www.sensowash.cn +49 78 33 70 289 info@duravit.com www.duravit.com...
Need help?
Do you have a question about the SensoWash Slim 611000 00 2 10 2300 and is the answer not in the manual?
Questions and answers