Table of Contents
Advertisement
Quick Links
Advertisement
Table of Contents

Subscribe to Our Youtube Channel
Summary of Contents for Zanussi ZOU10411XU
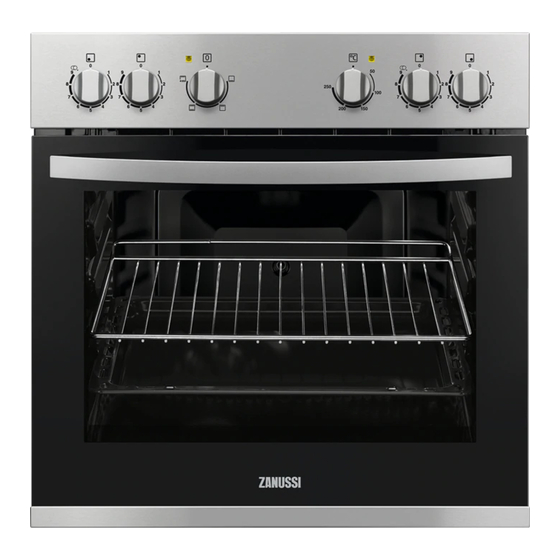
- Page 1 User Manual GETTING STARTED? EASY. ZOU10411XU EN User Manual Oven...
-
Page 2: Safety Information
SAFETY INFORMATION Before the installation and use of the appliance, carefully read the supplied instructions. The manufacturer is not responsible for any injuries or damages that are the result of incorrect installation or usage. Always keep the instructions in a safe and accessible location for future reference. -
Page 3: Safety Instructions
Always use oven gloves to remove or put in accessories or • ovenware. Before carrying out any maintenance, disconnect the appliance • from the power supply. Ensure that the appliance is switched off before replacing the • lamp to avoid the possibility of electric shock. Do not use a steam cleaner to clean the appliance. -
Page 4: Internal Lighting
removed from the holder), earth leakage trips • Discoloration of the enamel or stainless steel and contactors. has no effect on the performance of the • The electrical installation must have an isolation appliance. device which lets you disconnect the appliance •... -
Page 5: Product Description
• Disconnect the appliance from the mains • Remove the door catch to prevent children or supply. pets from becoming trapped in the appliance. • Cut off the mains electrical cable close to the appliance and dispose of it. PRODUCT DESCRIPTION GENERAL OVERVIEW Control panel Knobs for the hob... - Page 6 OVEN FUNCTIONS Oven function Application Off position The oven is off. Bottom Heat To bake cakes with crispy bottom and to preserve food. Grilling To grill flat food and to toast bread. Conventional To bake and roast food on one shelf position. Cooking (Top / Bottom Heat) Conventional...
-
Page 7: Using The Accessories
USING THE ACCESSORIES Baking tray: WARNING! Refer to Safety chapters. Push the baking tray between the guide bars of the shelf support. INSERTING THE ACCESSORIES Wire shelf: Push the shelf between the guide bars of the shelf support and make sure that the feet point down. ADDITIONAL FUNCTIONS COOLING FAN prevent this, the oven has a safety thermostat which... -
Page 8: Baking And Roasting Table
BAKING AND ROASTING TABLE Cakes Top / Bottom Heat Food Time (min) Comments Temperature (°C) Shelf position Whisked recipes 45 - 60 In a cake mould Shortbread 24 - 34 In a cake mould dough Butter-milk 60 - 80 In a 26 cm cake cheese cake mould Apple cake (Ap-... - Page 9 Bread and pizza Top / Bottom Heat Food Time (min) Comments Temperature (°C) Shelf position 60 - 70 1 - 2 pieces, White bread 500 gr one piece Rye bread 30 - 45 In a bread tin 25 - 40 6 - 8 rolls in a Bread rolls baking tray...
- Page 10 Top / Bottom Heat Food Time (min) Comments Temperature (°C) Shelf position Pork 90 - 120 On a wire shelf and a deep pan Veal 90 - 120 On a wire shelf and a deep pan English roast 44 - 50 On a wire shelf beef rare and a deep pan...
- Page 11 GRILLING Set the temperature to 250 °C. Preheat the oven for 10 minutes. Use the third position. Quantity Time (min) Food Pieces Quantity (kg) 1st side 2nd side Fillet steaks 12 - 15 12 - 14 Beef steaks 10 - 12 6 - 8 Sausages 12 - 15...
-
Page 12: Information For Test Institutes
Temperature Shelf posi- Food Accessories Time (min) (°C) tion Victoria Sand- baking dish on wire shelf 35 - 45 wich Poached fish, baking tray or dripping pan 35 - 45 0.3 kg Whole fish, 0.2 baking tray or dripping pan 35 - 45 Fish fillet, 0.3 kg pizza pan on wire shelf... -
Page 13: Care And Cleaning
Accesso- Shelf Tempera- Food Function Time (min) Comments ries position ture (°C) Apple pie Conven- Wire 80 - 120 Use 2 tins (20 cm tional shelf diameter), diago- Cooking nally shifted. Sponge Conven- Wire 35 - 45 Use a cake mould cake tional shelf... -
Page 14: Removing And Installing Door
To clean the door gasket, refer to the general information about cleaning. REMOVING AND INSTALLING DOOR The oven door has two glass panels. You can remove the oven door and the internal glass panel to clean it. Read the whole "Removing and installing door"... -
Page 15: Replacing The Lamp
7. First lift carefully and then remove the glass panel. REPLACING THE LAMP WARNING! Risk of electric shock. The lamp can be hot. 1. Turn off the oven. Wait until the oven is cooled down. 8. Clean the glass panels with water and soap. 2. -
Page 16: Installation
We recommend that you write the data here: Model (MOD.) ......... Product number (PNC) ......... Serial number (S.N.) ......... INSTALLATION BUILDING IN WARNING! Refer to Safety chapters. min. 550 BUILDING UNDER CAUTION! Only a qualified and min. 560 competent person must do the installation of the appliance. -
Page 17: Connecting The Terminal Board
(refer to the ENERGY EFFICIENCY PRODUCT FICHE AND INFORMATION ACCORDING TO EU 65-66/2014 Supplier's name Zanussi Model identification ZOU10411XU Energy Efficiency Index 94.9 Energy efficiency class Energy consumption with a standard load, conventional 0.75 kWh/cycle... -
Page 18: Environmental Concerns
General hints depending on the duration of the cooking. The residual heat inside the oven will continue to cook. Make sure that the oven door is closed properly when the oven operates. Do not open the door too Use the residual heat to warm up other dishes. often during cooking. - Page 20 WWW.ZANUSSI.COM/SHOP...


Need help?
Do you have a question about the ZOU10411XU and is the answer not in the manual?
Questions and answers