Cisco Linksys SGE2010P Admin Manual
48-port 10/100/1000 ethernet switch business series
Hide thumbs
Also See for Linksys SGE2010P:
- Datasheet (5 pages) ,
- Firmware upgrade manual (5 pages) ,
- Release note (3 pages)

Related Manuals for Cisco Linksys SGE2010P


Summary of Contents for Cisco Linksys SGE2010P
- Page 1 ADMIN GUIDE BUSINESS SERIES 48-port 10/100/1000 Ethernet Switch SGE2010/SGE2010P Model:...
-
Page 2: Table Of Contents
Introduction ......1 What’s in this User Guide? Getting to Know the SGE2010/SGE2010P ....2 SGE2010/P Front Panel SGE2010/P Back Panel Connecting Devices to the SGE2010/SGE2010P . - Page 3 Industry Canada Statement EC Declaration of Conformity (Europe) Specifications ......59 SGE2010/SGE2010P Administration Guide Table of Contents...
-
Page 4: Introduction
Switch. Or if you prefer, you can use the console interface to configure the Switch. Use the instructions in this guide to help you connect the switch, set it up, and configure it to bridge your different networks. These instructions should be all you need to get the most out of the Switch. -
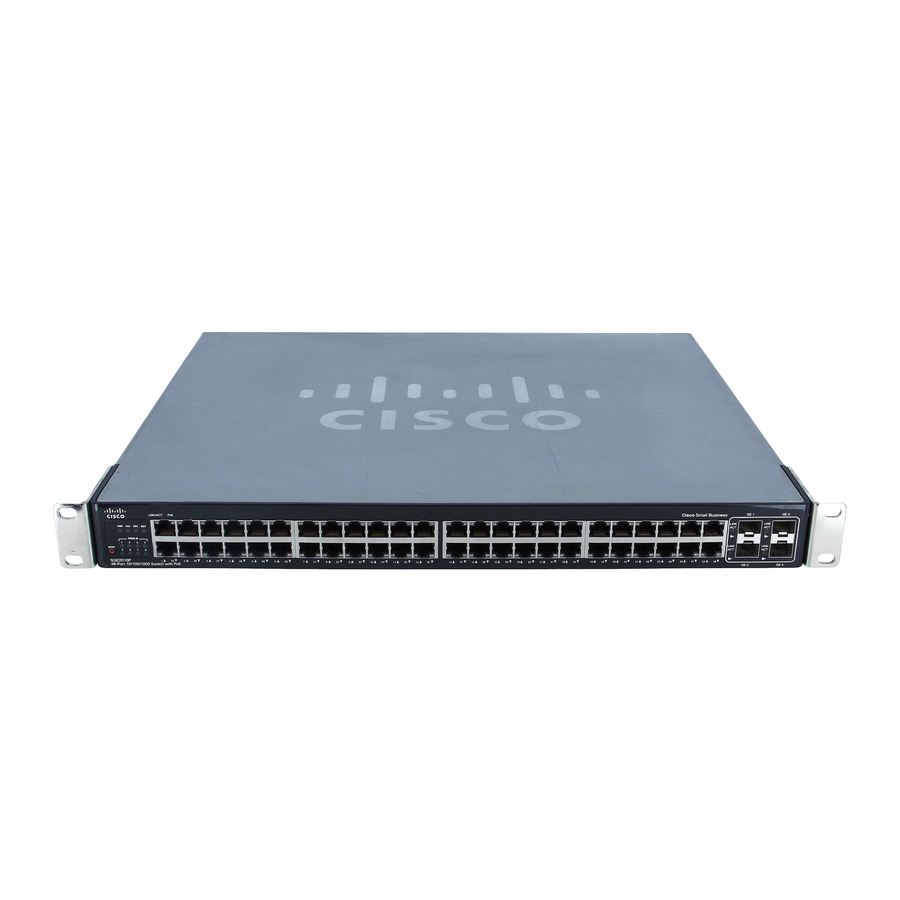
Page 5: Getting To Know The Sge2010/Sge2010P
On the SGE2010, a green Speed LED indicates that the port is linked to a 100Mbps device. On the SGE2010P, a green PoE LED indicates that PoE is active on that port. SGE2010/SGE2010P Administration Guide Getting to Know the SGE2010/SGE2010P... -
Page 6: Sge2010/P Back Panel
The switch can deliver a maximum of 15.4W to a PoE port. With regular AC power supply, there is 360W available to all PoE ports, and 280W available with redundant power supply. -
Page 7: Connecting Devices To The Sge2010/Sge2010P
Connecting Devices to the SGE2010/SGE2010P Connecting Devices to the SGE2010/ SGE2010P This chapter explains how to physically connect your network devices to the switch. • ”Sample Network Configuration, ” on page 4 • ”Maximum Cabling Distances, ” on page 4 •... -
Page 8: Before You Install The Switch
(50 mm). • Connect the supplied power cord to the switch’s power port, and plug the other end into an electrical outlet. CAUTION: Make sure you use the power cord that is supplied with the switch. Use of a different power cord could damage the switch. -
Page 9: Rack-Mount Placement
1. Remove the four front screws on one side of the Ethernet switch. Retain the screws for re- installation. 2. Place one of the supplied spacers on the side of the Ethernet switch so the four holes align to the screw holes. -
Page 10: Wall-Mount Placement
NOTE: The Ethernet switch, shown below, is mounted with the ports located on top. When the switch is mounted to a wall, the ports can be oriented in any direction. 2. Place one of the supplied spacers on the side of the Ethernet switch so the four holes align to the screw holes. - Page 11 5. If you use the console interface to configure the Ethernet switch, then connect the supplied serial cable to the console port (located on the back of the Ethernet switch), and tighten the captive retaining screws. Connect the other end to your PC’s serial port. (The PC must be running VT100 terminal emulation software, such as HyperTerminal.)
-
Page 12: Using The Console
You can use the HyperTerminal to connect to your switch. NOTE: The switch also can be configured through a telnet connection. Telnet to the switch IP address 192.168.1.254. Then, press the Enter key. The default logon ID is admin with a blank password. - Page 13 OK. 3. On the Connect To screen, use the Connect using drop-down list to select a port to communicate with the switch: COMn, or TCP/ IP. SGE2010/SGE2010P Administration Guide Using the Console Connecting to Your Switch with HyperTerminal...
- Page 14 6. Optionally, on the File menu, click Save to save these settings. The next time that you need to connect to the console, you can open this saved connection. SGE2010/SGE2010P Administration Guide Using the Console Connecting to Your Switch with HyperTerminal...
-
Page 15: Connecting To The Switch With Telnet
Connecting to the Switch with Telnet You can connect to the switch with telnet. 1. Open a command line editor and enter telnet <switch ip address>. Then, press the Enter key. 2. When the Login screen appears, select Edit and enter admin in the User Name field. Leave the Password field blank. -
Page 16: Using The Switch Main Menu
Using the Switch Main Menu The Switch Main Menu provides access to screens that you can use to configure your system, view or modify port and PoE settings, and view or modify system and stacking mode. System Configuration (see page 13) -
Page 17: System Information
Stack Configuration (see page 44) 0.Back (Select return to the previous menu.) To open this screen: From the Switch Main Menu, select 1. System Configuration Menu. System Information The System Information menu provides access to screens where you can view firmware version information and general system information. -
Page 18: General Information
Versions Use the Versions screen to display the boot, software, and hardware firmware versions of the Ethernet switch. In stacking mode, this information is displayed for the stack master. To open this screen: 1. From the Switch Main Menu, select 1. System Configuration. -
Page 19: Management Settings
SSH Configuration (see page 18) 0.Back (Select to return to the previous menu.) To open this screen: 1. From the Switch Main Menu, select 1. System Configuration Menu. 2. From the System Configuration Menu, select 2. Management Settings. SGE2010/SGE2010P Administration Guide... -
Page 20: Serial Port Configuration
Using the Console System Configuration Serial Port Configuration Use the Serial Port Configuration screen to view or change the baud rate of the Ethernet switch. To open this screen: 1. From the Switch Main Menu, select 1. System Configuration Menu. -
Page 21: Ssh Configuration
To open this screen: 1. From the Switch Main Menu, select 1. System Configuration Menu. 2. From the System Configuration Menu, select 2. Management Settings. 3. From the Management Settings Menu, choose 2. Telnet Configuration. To change the time-out setting: 1. - Page 22 SSH server port To open this screen: 1. From the Switch Main Menu, select 1. System Configuration Menu. 2. From the System Configuration Menu, select 2. Management Settings. 3. From the Management Settings Menu, choose 3. SSH Configuration.
- Page 23 Using the Console System Configuration To open this screen: 1. From the Switch Main Menu, select 1. System Configuration Menu. 2. From the System Configuration Menu, select 2. Management Settings. 3. From the Management Settings Menu, choose 3. SSH Configuration.
-
Page 24: Username & Password Settings
Use the SSH Keys Fingerprints screen to view the RSA and DSA fingerprints. To open this screen: 1. From the Switch Main Menu, select 1. System Configuration Menu. 2. From the System Configuration Menu, select 2. Management Settings. 3. From the Management Settings Menu, choose 3. SSH Configuration. -
Page 25: Security Settings
NOTE: The default user is “admin” with no password. To open this screen: 1. From the Switch Main Menu, select 1. System Configuration. 2. From the System Configuration Menu, select 3. Username & Password Settings. To change User & Password settings: 1. - Page 26 Use the SSL Certificate Generation screen to view, edit, and execute device-generated certificates. To open this screen: 1. From the Switch Main Menu, select 1. System Configuration. 2. From the System Configuration menu, select 4. Security Settings. 3. From the Security Settings Menu, select 1. SSL Generate Certificate.
- Page 27 Use the Show Certificate screen to display the internal certificate. To open this screen: 1. From the Switch Main Menu, select 1. System Configuration. 2. From the System Configuration Menu, select 4. Security Settings. 3. From the Security Settings Menu, select 2. SSL Show Certificate.
-
Page 28: Vlan Management
Default VLAN Setup (see page 25) 0.Back (Select to return to the previous menu.) To open this screen: 1. From the Switch Main Menu, select 1. System Configuration. 2. From the System Configuration Menu, select 5. Vlan Management. Default VLAN Setup You can use the Default VLAN Setup screen to view and change the VLAN ID. -
Page 29: Ip Configuration
Network Configuration (see page 35) 0.Back (Select to return to the previous menu.) To open this screen: 1. From the Switch Main Menu, select 1. System Configuration. 2. From the System Configuration Menu, select 6. IP Configuration. SGE2010/SGE2010P Administration Guide... -
Page 30: Ipv4 Address Configuration
0.Back (Select to return to the previous menu.) To open this screen: 1. From the Switch Main Menu, select 1. System Configuration. 2. From the System Configuration Menu, select 6. IP Configuration. 3. From the IP Configuration menu, select 1. IPv4 Address Configuration. -
Page 31: Ipv6 Address Configuration
NOTE: This option is available only if the interface is configured as a DHCP interface, through IPv4 Address Settings. To renew DHCP: 1. From the Switch Main Menu, select 1. System Configuration. 2. From the System Configuration Menu, select 6. IP Configuration. 3. From the IP Configuration menu, select 1. IPv4 Address Configuration. - Page 32 IPv6 Default Gateway (see page 33) To open this screen: 1. From the Switch Main Menu, select 1. System Configuration. 2. From the System Configuration Menu, select 6. IP Configuration. 3. From the IP Configuration menu, select 2. IPv6 Address Configuration.
- Page 33 You can use the IPv6 Address - Configuration screen to edit the IPv6 address settings. To open this screen: 1. From the Switch Main Menu, select 1. System Configuration. 2. From the System Configuration Menu, select 6. IP Configuration. 3. From the IP Configuration menu, select 2. IPv6 Address Configuration.
- Page 34 The IPv6 Address Table lists the IPv6 addresses that are configured. To open this screen: 1. From the Switch Main Menu, select 1. System Configuration. 2. From the System Configuration Menu, select 6. IP Configuration. 3. From the IP Configuration menu, select 2. IPv6 Address Configuration.
- Page 35 ISATAP Interface Show You can use the To open this screen: 1. From the Switch Main Menu, select 1. System Configuration. 2. From the System Configuration Menu, select 6. IP Configuration. 3. From the IP Configuration menu, select 2. IPv6 Address Configuration.
- Page 36 You can use the IPv6 Default Gateway screen to view or edit information about the IPv6 Default Gateway. To open this screen: 1. From the Switch Main Menu, select 1. System Configuration. 2. From the System Configuration Menu, select 6. IP Configuration. 3. From the IP Configuration menu, select 2. IPv6 Address Configuration.
- Page 37 HTTP server and configure the port on which the session is enabled. To open the screen: 1. From the Switch Main Menu, select 1. System Configuration. 2. From the System Configuration Menu, select 6. IP Configuration. 3. From the IP Configuration menu, select 3. HTTP Configuration.
-
Page 38: Network Configuration
To open the screen: 1. From the Switch Main Menu, select 1. System Configuration. 2. From the System Configuration Menu, select 6. IP Configuration. 3. From the IP Configuration menu, select 4. HTTPS Configuration. To change HTTPS settings: 1. Select Edit, and then make your changes. - Page 39 You can use the Ping IPv4 screen to ping an IPv4 address. To open the screen: 1. From the Switch Main Menu, select 1. System Configuration. 2. From the System Configuration Menu, select 6. IP Configuration. 3. From the IP Configuration menu, select 5. Network Configuration.
- Page 40 You can use the Ping IPv6 screen to ping an IPv6 address. To open the screen: 1. From the Switch Main Menu, select 1. System Configuration. 2. From the System Configuration Menu, select 6. IP Configuration. 3. From the IP Configuration menu, select 5. Network Configuration.
- Page 41 You can use the TraceRoute IPv4 screen to run a trace route test for an IPv4 address To open the screen: 1. From the Switch Main Menu, select 1. System Configuration. 2. From the System Configuration Menu, select 6. IP Configuration.
- Page 42 You can use the TraceRoute IPv6 screen to run a trace route test for an IPv6 address. To open the screen: 1. From the Switch Main Menu, select 1. System Configuration. 2. From the System Configuration Menu, select 6. IP Configuration.
-
Page 43: File Management
Active Image (see page 42) 0.Back (Select to return to the previous menu.) To open this screen: 1. From the Switch Main Menu, select 1. System Configuration. 2. From the System Configuration Menu, select 7. File Management. Upgrade / Backup IPv4 You can use the Upgrade/Backup IPv4 screen to download files from an IPv4 address. - Page 44 You can use the Upgrade/Backup IPv6 screen to download files from an IPv6 address. To open this screen: 1. From the Switch Main Menu, select 1. System Configuration. 2. From the System Configuration Menu, select 7. File Management. 3. From the File Management Menu, select 2. IPv6 Upgrade/Backup.
-
Page 45: Active Image
Action list. Active Image There are two software images on the Ethernet switch: Image 1 and Image 2. When you copy an image to the switch via TFTP, the inactive image is replaced. When you copy an image to the switch via the console port, the active image is replaced.You can use the Active Image screen to... -
Page 46: Restore System Default Settings
NOTE: Restoring default settings from the console or web resets all values except stacking configuration (stacking mode, stacking ports, and auto-numbering settings are not reset). To reset stacking configuration, use the hardware reset button on the front of the Ethernet switch. Reset to Factory Settings You can restore the switch to the factory default settings. -
Page 47: Stack Configuration
Stack Configuration You can use the Stack Configuration screen to specify the Stack ID for the Ethernet switch. By default, ID numbers are automatically assigned to each device. To open this screen: 1. From the Switch Main Menu, select 1. System Configuration. -
Page 48: Port Status
You can use the Port Status screen to view the port connection status. You can use the up or down arrow keys to scroll through all the ports on the switch. NOTE: To configure ports, use the Port Configuration screen. See ”Port Settings, ”... -
Page 49: Port Configuration
You can use the up or down arrow keys to scroll through all the ports on the Ethernet switch. To open this screen: 1. From the Switch Main Menu, press 3. Port Configuration. 2. From the Port Status Menu, press 2. Poe Status. SGE2010/SGE2010P Administration Guide... -
Page 50: Poe Settings
You can use the PoE Settings screen to specify the priority and PoE settings for each port. You can use the up or down arrow keys to scroll through all the ports on the Ethernet switch. To open this screen: 1. -
Page 51: System Mode (Layer 2 / Layer 3) Selection
System Mode (Layer 2 / Layer 3) Selection You can use the System Mode Selection screen to specify whether the Ethernet switch is operating in Layer 2 or Layer 3 mode. You can also configure stacking mode from this screen. -
Page 52: Help
5. When the Operation complete message appears, press the Esc key to move the cursor to the Action list. 6. Reboot the Ethernet switch. Your new settings will take effect after reboot. Help You can use the Help screen to view information about the console menus and options. -
Page 53: Logout
Using the Console Logout Logout The Logout command lets you logout from the Ethernet switch. NOTE: When you issue this command, you are immediately logged off the Ethernet switch. SGE2010/SGE2010P Administration Guide... -
Page 54: Web Utility Configuration
You can connect to the switch using a standard web browser on a computer that is connected to the same network as the switch. To access the web-based utility, enter the IP address of the switch to the address field of your web browser. The default IP address is 192.168.1.254. -
Page 55: Viewing On-Line Help
Viewing On-line Help Viewing On-line Help The Web Utility has on-line Help including field definitions for each screen. To access the on- line help for a particular screen, click the Help button on the right side of the screen. SGE2010/SGE2010P Administration Guide... -
Page 56: Contacts
• 24-Hour Technical Support: 800-326-7114 • RMA (Return Merchandise Authorization): • Website: http://www.linksys.com • FTP Site: ftp://ftp.linksys.com • Support: http://www.linksys.com/support • Sales Information: 800-546-5797 (800-LINKSYS) EU Contacts • Website: http://www.linksys.com/international • Product Registration: http://www.linksys.com/registration SGE2010/SGE2010P Administration Guide US/Canada Contacts http://www.linksys.com/warranty... -
Page 57: Customer Site Survey
If this site is not customer-owned, who is the owner and maintainer of the site? Is this a manned site? Specify the hours of operation (for example, Monday through Friday, 8am to 5pm, Saturday 9 am to 12 Noon). SGE2010/SGE2010P Administration Guide... - Page 58 Site Coordinator Specify the name and phone number of the site coordinator responsible for ensuring that the site is adequately prepared for the installation of the Cisco equipment. Name: Phone: Network/Bandwidth What is the downlink and uplink speed of...
-
Page 59: Warranty Information
This limited warranty gives you specific legal rights, and you may also have other rights which vary by jurisdiction. SGE2010/SGE2010P Administration Guide... -
Page 60: Obtaining Warranty Service
(including any fees for support services) can be found at: www.linksys.com/support. This limited warranty is governed by the laws of the jurisdiction in which the Product was purchased by you. Please direct all inquiries to: Linksys, P.O. Box 18558, Irvine, CA 92623 SGE2010/SGE2010P Administration Guide... -
Page 61: Federal Communication Commission Interference Statement
Reglement sur le materiel brouilleur du Canada. EC Declaration of Conformity (Europe) In compliance with the EMC Directive 89/336/EEC, Low Voltage Directive 73/23/EEC, and Amendment Directive 93/68/EEC, this product meets the requirements of the following standards: • EN55022 Emission • EN55024 Immunity SGE2010/SGE2010P Administration Guide... -
Page 62: Specifications
• SGE2010 48-port 10/100/1000 Ethernet Switch Model • SGE2010P 48-port 10/100/1000 Ethernet Switch with PoE • IEEE 802.3af PoE on delivered over any of the 48 10/100 ports • Power budget allows for max power of 15.4W to an Ethernet port, with... - Page 63 Secure Socket Layer (SSL) security for Web UI Secure Shell (SSH) RADIUS Port Mirroring TFTP upgrade DHCP Client BootP SNTP Xmodem upgrade Cable Diagnostics PING Syslog Telnet Client (SSH secure support) IEEE 802.1x 802.1x - RADIUS Authentication. MD5 Hash Guest VLAN Single/Multiple Host mode SGE2010/SGE2010P Administration Guide...
- Page 64 UL (UL 60950), CSA (CSA 22.2), CE mark, FCC Part 15 (CFR 47) Class A Regulatory Compliance Products with the CE Marking indicate compliance with the 89/336/EEC and 73/ 23/EEC directives, which include the safety and EMC standards listed below. SGE2010/SGE2010P Administration Guide...
- Page 65 SGE2010 — 100-240V 47-73Hz, Internal, Universal; Also equipped with external redundant power supply connector for external power supply, -48VDC SGE2010P — 100-240V 47-63Hz, Internal, Universal; Also equipped with external redundant power supply connector for external power supply, -48VDC SGE2010/SGE2010P Administration Guide...
- Page 66 080312A-LB...
Need help?
Do you have a question about the Linksys SGE2010P and is the answer not in the manual?
Questions and answers