Table of Contents
Advertisement
Available languages
Available languages
Quick Links
IMPORTANT:
KEEP THIS INSTRUCTION MANUAL FOR FUTURE REFERENCE.
WARNING:
1.
Two people are required for assembly.
2.
Some parts may contain sharp edges. We recommend that you wear protective gloves.
3.
When assembling and using this product, basic safety precautions should always be followed to reduce the risk of
personal injury or damage. Please read all instructions before assembly and usage.
4.
Do not leave the gazebo up where there is a risk of high winds, as possible damage will occur to the structure. The
manufacturer or retailer is not liable for any loss of the product or other items due to the failure to take down the gazebo
during strong wind.
5.
WARNING: Keep all flame and heat sources away from this gazebo fabric. This gazebo is made with fabric that meets
CPAI-84 specifications for flame resistance. It is not fire proof. The fabric will burn if left in continuous contact with any
flame source. The application of any foreign substance to the gazebo fabric may render the flame-resistant properties
ineffective.
PREPARATION:
Before beginning assembly of this product, make sure all parts are present. Compare parts with package contents list. If
any part is missing or damaged, do not attemp
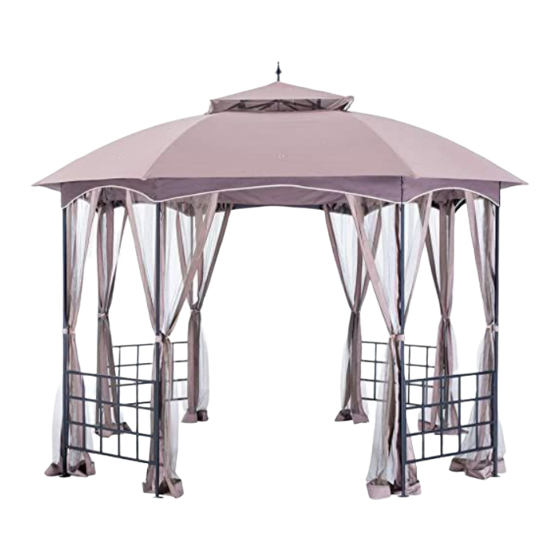
Caltalina Gazebo
Item#: L-GZ660PST
TV. #:187020
t to assemble the product.
1
Advertisement
Table of Contents

Related Manuals for Sunjoy Caltalina L-GZ660PST


Summary of Contents for Sunjoy Caltalina L-GZ660PST
- Page 1 Caltalina Gazebo Item#: L-GZ660PST TV. #:187020 IMPORTANT: KEEP THIS INSTRUCTION MANUAL FOR FUTURE REFERENCE. WARNING: Two people are required for assembly. Some parts may contain sharp edges. We recommend that you wear protective gloves. When assembling and using this product, basic safety precautions should always be followed to reduce the risk of personal injury or damage.
-
Page 2: Parts List
Parts List Part Description Image Top connector 1 Top connector 2 Finial Hook Side top connector 1 Side top connector 2 Long side pole 1 Short side pole 2 Corner connector Arch bar 1 Arch bar 2 Arch bar 3 Pole 1 Pole 2 Screen... -
Page 3: Hardware Pack
Hardware Pack 1 Part NO# Description Image M5*15 Bolt 32 PCS M5 Washer 48 PCS M5*35 Bolt 16 PCS M5 Wrench 1 PCS Fig.1: Using bolt (AA) and flat washer (BB) to assemble the beam 1(F) to the post 1 (I) or post 2 (J) Fig.2: Using bolt (CC) and flat washer (BB) to connect the screen (K) to the post 1(I) or post 2 (J). - Page 4 Hardware Pack 2 Ф6*180 Peg 16 PCS Fig.5: Insert Side top connector 2 (C4) to top connector 1 (A) and attach Hook (B) to top connector 2 (A). Fig.6: Insert Side pole 1 (D1) and Side pole 2 (E2) into Side top connector 2 (C4). Fig.7: Insert assembly Side pole 2 (E2) and Side pole 1 (D1) into Corner connector (E3).
-
Page 5: Year Limited Warranty
Hardware Pack 3 Plastic tie 60 PCS Fig.12: Hanging the mosquito netting (N) to arch bar H (F/ G) by plastic tie (FF). 1 YEAR LIMITED WARRANTY This product is warranted for 1 year against any defects in material and workmanship. If defective, the product will be repaired or replaced free of charge. - Page 6 Gazebo De Caltalina Artículo#: L-GZ660PST TV. #:187020 IMPORTANTE: GUARDE ESTE MANUAL DE INSTRUCCIONES PARA CONSULTARLO CUANDO SEA NECESARIO. AVISO: Se necesitan dos personas para el montaje. Algunas piezas pueden tener bordes afilados. Le recomendamos el uso de guantes de protección. Mientras este montando y utilizando este producto, tendrá...
-
Page 7: Lista De Piezas
Lista de Piezas Descripción Pieza Cantidad Diagrama de la pieza Conexión del techo 1 Conexión del techo 2 Finial Gancho central Conexión 1 Conexión 2 Poste barra 1 Poste barra 2 Conexión de esquina Fachada 1 Fachada 2 Fachada 3 Poste 1 Poste 2 Barrera... - Page 8 Lista de piezas de ferretería 1 Pieza Descripción Cantidad Diagrama de la pieza M5*15 Tornillo 32 PCS M5 Arandela plana 48 PCS M5*35 Tornillo 16 PCS 1 PCS Llave Paso 1 Fig.1: Utilice tornillo (AA), arandela plana (BB) para conectar el fachada 1 (F) a la poste 1 /2 (I/J).
- Page 9 Lista de piezas de ferretería 2 Ф6*180 Estaca 16 PCS Paso 2 Fig.5: Introduzca la barrera (C4) en la conexión del techo 2 (A), y fije el gancho central (B) al conexión del techo 2 (A). Fig.6: Introduzca la poste barra 1 (D1) a las poste barra 2 (E2) en la conexión 2 (C4). Fig.7: Introduzca la poste barra 2 (E2) a las poste barra 1 (D1) en la (E3)
-
Page 10: Garantía Limitada De 1 Año
Lista de piezas de ferretería 3 Anillo 60 PCS Paso 3 Fig.12: Colgar el mosquitero (N) en la barra de arco (H / F / G) con una atadura de plástico (EE). GARANTÍA LIMITADA DE 1 AÑO Este product está garantizado por 1 año contra cualquier defecto de materiales y de mano de obra. Si está defectuoso, el product será reparado o reemplazado de forma gratuita.
Need help?
Do you have a question about the Caltalina L-GZ660PST and is the answer not in the manual?
Questions and answers