Table of Contents
Advertisement
Advertisement
Table of Contents

Related Manuals for Snooper MY-SPEED DVR


Summary of Contents for Snooper MY-SPEED DVR
- Page 1 User manual...
-
Page 2: Table Of Contents
36 Troubleshooting Snooper Downloads 40 Specification MySpeed DVR 41 Specification My Speed XL 42 Specification My Speed Plus 43 Service Under Warranty 44 Accessories Limited Warranty 45 Snooper End User License Agreement EN Page 2 of 43 MY Speed combined V3.0 02/21... -
Page 3: What's Included
What’s included? 1 x Snooper satellite navigation system 1 x Micro-SD Card 1 x Windscreen Mounting Bracket 1 x In-car Charger 1 x TMC antenna 1 x USB Cable 1 x Mounting disc for dash mounting the bracket 1 x Additional Micro SD card for DVR (MySpeed DVR only) PLEASE NOTE Due to our desire to continually improve our products, the specification may change without notice. -
Page 4: Overview Myspeeddvr
Overview MY Speed DVR Front View 1. Power Button 3 Touch screen LCD Press and hold to switch on or off. 4. Earphone jack (Earphones not included) 2. LED Power indicator 5. Micro-SD Card Slot Status LED 6. TMC/Video In socket ** TMC not used on MySpeed DVR On and Charging - Red LED 7. - Page 5 ** The 1st time the My Speed DVR is used the DVR SD card will require formatting. Refer to page 73 for instruction on how to format the card OR If a MicroSD card which was not supplied is going to be used it MUST be formatted using the Snooper player BEFORE being used.
-
Page 6: Overview Myspeed Xl
Overview MySpeed XL Front View 1. Power Button 3 Touch screen LCD Press and hold to switch on or off. 4. Earphone jack (Earphones not included) 2. LED Power indicator 5. Micro-SD Card Slot Status LED 6. USB Socket On and Charging - Solid Red LED 7. -
Page 7: Registering
Registering IMPORTANT! PLEASE READ BEFORE USING. To enable to locate Fixed Speed Cameras and Accident Black spots you will have to register and download the AURA™ Camera Database. Please Note: CAMERAS ARE PRE INSTALLED ON THIS DEVICE . Register Online Go to the official website www.snooperneo.co.uk and register your unit online. -
Page 8: Start Up
NOTE: Snooper Updater software does not support Windows 95, 98, Millennium, 2000, XP. Once the software is installed, you are ready to download the speed camera database onto Snooper. Once the initial setup is completed the speed camera updater software icon is displayed on your desktop. -
Page 9: Downloading The Aura™ Camera Database
The Snooper will then save the data received. ● The software will indicate that the download is complete and will instruct you to disconnect the Snooper from your PC. Close the ● camera updater program by clicking the ‘x’ situated in the top right hand corner of the updater window. -
Page 10: Installing Snooper
Snooper and plug the larger plug into the cigarette lighter socket of your vehicle. Please Note: Only use the cigarette lighter power cable provided with Snooper. Snooper operates on 5V and using any other cigarette lighter power cable will damage your device and void the warranty. -
Page 11: Power Connection & Charging
Replacing the Fuse If Snooper stops operating, the fuse in the cigarette lighter plug may have blown . If it has blown, follow these steps and replace it with a 3 amp, 5mm x 20mm fast acting fuse. -
Page 12: Charging The Internal Battery Myspeed Dvr
Powering Snooper using the built-in battery Once Snooper is fully charged, it is ready for use. Press and hold the power switch on the top of the unit for 2 seconds to switch on the device. -
Page 13: Charging The Internal Battery Myspeed Xl
Once the device is fully charged, it is ready for use. Press and hold the power switch on the top of the unit for 2 seconds to switch it Note: the battery is designed to be a back up and Snooper recommends that the the navigation device is powered from the vehicle charger. - Page 14 Powering Snooper using the built-in battery Once Snooper is fully charged, it is ready for use. Press and hold the power switch on the top of the unit for 2 seconds to switch on the device.
-
Page 15: Alerts And Warnings
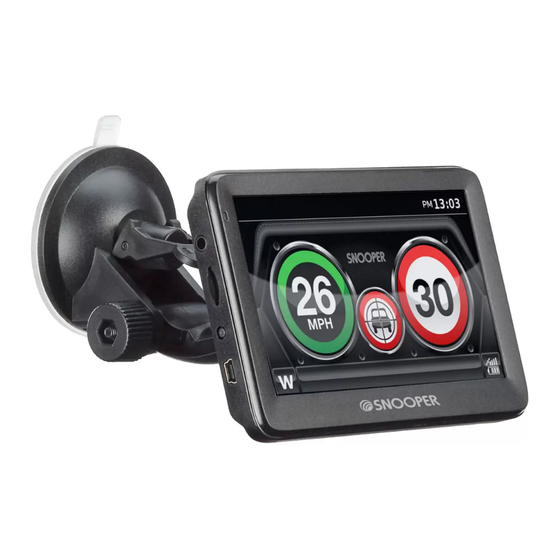
Alerts and warnings 2 Current vehicle speed 4 Road speed limit * 1 Direction of travel 3 Road name or number 5 Outer ring will turn red when the vehicle speed limit exceeds the road speed limit 6 Distance to speed camera ** 7 Type of speed camera ** 8 Current time * If the road speed limit is unknown then the speed linit will be replaced with an exclamation mark. - Page 16 1.0 Main Menu Note DVR and TPMS icons only appear on 1.1 Brightness Control MySpeed DVR Snooper brightness can be adjusted using this function within the menu. To adjust the volume: Press the ‘Brightness Control’ icon. ● ● There are 3 settings: Auto, Day and Night.
- Page 17 Press ‘OK’ at the bottom of the screen to save your setting. ● Language Snooper comes with a choice of voice prompts and alerts in several languages. Changing the language also changes the language of the menu items as well on the unit. To use this facility: Press the centre of the screen to enter the menu.
- Page 18 Use this to change the time format for the clock on the main screen - Select 12H or 24 H 1.5.2 MPH/KMH This option allows you to switch the information on Snooper between imperial and metric measurement. 1.5.3 Alert sound If set to Yes a sound will be emitted if the vehicle exceeds the over sped limit (set in section 1.4.1)
-
Page 19: Version (Hardware & Software)
5.15 Version This option allows you to view the hardware and software version numbers of your unit. To view this information: Press the centre of the screen to enter the menu. ● Press the ‘Configure’ button. ● Press the arrow twice. -
Page 20: Digital Video Recorder (Myspeed Dvr Only)
My Speed DVR ONLY 5.17 Digital Video Recorder (DVR) The SC5900 will automatically record the view in front of your vehicle and will record all audio within range of the built-in microphone using the integral high definition camera and recording software which can record continuously. - Page 21 5.18 Photography. As well as the ability to record video the SC5900 can also be used to take photographs Options in the DVR still camera settings screen. Many of the buttons are the same on both the video and photography screens. This section explains the different setting on the digital camera.
- Page 22 5.19 Snooper video player. To playback recorded video from the SC5900 download the snooper player from www.snooperneo.couk, both PC and Mac versions are available. The player will also display the GPS information which is embedded in the video file. 1 1 6 6...
- Page 23 Remove the Micro SD card from the top of the SC5900 and insert in to a card reader on the PC. Open the Snooper player and click on 'add media files ' (23) this will open a new window, allowing you to browse your computer for video files.
- Page 24 Speed, Gravity sensor and Compass Vehicle speed. Gravitational Direction of travel acceleration. Embedded data This GPS information is embedded in the video file and can not be amended. The information shown is: Date: YYYY-MM-DD, UTC Time (24hr format). GPS coordinates. Speed. Notes on SD cards : Card minimum specification ( read and write speed Class 6 or above.
-
Page 25: Bluetooth (Myspeed Dvr Only)
Bluetooth ON and paired the pairing process. Not all mobile devices are compatible with all of the features of the Snooper To switch Bluetooth On press the BT icon. Note: If this icon is shown then BT is Off press to switch BT On If this icon is shown then BT is already On Press Pair/Connect: the following screen will be displayed. - Page 26 After the pairing is successful the Snooper will revert back to the ‘Phone Menu’ screen but the icons are no longer ‘greyed out’ . Press (6) to return to the Navigation menu. Dialling (1) To dial a number press ‘Dialling’ then enter the number, using the keypad, press Green button (a) to make the call.
- Page 27 A2DP (4) The Advanced Audio Distribution Profile is a Bluetooth profile that allows for the wireless transmission of stereo audio from an A2DP source (typically a phone or computer) to an A2DP receiver. This device also supports AVRCP The Audio/Video Remote Control Profile is a Bluetooth profile that allows Bluetooth devices to control media playback on remote devices.
- Page 28 DUN screen press ‘DISCONNECT’ 11. Updating Maps New mapping is periodically released by Snooper. To check if map updates are available please visit: https://www.snooperneo.co.uk/MapSerialCheck.cfm NOTE: Your device must be registered at https://www.snooperneo.co.uk/RegisterSatNav.cfm to receive map updates and map updates may be chargeable.
- Page 29 5. Continue to click ‘Next’ until the installation completes 6. Click ‘Close’ to close the installation window. 7. A new icon will be on the desktop of your PC. Double click on the icon to open the program 8. Choose your language by clicking on the applicable flag. PLEASE SWITCH ON AND CONNECT YOUR DEVICE TO THE PC USING THE USB CABLE PROVIDED.
- Page 30 12. If you have not already done so, switch on your device and reconnect it to the PC via a USB cable. 13. The update is complete, disconnect your device from the PC and close the program. IMPORTANT: FOR SUBSEQUENT MAP UPDATES YOU DO NOT NEED TO CARRY OUT STEPS 1 to 6 AND THE MAP DOWNLOADER IS ALREADY INSTALLED ON YOUR PC.
- Page 31 4. If an update is available click ‘update’ and follow the on screen instruction. NOTE: THE MAC MUST BE CONENCTED TO EXTERNAL POWER IN ORDER TO PERFORM AN UPDATE 5. Once the download has completed the file will be extracted by the software, this may take a while. 6.
-
Page 32: Troubleshooting Snooper Downloads
Downloads SNOOPER If you are having any difficulty in performing a download onto the Snooper unit it is advisable to refer to the checklist in Section A first before contacting us. If you are still unable to perform a download after following all of this checklist then please send an email to Support@snooper.eu... - Page 33 Snooper update software. If you do have a Firewall on your computer Snooper Updater software may appear to stop and it is at this point that your Firewall software will inform you that Snooper Updater software is trying to access the internet. Please make sure that you grant/allow/permit access through the Firewall.
- Page 34 SECTION C C an’t receive a GPS signal Please avoid places such as between buildings, overpass and tunnels and check the signal reception in a suitable place with a good view of the sky. When the battery is completely discharged or turning off and then on the battery switch, the initial acquisition time may be delayed.
- Page 35 MSTAR MSB 2531 800 MHz CPU of DVR AC5201A, 160MHz, 16MB memory, interpolation 1080P *Note: Only the mapping SD WinCE 6.0 card supplied will work with Snooper once synchronisation Memory 4GB Flash of the card and the unit has been completed. Replacement...
-
Page 36: Specification My Speed Xl
SPECIFICATION for MYSPEED XL Processor (CPU) MSTAR MSB 2531 800 MHZ *Note: Only the SD card supplied will work with WinCE 6.0 Snooper once synchronisation of the card and the unit has Memory 4GB Flash been completed. Replacement cards are available from In... - Page 37 Battery We recommend that you fully charge the battery before you use Snooper for the first time. A new battery or one that has not been used for a long time could have a reduced capacity the first few times it is used.
-
Page 38: Service Under Warranty
Snooper. 3. Should you have any difficulties with the performance of this product during the warranty period, please call Snooper or visit our web site http:// www.snooperneo.co.uk. You may also contact Snooper Customer Services at the address listed below for any service help you may need with Snooper products. -
Page 39: Snooper End User License Agreement
Snooper and/or its third-party providers. The Software and Content are provided under the following license and are subject to the following terms and conditions which are agreed to by End User (“you” or “your”), on the one hand, and Snooper and its licensors (including their licensors and suppliers) and affiliated companies on the other hand. - Page 40 Map Data, in which case you will need to either (a) select reduced Map Data coverage for your updates, or (b) purchase separately a microSD card or a SD card (if and as applicable to your Snooper product) and load all of the Map Data coverage for your updates to the card and insert the card into the microSD card or SD card slot contained in your Snooper product.
- Page 41 This License shall continue for as long as you use the Product. However, this License will terminate automatically without notice from SNOOPER if you fail to comply with any of its terms or conditions. You must agree, upon termination, to destroy all copies of the Content in existence.
- Page 42 Neither Snooper nor its Licensors, including HERE, condone speeding or any other failure to comply with your local traffic laws. It is your responsibility to drive with the posted speed limit at all times and to drive in a careful manner. Neither Snooper nor its Licensors, including HERE, accepts ANY liability whatsoever for you receiving any speeding fines or points on your license through using this device.
- Page 43 @snooperuk Snooper UK Snooper uk www.snooper.co.uk InPhase International Ltd, DB House, Rani Drive, Nottingham NG5 1RF, United Kingdom customerservices@snooper.eu. EN Page 43 of 43 MY Speed combined V3.0 02/21...
Need help?
Do you have a question about the MY-SPEED DVR and is the answer not in the manual?
Questions and answers