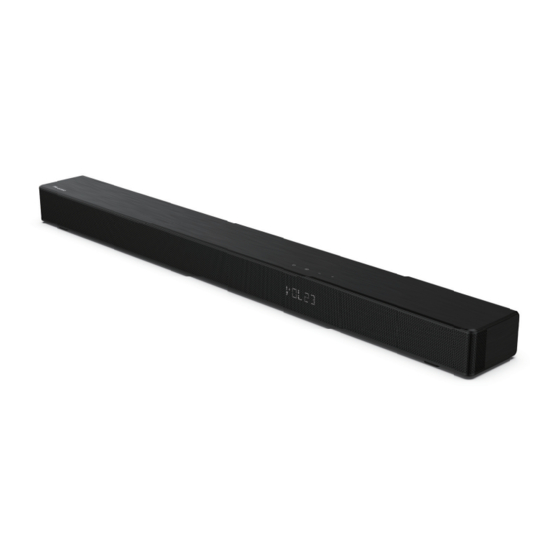
Summary of Contents for Hisense HS216F
- Page 1 2.1ch Theater Sound System SOUNDiVA P Model: HS216F USER MANUAL Before using the sound bar, please read this manual thoroughly and retain it for future reference.
-
Page 2: Table Of Contents
Wall Mounting (if using option-B) Pair Bluetooth-enabled Devices Listen to Music from Bluetooth Device Connections Dolby Atmos® USB Operation Use the HDMI Socket Use the OPTICAL Socket Troubleshooting Use the COAXIAL Socket Use the IR Socket Specifications Connect Power Use the Hisense EzPlay Function... -
Page 3: Important Safety Instructions
Important Safety Instructions third prong is provided for your safety. If the C AUT I ON provided plug does not fit into your outlet, RISK OF ELECTRIC SHOCK consult an electrician for replacement of the DO NOT OPEN obsolete outlet. AV IS 10 Protect the power cord from being walked on or pinched particularly at plugs, convenience... -
Page 4: Warning
Bluetooth • Do not place this unit on the amplifier or SIG,Inc. and any use of such marks by Hisense is receiver. under license. Other trademarks and trade names • If any solid object or liquid falls into the are those of their respective owners. - Page 5 Supported input audio formats The audio formats supported by this system are as follows. Format Function HDMI IN LPCM 2ch √ √ √ √ LPCM 5.1ch √ LPCM 7.1ch √ Dolby Digital √ √ √ √ Dolby TrueHD √ √ Dolby Digital Plus √...
-
Page 6: What's In The Box
What’s in the Box Remote Control / Main Unit User Manual AAA Batteries x 2 AC power Cord HDMI Cable Wall Bracket IR pass-through Cable • Power cord quantity and plug type vary by regions. • Images, illustrations and drawings shown on this User Manual are for reference only, actual product may vary in appearance. -
Page 7: Identifying The Parts
Identifying the Parts Main Unit O P T 1 Remote Control Sensor Receive signal from the remote control. 2 Display Window Show the current status. 3 Standby Indicator 4 Screws Remove the screws then install the wall mounting screws into the back of the unit. (ON/OFF) button Switch the unit between ON and Standby mode. -
Page 8: Remote Control
Remote Control Switch the unit between ON and STANDBY mode. (SOURCE) Select the play function. 3 SURR Adjust the surround ON/OFF. (BT) Select the Bluetooth mode. Press the (BT) button to disconnect the current Bluetooth connection or re-enter the pairing state. 5 EQ Select a preset sound effect. -
Page 9: Placement And Mounting
Placement and Mounting Placement A If your TV is placed on a table, you can place the unit on the table directly in front of the TV stand, centered with the TV screen. B If your TV is attached to a wall, you can mount the unit on the wall directly below the TV screen. Wall Mounting (if using option-B) Note: Installation must be carried out by qualified... -
Page 10: Connections
Connections Connections Method 1: eARC (Audio Return Channel) Dolby Atmos® The ARC (Audio Return Channel) function allows Dolby Atmos gives you amazing experience you you to send audio from your ARC- compliant TV to have never before by overhead sound, and all the your soundbar through a single HDMI connection. -
Page 11: Use The Optical Socket
Use the OPTICAL Socket Use the IR Socket Remove the protective cap of the OPTICAL If the Soundbar blocks the IR receiver of the socket, then connect an OPTICAL cable to the TV when placing directly in front of it, you TV’s OPTICAL OUT socket and the OPTICAL can connect the Soundbar and TV with the socket on the unit. -
Page 12: Use The Hisense Ezplay Function
Use the Hisense EzPlay Function... -
Page 13: Basic Operation
Adjust the Bass/Treble Level Basic Operation Press the TREBLE +/- buttons to increase or • decrease the treble. Standby/ON (treble+5 / treble–5) When you first connect the main unit to the mains Press the BASS +/- buttons to increase or •... -
Page 14: Optical / Coaxial /Hdmi Earc Operation
When selecting a different audio format, the and you will hear "Pairing" from the unit. unit will display the following as follows: 3 Select “Hisense SOUNDIVA Pro” in the pairing list. After successful pairing, you will hear Audio (abbreviation) Display "Paired"... -
Page 15: Listen To Music From Bluetooth Device
Tips: To skip to the previous/next file, press the buttons on the remote control. • Enter "0000" for the password if necessary. Tips: • If no other Bluetooth device pairs with this player within two minutes, the player will • The unit can support USB devices with up to recover its previous connection. - Page 16 I can’t find the Bluetooth name of this unit on my Bluetooth device for Bluetooth pairing • Ensure the Bluetooth function is activated on your Bluetooth device. • Ensure you have paired the unit with your Bluetooth device. This is a 15 mins power off function, one of the ERPII standard require- ment for saving power •...
-
Page 17: Specifications
Specifications Specifications Model Name HS216F Soundbar Model Name HS216F Power Supply AC100-240V~ 50/60Hz Soundbar Power Consumption 30 W Standby Power < 0.5 W Power Supply AC100-240V~ 50/60Hz USB port for playback 500mA Power Consumption 30 W USB Compatibility Hi-Speed USB (2.0) / FAT32 Standby Power <... - Page 18 WARNING: This product can expose you to chemicals including Lead, which is known to the State of California to cause cancer. For more information go to: www.P65Warnings.ca.gov. Réglement de la FCC (pour les clients américains) REMARQUE : FCC INFORMATION (for US customers) •...
- Page 19 HS216F...


Need help?
Do you have a question about the HS216F and is the answer not in the manual?
Questions and answers