
Subscribe to Our Youtube Channel
Related Manuals for Chauvet Tiger DMX 60


Summary of Contents for Chauvet Tiger DMX 60
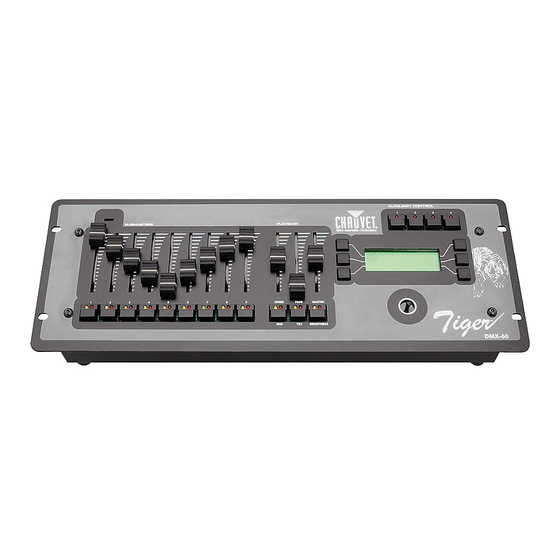
- Page 1 Tiger DMX 60 Tiger DMX 60 Tiger DMX 60 Tiger DMX 60 User Manual Version 1.1 CHAUVET 3000 North 29 Hollywood, FL 33020 USA Tel: 954-929-1115 Fax: 954-929-5560 www.CHAUVETlighting.com...
-
Page 2: Warranty Information
If this product is not covered under the terms of this warranty, CHAUVET will advise you of the costs to carry out any repairs necessary and the unit will be shipped to you on receipt of payment for the work including the return freight charges. -
Page 3: Table Of Contents
1 Index Index ...3 Introduction ...5 Operational Overview ...5 Terminology...6 Front Panel Controls and Displays ...6 2.3.1 LCD Display and Soft Buttons...6 2.3.2 Faders and Flash Buttons ...7 2.3.3 Joystick...7 2.3.4 Auxiliary Buttons...7 Quick Start ...8 Set-up ...8 Program a Memory...10 Programming a Sequence...12 Setting up the Console ...14 Assigning and Patching a Fixture. - Page 4 Power Connection ...36 Remote Go/Step Input...36 DMX Out Connection...37 Audio Input ...37 Memory Module...37 PC Software ...38 Menu Navigation Flow Chart...39...
-
Page 5: Introduction
2 Introduction 2.1 Operational Overview The Tiger is a lighting controller that allows for the control of intelligent and generic lighting in a seamless manner. It can be used in a variety of applications from clubs to theatre to television. The Tiger can control up to 18 intelligent fixtures using a maximum of 18HTP and 99LTP channels. -
Page 6: Terminology
There are two ways to approach the manual. If you are impatient to get started simply go to section 3 Quick Start and leap in. If you want a more detailed explanation then you will need to work your way through each section of the manual. 2.2 Terminology Memory- Tells one or more fixtures to change settings for intensity, beam,... -
Page 7: Faders And Flash Buttons
2.3.2 Faders and Flash Buttons The faders and flash buttons are used to perform different functions depending on the mode the console is in. In playback mode the first 9 faders on each page are used to trigger memories while the flash buttons bump the memories to full. The three faders on the extreme right are used to control the memory stack. -
Page 8: Quick Start
Quick Start This section will assume that you are turning the console on for the first time and you have not assigned or patched any fixtures. 3.1 Set-up When you turn the console on you will see the following screen on the LCD: Page01 Step--- Page+ Page-... - Page 9 The softkeys on either side of the < Unassigned > command will scroll you through the fixtures stored on the console. For the purpose of this manual we will assume we have four Chauvet 250XR fittings. Use the softkeys to scroll through until you have the name of the fixture on the screen.
-
Page 10: Program A Memory
3.2 Program a Memory You should be on the following screen: Page01 Step--- Page+ Page- Press the More.. key to move to the following menu screen: Page01 Step--- Flash On Sound Off Dir Fwd Select the ProgMem key to take you to: Page01 Step--- Select Memory Back Page +... - Page 11 If a parameter has been changed the yellow LED flashes. This indicates that that parameter will be included in the memory. IMPORTANT INFORMATION The Tiger console records only what is selected/tagged. The Yellow LED will flash if that attribute is going to be included in the memory. If you wish to include an attribute in the memory and the yellow LED is not flashing then hold the button down for 2 second.
-
Page 12: Programming A Sequence
3.3 Programming a Sequence Once you have programmed memories you can store them in sequences and replay these either manually, to a beat, triggered by sound or by setting the speed. To store a sequence go to the following menu: Page01 Step--- Flash On Sound Off... - Page 13 Once you have set the number of steps you require use the Back key twice to take you to the save menu page. Program Sequence Cancel Save As Save From this page you can save the chase or if you do not want to keep it then you can use cancel. You now need to use the Back key to go to the default menu page.
-
Page 14: Setting Up The Console
Firstly the fixture type must be selected and then it must be given a DMX address. The Tiger is supplied with 18 Chauvet fixtures stored on it. There is however a comprehensive library of fixtures available for downloading. There is also a fixture creation software package available for free. - Page 15 Page01 Step--- View/Pvw Assign/Patch Load/Save Select the Assign/Patch soft-key. This will bring up the following menu: Assign/Patch Back Fixtures Generics Select the Fixtures softkey. You will now see the following screen: Fixture 01 ← Unassigned DMX: --- Select the Edit Key. The screen now shows: Assign Fixture 01 ←...
-
Page 16: Editing/Creating A Fixture
Repeat these steps until you have assigned all the fixtures you wish to use. Once a fixture has been assigned the yellow LED on the relevant flash button will be illuminated. If the fixture you wish to use is not stored on the console you can either download it from a fixture library with the optional cable, use a memory module with fixtures stored on it, or you can create a fixture on the console. - Page 17 Dimmer Channel 1 Pan Channel 2 Tilt Channel 3 Colour Wheel Channel 4 Gobo Wheel Channel 5 Speed Channel 6 The manufacturer has launched a new model of the fixture adding a second colour wheel. The colour wheel is on channel 7. You would have selected the attribute as a colour, then go to the DMX screen select 007 and press OK.
-
Page 18: Loading A Fixture
When setting the Home value you can use the Up or Down keys or the flash button to set the home value. To set the colour, beam or any other attributes select Insert. Edit Profile: Ch01 Name: Other DMX: 007 Home: 000 Using the soft-key Name will toggle through the options available. -
Page 19: Autopatch
Scroll to the channel number you wish to patch either using the Up or Down keys to change pages or the <> keys to move in single digits. It is also possible to use the flash buttons as a numeric entry tool. Once you have selected the relevant channel then select Edit. You can now set the address for the channel using the Up or Down keys or by using the flash buttons for numeric entry. -
Page 20: Programming
5 Programming The Tiger console can store 108 base memories that can be used to build up a range of sequences and chases. When recording a memory you can select which attributes and which fixtures and channels you want recorded in each memory. It is therefore possible to build up memories that have only certain fixtures in them or have only certain colours or gobo’s in them. - Page 21 Once you have pressed the relevant flash button the menu changes: Edit Fixtures Back Save As Save The flash buttons and faders have now also changed function. They now allow you to select fixtures or control the intensity of generic channels and fixtures. The flash buttons which have yellow LED’s lit are the ones to which fixtures have been assigned.
-
Page 22: Replaying A Memory
IMPORTANT INFORMATION The Tiger console records only what is selected/tagged. The Yellow LED will flash if that attribute is going to be included in the memory. If you wish to include an attribute in the memory and the yellow LED is not flashing then hold the button down for 2 second. -
Page 23: Effects
5.3 Effects The effects tools provided on the Tiger are aimed at aiding with programming speed. There are two types of effect, Movement and Fan. The Movement function allows you to quickly program a circle or a square. You can change the size of the X and Y parameters and you can also set the speed. -
Page 24: Fans
a colour or a gobo to a fixture. Use the More.. key to go back to the fixture selection page. From here you can access the Channels function. 5.3.2 Fans Fans are a quick way to set an attribute on different lights to a different value. Having gone into program mode and selected the lights you wish to work with select Channels. - Page 25 Program Sequence 01 Back (000 Steps) Down It is possible to store up to 12 Sequences each of 250 steps. To select a different sequence number use the Up or Down soft keys to select the sequence number you want. If the number next to steps has a value other than 000 then it has already had memories stored in it.
- Page 26 Page01 Step--- Page+ Page- To playback your sequence select the sequence number using the Page+ or Page- keys. Having selected the sequence raise the Master fader. You can then set the speed of the chase and the fade time between steps by using the Speed and Fade faders. If you wish to trigger the chase manually leave the Speed fader set to zero and use the Flash button under Master to step through the sequence.
- Page 27 To stop a sequence reset the Speed fader to zero. To edit an existing Sequence select the sequence after having gone into program sequence mode. This will bring up a new menu: Program Sequence -- Cancel Save As Save Cancel will take you back a to the previous menu. Save As will allow you to save the sequence with a different number.
-
Page 28: Playback
6 Playback 6.1 Memories To playback a memory you need to be on the following menu or Run 2 or Run 3 menu screens: Page-- Step--- Page+ Page- The Page+ or Page- soft-keys will allow you to navigate between the 12 pages of memories. Each page has nine memories and one sequence stored on it. -
Page 29: Sequences
6.3 Sequences There are several options as to how a sequence can be played back. Firstly use the Page+ or Page- soft-keys to select which sequence you want to output. To replay a sequence the Master Fader must always be above zero. 6.3.1 Manual Sequence If you wish to play back a sequence in manual mode then you can trigger each step by pressing the Master Flash Button. -
Page 30: View And Preview
sequence by having programmed a page of memories that only contain the colour attributes of the fixtures. Triggering the page chase will mean the fixtures change colour each time they move. For a Page chase to work you need to have the Master Fader set above zero. From the main playback menu select the PageChase soft-key. -
Page 31: Blackout
the steps of the selected sequence. The + or – soft-keys will change the selected sequence. The sequence selected for preview is shown on the top line of the LCD display. 6.6 Blackout There is a blackout soft-key to allow for snap black outs. From the main playback menu: Page-- Step--- Page+... -
Page 32: Memory Module
7 Memory Module Each Tiger console is shipped with a memory module. The memory module allows you to back up a show or store a show while the desk is used for a different event. It is also possible to store different fixture types on the module. -
Page 33: Super User Functions
8 Super User Functions The Tiger Console has a set up menu that is not accessible during usual operation. The functions available in this mode are generally only used when setting the console up for personal preferences. There are three super user menus, the More.. soft-key on each page will allow you to move to the next menu. -
Page 34: Lock Mode
1. Change Code: this will allow you to input a unique code for the console. Please make sure you remember this code or the desk will be locked permanently. You will need to contact Chauvet Lighting for the master unlock code. Once you have input the code you will return to the main Super User menu. -
Page 35: Pan And Tilt Default Settings
8.5 Pan and Tilt Default Settings You can toggle between two settings for Pan and Tilt. The soft-key for this function is on the second page of super user options. In Snap mode the pan and tilt changes will happen instantaneously. -
Page 36: Connections
9 Connections There are five connections on the rear panel of the Tiger Console. 9.1 Power Connection A four pin ring locking DIN connector is provided for the connection of a remote power supply. DC Connections: Pin 1 – + 10 Volts @ 400mA (650mA) Pin 2 –... -
Page 37: Dmx Out Connection
9.3 DMX Out Connection A single 5 pin Female out shall be provided to connect the Tiger console to DMX devices. Wiring shall be in compliance with DMX 512 1990 standards. The connection is not isolated but has voltage protection. Data shall be transmitted on all 512 channels. Pin 1 0V Signal Ground Pin 2 DMX Drive Compliant Pin 3 DMX Drive True... -
Page 38: Pc Software
USB port. The fixture library and the software needed to transfer fixtures to the Tiger is available for downloading from www.chauvetlighting.com. Install the software using the onscreen help. The cable can be purchased from any Chauvet dealer. Once the software is loaded on your PC select the fixture library file you require. Open this and select the manufacture of the fixture required. -
Page 39: Menu Navigation Flow Chart
11 Menu Navigation Flow Chart This flowchart details the basic menu navigation structure of the Tiger Desk. (Edit Live, Flash Mode, Sequence Drive/Direction, Memory Page, Blackout) Program Program Memories Sequences Generics Create seq. Fixture Copy seq. select Delete seq. Fixture edit Insert step Fan edit Delete step...
Need help?
Do you have a question about the Tiger DMX 60 and is the answer not in the manual?
Questions and answers