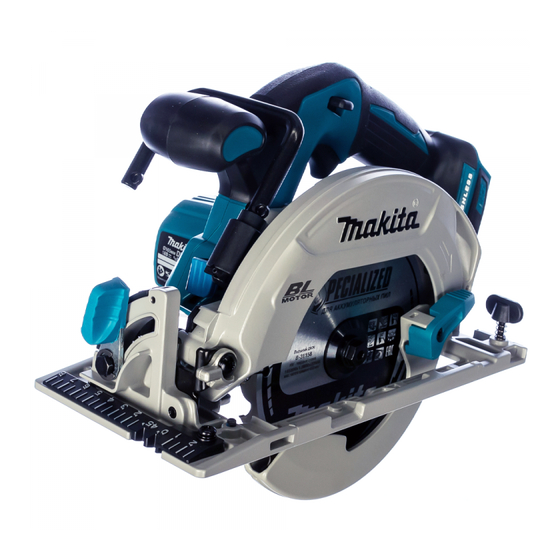
Makita DHS680 Instruction Manual
Hide thumbs
Also See for DHS680:
- User manual ,
- Instruction manual (100 pages) ,
- Technical information (19 pages)
Table of Contents
Advertisement
Quick Links
Advertisement
Table of Contents

Summary of Contents for Makita DHS680
- Page 1 INSTRUCTION MANUAL Cordless Circular Saw DHS680 Read before use.
-
Page 2: Specifications
With Uncertainty (K) : 1.5 m/s appropriate Makita genuine saw blades, other materials NOTE: The declared vibration total value(s) has been can also be sawed. measured in accordance with a standard test method Noise and may be used for comparing one tool with another. -
Page 3: Ec Declaration Of Conformity
Power tools can produce electromagnetic fields WARNING: The vibration emission during actual (EMF) that are not harmful to the user. However, use of the power tool can differ from the declared val- users of pacemakers and other similar medical devices ue(s) depending on the ways in which the tool is used should contact the maker of their device and/or doctor especially what kind of workpiece is processed. - Page 4 Power tool use and care Do not use a battery pack or tool that is dam- aged or modified. Damaged or modified batteries Do not force the power tool. Use the correct may exhibit unpredictable behaviour resulting in power tool for your application. The correct fire, explosion or risk of injury.
- Page 5 Always use blades with correct size and shape (diamond versus round) of arbour holes. Blades that do not match the mounting hardware of the saw will run off-centre, causing loss of control. Never use damaged or incorrect blade wash- ers or bolt. The blade washers and bolt were specially designed for your saw, for optimum performance and safety of operation.
- Page 6 The lower guard may be retracted manually only for special cuts such as “plunge cuts” and “compound cuts”. Raise the lower guard by the retracting handle and as soon as the blade enters the material, the lower guard must be released. For all other sawing, the lower guard should operate automatically.
-
Page 7: Functional Description
It will it into place. Insert it all the way until it locks in place also void the Makita warranty for the Makita tool and with a little click. If you can see the red indicator on the charger. - Page 8 Indicator lamps Remaining capacity without pressing the lock-off lever. Return tool to a MAKITA service center for proper repairs BEFORE further usage. Lighted Blinking • NEVER tape down or defeat purpose and func- 75% to 100% tion of lock-off lever.
-
Page 9: Overload Protection
Overload protection When you turn the tool on, the battery indicator shows the remaining battery capacity. When the tool is operated in a manner that causes it to The remaining battery capacity is shown as the follow- draw an abnormally high current, the tool automatically ing table. -
Page 10: Bevel Cutting
Bevel cutting Lighting the lamp CAUTION: • Do not look in the lamp or see the source of lamp directly. ► 1. Front lever Loosen the front lever. Set for the desired angle (0° - 50°) by tilting accordingly, then tighten the front lever securely. - Page 11 Be sure the blade is installed with teeth pointing up at the front of the tool. • Use only the Makita wrench to install or remove the blade. ► 1. Mounting shaft 2. Inner flange 3. Saw blade 4. Outer flange 5. Hex bolt...
-
Page 12: Operation
► 1. Vacuum cleaner 2. Hose When you wish to perform clean cutting operation, connect a Makita vacuum cleaner to your tool. Install the dust nozzle on the tool using the screw. Then connect a hose of the vacuum cleaner to the dust noz- zle as shown in the figure. -
Page 13: Maintenance
MAINTENANCE CAUTION: • Always be sure that the tool is switched off and the battery cartridge is removed before carrying out any work on the tool. • Clean out the upper and lower guards to ensure there is no accumulated sawdust which may impede the operation of the lower guarding system. -
Page 14: Optional Accessories
CAUTION: • These accessories or attachments are recom- mended for use with your Makita tool specified in this manual. The use of any other accessories or attachments might present a risk of injury to persons. Only use accessory or attachment for its stated purpose. - Page 16 Makita Europe N.V. Jan-Baptist Vinkstraat 2, 3070 Kortenberg, Belgium Makita Corporation 3-11-8, Sumiyoshi-cho, Anjo, Aichi 446-8502 Japan 885374E224 www.makita.com 20190228...


Need help?
Do you have a question about the DHS680 and is the answer not in the manual?
Questions and answers