
Subscribe to Our Youtube Channel
Related Manuals for ExSilent Qleaf Pro


Summary of Contents for ExSilent Qleaf Pro
- Page 1 User manual Gebruikershandleiding Gebrauchsanweisung Mode d’emploi Manual de usuario...
- Page 2 English Qleaf Pro user manual Nederlands Qleaf Pro gebruikershandleiding Deutsch Qleaf Pro Gebrauchsanweisung Français Mode d’emploi du Qleaf Pro Español Qleaf Pro manual de usuario...
- Page 3 Qleaf Pro user manual English...
- Page 4 Qleaf Pro Congratulations on your purchase of the Qleaf Pro. With the purchase of a Qleaf Pro, you are guaranteed a product composed of high-quality components. By the application of several important innovations in the field of hearing aids, the Qleaf Pro ensures stylish, pleasant hearing adapted for modern day use.
-
Page 5: Table Of Contents
The data of your Qleaf Pro The daily use of Qleaf Pro Place the battery Warranty Eject the battery Insert Qleaf Pro in the soft tip Manufacturer Remove Qleaf Pro from the soft tip Place Qleaf Pro in the ear Remove Qleaf Pro from the ear Fitting procedure and configuration... -
Page 6: What Is Qleaf Pro
What is Qleaf Pro? The Qleaf Pro is a modular (same for each ear) One of the most common repair reasons is damag- CIC* device with a standard fitting, for which a ing or clogging of the speaker due to ear wax. The soft tip is used. - Page 7 Qleaf with natural ‘directivity’ Pro serves as a damper). When the Qleaf Pro • Minimum wind noise, because the micro- has been set up with more than one program...
-
Page 8: Qleaf Pro's Anatomy
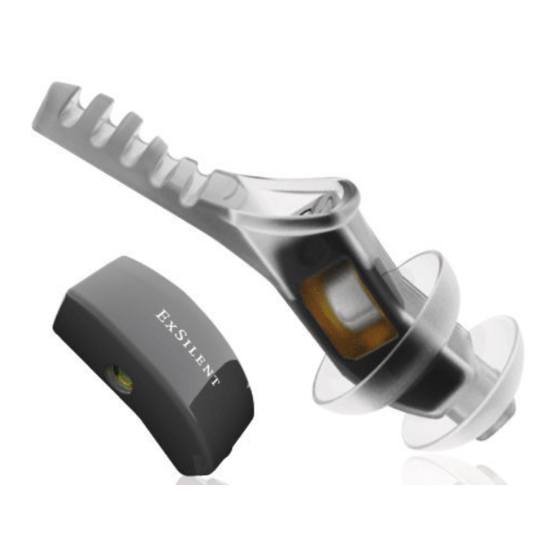
Qleaf Pro’s anatomy A Qleaf Pro - module (casing) Battery compartment Colored side indicator Microphone opening Opening for battery ejection Speaker opening Soft tip Sound opening Domes Pull cord Battery (type 10) Plus pole (+) 10 Minus pole (–) 11 Battery ejection tool 8 English... -
Page 9: Qleaf Pro Module (A)
10 cell battery - that provides the power the Qleaf Pro. supply for Qleaf Pro. The device is switched off upon the removal of the battery. The battery Opening for battery ejection (4) compartment is used for two purposes: in... -
Page 10: Soft Tip (B)
Qleaf Pro’s anatomy Soft tip (B) Pull cord (8) To take the Qleaf Pro out of the ear, the pull The soft tip of the Qleaf Pro is made of a cord is used. After insertion of the Qleaf Pro biocompatible plastic and designed as a... -
Page 11: The Daily Use Of Qleaf Pro
The daily use of Qleaf Pro Eject the battery Before you start any of the actions mentioned in chapters ‘The daily use of Qleaf Pro’ and ‘Maintenance and use’ , make sure you are using a Hold the module and eject the battery with the clean and horizontal working surface. -
Page 12: Insert Qleaf Pro In The Soft Tip
The daily use of Qleaf Pro Insert Qleaf Pro in Make sure your hands are clean while inserting the Qleaf Pro. Make-up, crème, body oil, gel, the soft tip hairspray and likewise products can dirty up the module and can, for example, contribute to the •... - Page 13 • Next, simultaneously push the Qleaf Pro • Please make sure that the module is inserted device with the thumb in the soft tip and pull all the way into the soft tip. the pull cord. English...
-
Page 14: Remove Qleaf Pro From The Soft Tip
• Place the Qleaf Pro device (the part without soft tip around it) between your fi ngers and pull it out of the soft tip. 14 English * The front of the Qleaf Pro is the part that goes in the ear fi rst. -
Page 15: Place Qleaf Pro In The Ear
Place Qleaf Pro in the ear • Put the end of the soft tip with the dome(s) loosely in the ear. The pull cord is situated behind the tragus, directing towards the nose. Inserting a new soft tip can be a bit... - Page 16 The daily use of Qleaf Pro • Insert the device into the ear by pressing on the fl at side of the device. Now gently push the device deeper into the ear. If the mouth is opened wide, insertion will be easier. Ideally, the fl at side of the module (where the microphone is situated) will be fl ush to the entry of the ear canal after insertion.
-
Page 17: Remove Qleaf Pro From The Ear
For this reason, consult The Qleaf Pro is by default tuned with a single your dispenser for any complaints about the tap function. This mode requires the user to fitting or configuration. - Page 18 The daily use of Qleaf Pro will prevent the programs from switching Please note that while tapping the hand unexpectedly, by - for example - a slamming touches the softtip in an uncomfortable way, door. you could shorten the softtip to match your ear size (see page 10). Should the user not want to use the diff erent programs, the AirTAP function can also be turned off .
- Page 19 English...
-
Page 20: Maintenance And Use
Maintenance and use Although the Qleaf Pro module can be used for for clogs and damages. This guarantees both right and left ears, the settings are usually you an optimal performance and a long different for the right and left ear. This means operational life. -
Page 21: Storage
• In case of severe dirt, you may clean it either battery from the device and store it in a secure with special (moist) cleaning tissues, with place outside its box. In this way, you increase soluble cleaning tablets for hearing aid the operational life of the battery and also products or you may alternatively have it allow for the evaporation of moisture possibly... -
Page 22: Warnings
Warnings The soft tip is an essential part of the When using Qleaf Pro for the first time, begin Qleaf Pro. Without the soft tip, the with a continuous wearing period of 4 hours Qleaf Pro will not be able to function... - Page 23 • cleaned wet. • exposed to extreme high temperatures, such Keep the Qleaf Pro away from small children as when using a hair dryer. and pets. In case of swallowing one of the • worn in mines or other environments where components, there is a choking hazard to small explosion risk is high.
- Page 24 Warnings Warning to hearing aid (v) Unilateral hearing loss of sudden or recent onset within the previous 90 days. dispensers (vi) Audiometric air-bone gap equal to or greater than 15 decibels at 500 hertz (Hz), 1,000 A hearing aid dispenser should advise a Hz, and 2,000 Hz.
- Page 25 Important notice for Following the medical evaluation, the physician will give you a written statement that states prospective hearing aid that your hearing loss has been medically users evaluated and that you may be considered a candidate for a hearing aid. The physician will refer you to an audiologist or a hearing aid Good health practice requires that a person dispenser, as appropriate, for a hearing aid...
- Page 26 Warnings Children with hearing loss dispensers now offer programs that permit you to wear a hearing aid for a period of time for a nominal fee after which you may decide if you In addition to seeing a physician for a medical want to purchase the hearing aid.
- Page 27 English...
-
Page 28: Information About Reparation Services
Information about reparation services The Qleaf Pro has been developed by 2. The guarantee period is twenty four (24) ExSilent BV, Overschiestraat 63, Amsterdam. months from the date on which the first Client For your complaints or reparation requests, purchased the Product. In the event of a... - Page 29 6. This limited guarantee is not applicable the defect has been caused directly by defects to damage caused by normal wear and in materials, design or finish; (ii) ExSilent or use. Neither will this limited guarantee be its approved service provider received no...
- Page 30 Information about reparation services that the battery was subjected to a short-circuit otherwise. ExSilent is not liable for any indirect, or that the connecting pieces of the battery secondary or consequential damage, costs housing or cells were broken or show evidence or expenses. Neither is ExSilent liable for any...
-
Page 31: Disclaimer
ExSilent reserves the right to change and make improvements in its products that are descri- bed in this document without prior notification. In no case, ExSilent can be held liable for any loss of data, neither for income, nor for any special incidental, nor for indirect damage. -
Page 32: The Data Of Your Qleaf Pro
The data of your Qleaf Pro Please note the data of your Qleaf Pro below. Date of purchase: Serial number of Device - Right: Serial number of Device - Left: Year of manufacturing Serial number (6 digits) 32 English... -
Page 33: Warranty
Warranty Name: Address: Zip code: City: Country: Phone: Date of purchase: Serial number - Right: Serial number - Left: City and country of purchase Name of the store: Address of the store: Zip code: City: Country: English... - Page 35 Qleaf Pro gebruikershandleiding Nederlands...
- Page 36 Qleaf Pro Gefeliciteerd met uw aanschaf van de Qleaf Pro. Met de aanschaf van een Qleaf Pro bent u verzekerd van een product dat is samengesteld uit hoogwaardige componenten. Door toepassing van diverse belangrijke innovaties op hoortoestelgebied staat de Qleaf Pro garant voor stijlvol luistergenot, aangepast aan deze tijd.
- Page 37 Batterij (C) De gegevens van uw Qleaf Pro Het dagelijks gebruik van de Qleaf Pro Plaatsen van de batterij Garantie Verwijderen van de batterij Qleaf Pro in de softtip inbrengen Fabrikant Qleaf Pro uit de softtip nemen Qleaf Pro in het oor plaatsen Qleaf Pro uit het oor nemen Aanpassing en instelling...
-
Page 38: Wat Is De Qleaf Pro
Wat is de Qleaf Pro? De Qleaf Pro is een modulair (voor elk oor ge- Een veelvoorkomende oorzaak van reparaties is lijk) CIC* toestel met een standaard aanpasdeel, verstopping of beschadiging van de luidspreker waarvoor een softtip wordt gebruikt. door oorsmeer. De Qleaf Pro soft tip beschikt over... - Page 39 Wan- u hoort met de natuurlijke richtingsgevoeligheid. neer de Qleaf pro is ingesteld met meer dan één • Minimale windruis door de diepe microfoon- programma (geheugen) kunnen de geheugens plaatsing.
-
Page 40: Anatomie Van De Qleaf Pro
Anatomie van de Qleaf Pro A Qleaf Pro module (behuizing) Batterijruimte Gekleurde links-rechts indicatie Microfoonopening Opening voor verwijderen van batterij Luidsprekeropening Softtip Geluidsopening Lamellen Trekkoordje Batterij (type 10) Pluspool (+) 10 Minpool (-) 11 Batterijverwijdertool 40 Nederlands... -
Page 41: Qleaf Pro Module (A)
Hierin ligt de microfoon die het geluid opneemt type 10 - die voor de stroomvoorziening dat door de Qleaf wordt bewerkt en versterkt. van de Qleaf Pro zorgt. Het toestel wordt uitgeschakeld door verwijderen van de batterij. Opening voor verwijderen batterij (4) Het batterijcompartiment wordt voor 2 doelen... -
Page 42: Softtip (B)
Anatomie van de Qleaf Pro Softtip (B) Trekkoordje (8) De Qleaf Pro wordt aan het trekkoordje uit het De softtip voor de Qleaf Pro is gemaakt van oor genomen. Na het inbrengen van de Qleaf een bio-compatibele kunststof en ontworpen Pro zit het trekkoordje achter de tragus (zie... -
Page 43: Het Dagelijks Gebruik Van De Qleaf Pro
Het dagelijks gebruik van de Qleaf Pro Verwijderen van de batterij Alvorens te beginnen met de instructies uit ‘Het dagelijks gebruik van de Qleaf’ Pro en ‘Onderhoud en gebruik’ is het belangrijk dat u een schoon en ho- Houd de module vast en verwijder de batterij rizontaal werkoppervlak tot uw beschikking heeft. -
Page 44: Qleaf Pro In De Softtip Inbrengen
Het dagelijks gebruik van de Qleaf Pro Qleaf Pro in de softtip Zorg dat uw handen schoon zijn wanneer u de Qleaf inbrengt in uw oor. Producten zoals inbrengen make-up, crème, body-oil, gel en haarlak kunnen ertoe leiden dat de module vuil wordt met als • Breng de module in de softtip met het CE teken gevolg dat bijvoorbeeld de microfoon opening als eerste, en zodat het teken zichtbaar is. - Page 45 • Duw daarna het Qleaf Pro toestel met de • Zorg ervoor dat de module helemaal in de duim in de softtip en trek gelijktijdig aan het softtip wordt ingebracht. trekkoordje. Nederlands...
-
Page 46: Qleaf Pro Uit De Softtip Nemen
Qleaf Pro uit de softtip nemen • Trek het trekkoordje naar de voorkant* van de Qleaf Pro en ‘strip’ de softtip zo ver mogelijk van de module. Tip: u kunt ervoor kiezen om de softtip gedeeltelijk op de module te laten zitten, en er alleen maar af te halen zover als nodig is om de batterij te verwijderen. -
Page 47: Qleaf Pro In Het Oor Plaatsen
Qleaf Pro in het oor plaatsen • Plaats het uiteinde van de Qleaf Pro met de lamellen losjes in het oor. Het trekkoortje bevindt zich hierbij achter de tragus (richting neus). Het inbrengen van een nieuwe softtip kan soms tragus... - Page 48 Het dagelijks gebruik van de Qleaf Pro • Druk nu het toestel voorzichtig dieper in het oor door op de platte kant van het toestel te drukken. Het wijd openen van de mond kan het inbrengen van het toestel vergemakkelijken. In het ideale geval is de vlakke kant van de module met de microfoon na het inbrengen gelijk aan de ingang van de gehoorgang.
-
Page 49: Qleaf Pro Uit Het Oor Nemen
Qleaf Pro uit het oor Wisselen van programma nemen Wanneer de Qleaf Pro met meer dan één programma (geheugen) is ingesteld, kunnen Hou het trekkoortje stevig vast en trek de programma’s worden geselecteerd met de module - altijd langzaam - uit het oor. - Page 50 Het dagelijks gebruik van de Qleaf Pro laatste modus beschermt tegen ongewenst Indien het tikken met de hand niet comfortabel wisselen van programma door plotseling is doordat de softtip te lang is, kunt u de softtip luchtdrukverschil, wat bijvoorbeeld kan inkorten (zie pagina 42). ontstaan door het slaan van een deur. Indien de gebruiker de tapfunctie niet wenst te gebruiken kan de functie ook uitgeschakeld worden.
- Page 51 Nederlands...
-
Page 52: Onderhoud En Gebruik
Onderhoud en gebruik Hoewel de Qleaf Pro gebruikt kan worden voor Controleer dagelijks of de module(s) en de zowel het rechter- als het linkeroor, verschillen softtip(s) verstopt of beschadigd zijn. Hiermee de instellingen meestal per oor. Dit betekent garandeert u zowel optimale prestaties van dat als een toestel eenmaal geprogrammeerd het toestel als een lange levensduur. -
Page 53: Opbergen
Opbergen Softtip: • Maak dagelijks schoon met een een zachte, droge tissue. ‘s Nachts: • In geval van sterke vervuiling, schoonmaken Wij adviseren u de softtip van de module af te met speciale (vochtige) reinigingsdoekjes halen zodra u het toestel ’s avonds niet meer voor hoortoestellen of reinigingscapsules gebruikt: Haal de batterij eruit en leg het toestel voor gehoortoestellen. -
Page 54: Waarschuwingen
Neem contact op met uw audicien of arts als softtips. Dit kan de hoorkwaliteit benadelen of het u niet lukt de Qleaf Pro uit uw oor te halen. ertoe leiden dat het toestel minder comfortabel in het oor zit en kan leiden tot oorinfecties. - Page 55 • nat schoongemaakt worden. Hou de Qleaf Pro uit de buurt van kinderen en • blootgesteld worden aan extreem hoge huisdieren. Bij het inslikken van componenten temperaturen, zoals bij gebruik van een direct uw arts raadplegen.
-
Page 56: Informatie Over Reparatieservice
Informatie over reparatieservice De Qleaf Pro is ontwikkeld door ExSilent BV, van de Cliënt ten opzichte van de verkoper/ Overschiestraat 63, Amsterdam. Indien u klach- licentiehouder van het Product. ten of reparatieverzoeken heeft, moet u contact 2. De garantieperiode loopt vierentwintig (24) - Page 57 Deze beperkte garantie is evenmin van het materiaal, ontwerp of afwerking; (ii) ExSilent toepassing indien: (i) het defect veroorzaakt of erkende aanbieder niet binnen dertig (30)
- Page 58 Informatie over reparatieservice van ExSilent, of gebruikt werd voor andere telijk, (met niet-bindend karakter) bij wet of doeleinden dan waar het voor bedoeld is; (vi) contractueel bepaald, uit onrechtmatige daad het defect veroorzaakt is door een opzettelijke of anderszins (inclusief, maar niet beperkt tot...
-
Page 59: Disclaimer
ExSilent behoudt zich het recht voor zonder voorafgaande kennisgeving wijzigingen en ExSilent behoudt zich te allen tijde het recht verbeteringen aan te brengen in de producten voor zonder voorafgaande kennisgeving dit die in dit document worden beschreven. -
Page 60: De Gegevens Van Uw Qleaf Pro
De gegevens van uw Qleaf Pro Registreer de gegevens van uw Qleaf Pro hieronder. Datum van aankoop: Serienummer van toestel - Rechts: Serienummer van toestel - Links: Serienummer (6 nummers) 60 Nederlands... -
Page 61: Garantie
Garantie Naam: Adres: Postcode: Stad: Land: Telefoonnummer: Datum van aankoop: Serienummer - Rechts: Serienummer - Links: Stad en land van aankoop Naam verkooplocatie: Adres verkooplocatie: Postcode: Stad: Land: Nederlands... - Page 63 Qleaf Pro Gebrauchsanweisung Deutsch...
- Page 64 Qleaf Pro Gratulation zum Kauf des Qleafs Pro. Mit dem Kauf eines Qleaf Pro garantieren wir Ihnen ein Produkt, das aus hochwertigen Komponenten besteht. Durch die Anwendung der zahlreichen, wichtigen Innovationen auf dem Gebiet der Hörgerätetechnik sichert Qleaf Pro eine elegante und angenehme Versorgung in der täglichen Nutzung.
- Page 65 Daten Ihres Qleaf Pro Der tägliche Einsatz von Qleaf Pro Das Einsetzen der Batterie Gewährleistung Das Entfernen der Batterie Einsetzen von Qleaf Pro in den Softtip Hersteller Entfernen von Qleaf Pro aus dem Softtip Einsetzen von Qleaf Pro in das Ohr Entfernen von Qleaf Pro aus dem Ohr...
-
Page 66: Was Ist Qleaf Pro
Verarbeitung und die Verstär- kann dieser leicht gereinigt oder ersetzt werden. kung der Signale an Ihre Hörprobleme anpasst. Qleaf Pro besitzt einen Mikroprozessor, der Qleaf Pro verwendet einen Softtip, der in drei Größen mit folgenden Eigenschaften ausgestattet ist: groß, mittelgroß und klein erhältlich ist. Die Größe • Adaptive “Rückkopplungsunterdrückung”dies des Softtips hängt von der Größe Ihres Gehörgangs... - Page 67 Ohrmuschel. Dies ermöglicht, dass eine Einstellung, bei der Qleaf Pro als Schalldämp- sich das Mikrofon genau in Ihrem Ohr befindet fer dient). Wird Qleaf Pro mit mehr als einem Pro- und Sie mit natürlicher Ausrichtung hören. gramm eingestellt (Speicher) können die Speicher •...
-
Page 68: Anatomie Des Qleaf Pro
Anatomie des Qleaf Pro A Qleaf Pro - Modul (Gehäuse) Batteriefach Farbige Seitenmarkierungen Mikrofonöff nung Öff nung für das Entfernen der Batterie Lautsprecheröff nung Softtip Schallöff nung Kuppel Die Zuglippe Batterie (Typ 10) Pluspol (+) 10 Minuspol (-) 11 Werkzeug zur Batterie-Entnahme 68 Deutsch... -
Page 69: Qleaf Pro - Modul (A)
Batteriefach (1) verarbeitet wird. Dieser Teil enthält die Batterie vom Typ 10, die das Qleaf Pro mit Strom versorgt. Das Gerät ist wäh- Öff nung für das Entfernen der Batterie (4) rend der Entnahme der Batterie abgeschaltet. Das Um die Batterie zu entfernen, wird ein zusätzli- Batteriefach hat zwei Aufgaben: a) in normalen ches Werkzeug zur Öff nung verwendet. -
Page 70: Softtip (B)
Der Softtip des Qleaf besteht aus einem entnommen werden. Nach dem Einsetzen biokompatiblen Kunststoff und ist als des Qleaf Pro wird die Zuglippe kaum sichtbar Wegwerfartikel vorgesehen, so dass er hinter den Tragus (siehe Seite 12) gelegt. Um die regelmäßig ersetzt werden kann. Für die... -
Page 71: Der Tägliche Einsatz Von Qleaf Pro
Der tägliche Gebrauch von Qleaf Pro Das Entfernen der Batterie Bevor Sie mit den erwähnten Tätigkeiten in den Kapiteln „Der tägliche Einsatz von Qleaf Pro” und der „Instand- haltung und Anwendung” beginnen, stellen Sie sicher, Halten Sie das Modul und entfernen Sie die dass Sie eine saubere und fl ache Arbeitsfl äche haben. -
Page 72: Einsetzen Von Qleaf Pro In Den Softtip
Der tägliche Gebrauch von Qleaf Pro Einsetzen von Qleaf Pro Stellen Sie sicher, dass Ihre Hände beim Einsetzen des Qleafs sauber sind. Make-up, Creme, Körperöl, in den Softtip Gel, Haarspray und ähnliche Produkte können das Modul verschmutzen und die Mikrofon-Öff nung • Fügen Sie das Modul in den Softtip mit der blockieren. - Page 73 • Als nächstes drücken Sie gleichzeitig das • Vergewissern Sie sich, dass das Modul Qleaf Pro Gerät mit dem Daumen in den komplett im Softtip eingefügt ist. Softtip und ziehen an der Zuglippe. Deutsch...
-
Page 74: Entfernen Von Qleaf Pro Aus Dem Softtip
Das geht schneller. • Nehmen Sie das Qleaf Pro Gerät (den Teil ohne Softtip) zwischen Ihre Finger und ziehen Sie es aus dem Softtip. 74 Deutsch * Die Vorderseite des Qleaf Pro ist der Teil, der zuerst ins Ohr geschoben wird. -
Page 75: Einsetzen Von Qleaf Pro In Das Ohr
Einsetzen Qleaf Pro ins Ohr • Legen Sie das Endteil des Softtips mit der Kuppel locker in das Ohr. Die Zuglippe liegt hinter dem Tragus in der Richtung der Nase. Das Einsetzen eines neuen Softtips kann bei trockenen Ohren schwerer sein, weil die... - Page 76 Der tägliche Gebrauch von Qleaf Pro • Drücken Sie die breite Seite des Geräts, um es ins Ohr einzusetzen. Nun schieben Sie das Gerät langsam tiefer in den Gehörgang. Durch leichtes Öff nen des Mundes, wird das Einsetzen erleichtert. Im idealen Fall wird die fl ache Seite des Moduls (wo sich das Mikrofon befi ndet) nach dem Einsetzen am Anfang des Gehörgangs eng anliegen und abschließen.
-
Page 77: Entfernen Von Qleaf Pro Aus Dem Ohr
Umschalten zwischen aus dem Ohr den Programmen Halten Sie die Zuglippe fest und ziehen Sie es Wenn das Qleaf Pro mit mehr als einem behutsam aus dem Ohr. Programm konfiguriert wurde (Speicher), können Programme mit Hilfe der AirTAP Anpassung und Funktion gewählt werden. - Page 78 Der tägliche Gebrauch von Qleaf Pro eine zweimal Antippfunktion ändern. Dieser maximal 4 Programme eingestellt werden. zusätzliche Modus erfordert, dass der Träger Wenn Programm 4 aktiviert ist und es wird das Ohr zweimal antippen muss, um zum abermals leicht auf das Ohr geklopft, ertönt ein nächsten Programm zu schalten.
- Page 79 Deutsch...
-
Page 80: Instandhaltung Und Anwendung
Instandhaltung und Anwendung Obwohl das Qleaf Pro Modul für beide Ohren Prüfen Sie die Module und die Softtips täglich verwendet werden kann, sind die Einstellun- auf Verstopfung und Schäden. Dies garan- gen normalerweise für das rechte und linke tiert Ihnen eine optimale Leistung und lange Ohr unterschiedlich. -
Page 81: Aufbewahrung
Aufbewahrung Softtip: • Reinigen Sie täglich mit einem weichen und trockenen (Papier-)Taschentuch. In der Nacht: • Wenn es sehr verunreinigt ist, reinigen Sie es Wir empfehlen, dass Sie in der Nacht das Modul aus mit speziellen, feuchten Reinigungstücher, mit dem Softtip entfernen: Entfernen Sie die Batterie löslichen Reinigungstabletten für Hörgeräte aus dem Gerät und bewahren Sie an einem siche- oder alternativ mit einem Ultraschall-Reiniger. -
Page 82: Warnungen
Anwendung“ nach (Seite 80). Verschmutzungen des Moduls verursachen. Aus diesem Grund verwenden Sie bitte nie das Wenn Sie mit der Verwendung des Qleaf Pro Modul ohne die Softtips. beginnen, starten Sie mit einer Tragezeit von 4 Stunden und erhöhen Sie die Tragezeit um eine Sobald das Gerät angepasst wurde, sollte... - Page 83 Haarspray (Friseur) oder Losungsmittel (wie z. • Exostosen (Knochenwachstum) im Gehörgang. B. Farbstoff ) verwendet werden. • Überproduktion von Cerumen. Beim Tragen oder Einsetzen des Qleaf Pro seien Das Gerät sollte nicht: Sie bitte vorsichtig und achten Sie auf Make-up, • Runterfallen. Crème, Körperöl, Gel, Haarspray und ähnliche •...
-
Page 84: Informationen Über Reparaturservice
Beschränkte Herstellergarantie. verbleibenden Teil der vierundzwanzig (24) Diese beschränkte Garantie gilt in jedem Monatsfrist gültig und im Übrigen unberührt Teil der Welt: ExSilent BV garantiert, dass die bleiben. Produkte mangelfrei sind. Materialien, Design 3. Während der Garantiezeit wird ExSilent oder und Fertigung unterliegen zum Zeitpunkt des ihre autorisierten Dienstleister die Reparatur ursprünglichen Kaufs, vorbehaltlich den folgen-... - Page 85 Geräts verlängert oder chemische Substanzen eingewirkt haben oder erneuert. Im Falle eines reparierten Produktes andere Tatsachen, über die ExSilent vernünfti- bleibt die alte Garantie weiterhin gültig. gerweise nicht kontrollieren kann, (einschließ- 5. Die beschränkte Garantie gilt nicht für bemal- lich, aber nicht nur für Mängel an Verbrauchs-...
- Page 86 (v) der Mangel durch die Tatsache, dass das ausschließliche Rechtsmittel, das der Kunde Produkt mit einer zusätzlichen Komponente gegen ExSilent hat und die einzige und aus- verwendet wurde oder verbunden war, die schließliche Haftung von ExSilent gegenüber nicht durch ExSilent geliefert oder hergestellt dem Kunden für Mängel oder unzulängliche...
-
Page 87: Haftungsausschluss
Inhalt dieses Dokuments gegeben werden. von ExSilent ist verboten. Dieses schließt ein, aber wird nicht auf implizite Garantien im Bezug auf seine Marktfähigkeit ExSilent behält sich das Recht vor, die und Eignung begrenzt, um ein bestimmtes Ziel Änderungen und Verbesserungen an zu erreichen. -
Page 88: Daten Ihres Qleaf Pro
Daten Ihres Qleaf Pro Bitte notieren Sie die Daten Ihres Qleaf unten. Kaufdatum: Seriennummer der Geräte - rechts: Seriennummer der Geräte - links: Seriennummer (6-stellige) 88 Deutsch... -
Page 89: Gewährleistung
Gewährleistung Name: Adresse: PLZ: Ort: Land: Telefon: Kaufdatum: Seriennummer - rechts: Seriennummer - links: Stadt und Land des Kaufs Name des Geschäfts: Adresse des Ladens: PLZ: Ort: Land: Deutsch... - Page 91 Mode d’emploi du Qleaf Pro Français...
- Page 92 Qleaf Pro Félicitations pour votre achat d’un Qleaf Pro. En achetant un Qleaf Pro, vous avez la garantie d’un produit doté de composants de haute qualité. Grâce à plusieurs innovations majeures dans le domaine des audioprothèses, Qleaf Pro vous procure une audition agréable, tout en style pour une utilisation moderne.
- Page 93 Pile (C) Les données de votre Qleaf Pro Utilisation quotidienne du Qleaf Pro Installer la pile Garantie Enlever la pile Insérer Qleaf Pro dans l’embout souple Fabricant Retirer Qleaf Pro de l’embout souple Positionner Qleaf Pro dans l’oreille Retirer Qleaf Pro de l’oreille Procédure de réglage et configuration Changement de programmes...
-
Page 94: Qleaf Pro : Définition
CIC* qui tient dans ration sont les dommages ou l’obstruction du l’oreille à l’aide d’un embout souple standard. haut-parleur par le cérumen. Qleaf Pro est équipé d’un système intégré qui empêche le cérumen Qleaf Pro est alimenté par une pile bouton de pénètrer dans l’appareil. - Page 95 • Le son est naturel. Cela est possible grâce au bon mètre selon lequel le Qleaf Pro sert de réducteur positionnement du microphone dans votre oreille, de bruit). Lorsque le Qleaf Pro a été configuré avec ainsi votre audition directionnelle est intacte plus d’un programme (mémoire), les mémoires •...
-
Page 96: Anatomie Du Qleaf Pro
Anatomie du Qleaf Pro A Qleaf Pro module (boîtier) Compartiment de pile Indicateur coloré de côté Ouverture du microphone Ouverture du compartiment de pile Ouverture du haut-parleur Embout souple Ouverture pour le son Dômes Fil d’extraction Pile (de type 10) Pôle positif (+) 10 Pôle négatif (–) 11 Outil d’extraction de la pile 96 Français... -
Page 97: Qleaf Pro Module (A)
• Bleu: Oreille gauche consulter le chapitre “Entretien et utilisation“ Ouverture du microphone (3) (page 108). Le microphone qui transmet le son au Qleaf Pro Compartiment de pile (1) pour traitement et amplifi cation se trouve ici. Ce compartiment abrite une pile bouton de type 10 qui sert à alimenter Qleaf Pro. -
Page 98: Embout Souple (B)
Anatomie du Qleaf Pro Embout souple (B) Fil d’extraction (8) Pour retirer Qleaf Pro de l’oreille, tirez sur le fi l L’embout souple du Qleaf Pro est en plastique d’extraction. Après l’insertion du Qleaf Pro dans biocompatible, il est jetable, vous pouvez donc l’oreille, le fi l se trouvera derrière le tragus (page en changer régulièrement. -
Page 99: Utilisation Quotidienne Du Qleaf Pro
Enlever la pile Avant d’entreprendre l’une des actions décrites dans les chapitres «Utilisation quotidienne du Qleaf Pro» et «Entretien et utilisation», installez- Tenez le module et enlevez la pile grâce à l’outil vous sur une surface de travail propre et plate. -
Page 100: Insérer Qleaf Pro Dans L'embout Souple
L’utilisation quotidienne du Qleaf Pro Insérer Qleaf Pro dans Assurez-vous que vos mains soient propres avant d’insérer le Qleaf Pro. Le maquillage, la crème, les l’embout souple huiles corporelles, le gel, la laque et les produits similaires sont susceptibles de salir le module et, •... - Page 101 • Ensuite, poussez simultanément le Qleaf Pro • Veuillez vérifi er que le module est inséré avec le pouce dans l’embout souple et tirez le entièrement dans l’embout souple. fi l d’extraction. Français...
-
Page 102: Retirer Qleaf Pro De L'embout Souple
C’est plus rapide. • Positionnez l’appareil Qleaf Pro (la partie sans embout souple) entre vos doigts et le tirer pour le séparer de l’embout souple. 102 Français * La face du Qleaf Pro est la partie qui est insérée dans l’oreille en premier. -
Page 103: Positionner Qleaf Pro Dans L'oreille
Positionner Qleaf Pro dans l’oreille • Placez l’extrémité de l’embout souple sur laquelle se trouve le(s) dôme(s) dans l’oreille, sans forcer. Le fi l d’extraction se trouve derrière le tragus. Insèrer un nouvel embout souple est parfois le tragus le tragus le tragus moins facile car la surface d’un nouvel embout... - Page 104 L’utilisation quotidienne du Qleaf Pro • Insèrez l’appareil dans l’oreille en appuyant sur la face plate. Ensuite, enfoncez doucement l’appareil plus profondément dans l’oreille. Ouvrir la bouche en grand facilite l’insertion. Dans l’idéal, la face plate du module (abritant le microphone) se trouvera juste à l’entrée du canal auditif après insertion dans l’oreille.
-
Page 105: Retirer Qleaf Pro De L'oreille
Pour cette raison, consultez votre audioprothésiste en cas de problème Le Qleaf Pro est activé par défaut grâce à une de réglage ou de configuration. Seul votre seule fonction d’écoute. Ce mode requiert de audioprothésiste est habilité... - Page 106 L’utilisation quotidienne du Qleaf Pro Ce mode supplémentaire requiert de est actif, après avoir taper doucement, un « l’utilisateur qu’il tape deux fois sur l’oreille pour bip » se fait entendre et l’appareil revient au passer au programme suivant. Ce mode évite programme un. les changements de programme intempestifs qui pourraient résulter de bruits impulsifs tels Veuillez noter que lorsque vous tapez, la...
- Page 107 Français...
-
Page 108: Entretien Et Utilisation
Entretien et utilisation Bien qu‘il soit possible d‘utiliser le module Qleaf Pro endommagés. Vous obtiendrez ainsi des perfor- indifféremment dans l‘oreille droite ou dans l‘oreille mances optimales de la part de votre appareil et lui gauche, les réglages sont généralement différents assurerez une longue durée de vie. Si vous remar- pour chaque oreille. -
Page 109: Conservation
Conservation Embouts souples: • Nettoyez-les quotidiennement à l’aide d’un embout souple. La nuit : • En cas de saleté importante, vous pouvez Nous vous conseillons de retirer l’embout souple les nettoyer soit avec un chiffon spécial (hu- du module pendant la nuit. Enlevez la pile de mide), soit avec des comprimés nettoyants l’appareil et rangez-le à... -
Page 110: Avertissements
à raison d‘une heure sup- Une fois l‘appareil réglé, nous vous conseillons plémentaire par jour. Si le port du Qleaf Pro de ne pas le porter dans l‘autre oreille. En est source de douleur, irritation permanente général, cela provoque une déterioration des... - Page 111 • porté en nageant, dans le bain, la douche ou le sauna. Tenez Qleaf Pro hors de portée des enfants et • nettoyé lorsqu’il est humide. des animaux. Il existe un risque d’etouffement • exposé à des températures très élevées, pour les enfants en cas d’avalement de l’un des...
-
Page 112: Information Sur Les Services De Réparations
Information sur les services de réparations Qleaf Pro a été développé par ExSilent BV, 2. La période de garantie est de vingt-quatre Overschiestraat 63, Amsterdam. Pour toute (24) mois à partir de la date à laquelle le réclamation ou demande de réparation, veuillez premier Client a acheté le Produit. En cas de contacter votre revendeur. - Page 113 Produit a été utilisé ou connecté avec un contact avec de la nourriture ou un liquide, autre composant qui n‘était pas fabriqué ou de l‘influence de produits chimiques, ou de fourni par ExSilent ou a été utilisé dans un but Français...
- Page 114 Client doit envoyer à 9. Tout amendement ou modification de cette ExSilent ou à l‘un de ses réparateurs agréés une garantie limitée doit faire l‘objet d‘un accord carte de garantie originale dûment remplie préalable écrit de ExSilent.
-
Page 115: Responsabilités
à atteindre un objectif défini. ExSilent se réserve le droit de modifier ou d’améliorer les produits décrits dans le présent ExSilent se réserve le droit de changer ou document sans préavis. -
Page 116: Les Données De Votre Qleaf Pro
Les données de votre Qleaf Pro Veuillez remplir les informations ci-dessous. Date d’achat : Numéro de série de l’appareil – Droit : Numéro de série de l’appareil – Gauche : Numéro de série (6 chiff res) 116 Français... -
Page 117: Garantie
Garantie Nom : Adresse : Code postal : Ville : Pays : Téléphone : Date d’achat : Numéro de série – Droit : Numéro de série – Gauche : Ville et pays de l’achat Nom du revendeur : Adresse du revendeur : Code postal : Ville : Pays : Français... - Page 119 Qleaf Pro manual de usuario Español...
- Page 120 Qleaf Pro Felicidades por tu compra de Qleaf Pro. Con la adquisición de Qleaf Pro, le garantizamos un producto compuesto de componentes de gran calidad. Debido a la aplicación de varias innovaciones importantes en el campo de los audífonos, el Qleaf Pro asegura una audición con estilo y placentera, adaptada al uso en tiempos modernos.
- Page 121 Batería (C) Los datos de su Qleaf Pro El uso diario de Qleaf Pro Colocando la pila Garantía Quitando la pila Insertando Qleaf Pro en el molde blando Fabricante Quitando Qleaf Pro del molde blando Colocando Qleaf Pro en el oído Quitando Qleaf Pro del oído Proceso de ajuste y configuración...
-
Page 122: ¿Qué Es Qleaf Pro
¿Qué es Qleaf Pro? El Qleaf Pro es lo que se llama un aparato CIC* Una de las razones de reparación más frecuentes, modular (igual para cada oído) en el que se es por daño u obstrucción del altavoz o parlante emplea un molde blando. - Page 123 • Mínima distorsión de tu propia voz (oclusión). puede usar hasta cuatro configuraciones diferen- • Alta ganancia de sonido por el posiciona- tes al programar Qleaf Pro. Puede solicitar a su miento del altavoz cerca del tímpano. audioprotesista que programe sus necesidades •...
-
Page 124: Anatomía De Qleaf Pro
Anatomía de Qleaf Pro A Qleaf Pro - módulo (carcasa) Compartimento de la pila Indicador de lado por color Abertura del micrófono Abertura para quitar la batería Abertura del altavoz Molde blando6 Abertura para el sonido Domos Tirador Pila (tipo 10) Polo positivo (+) 10 Polo negativo (–) 11 Herramienta de eyección de la pila 124 Español... -
Page 125: Qleaf Pro - Módulo (A)
Este compartimento contiene la pila – una el Qleaf Pro. pila de botón de tipo 10 – que proporciona la energía a Qleaf Pro. El aparato se apaga en Abertura para quitar la pila (4) cuanto se quita la pila. El compartimento de La herramienta incluida para quitar la pila las pilas se usa con una fi nalidad doble: en se usa a través de esta abertura. -
Page 126: Molde Blando (B)
Anatomía de Qleaf Pro Molde blando (B) Tirador (8) Para sacar el Qleaf Pro del oído se usa el El molde blando del Qleaf Pro está hecho de un tirador. Una vez que se ha insertado el Qleaf plástico bio-compatible y está diseñado para Pro, la aleta quedará... -
Page 127: El Uso Diario De Qleaf Pro
El uso diario de Qleaf Pro Quitando la pila Antes de empezar cualquiera de las acciones mencionadas en los capítulos ‘El uso diario de Qleaf’ Pro y ‘Mantenimiento y uso’ , asegúrate de Sujeta el modulo y quita la pila con la usar una superfi cie de trabajo limpia y horizontal. herramienta de eyección incluida en el paquete. -
Page 128: Insertando Qleaf Pro En El Molde Blando
El uso diario de Qleaf Pro Insertando el Qleaf Pro Asegúrate que tienes las manos limpias cuando insertes el Qleaf Pro. Maquillaje, crema, aceite en el módulo blando corporal, laca y productos similares pueden ensuciar el módulo y pueden, por ejemplo, • Inserte el modulo en el molde blando con la contribuir a la obstrucción de la apertura del... - Page 129 • Posteriormente, y de forma simultánea, • Por favor, asegúrese que el modulo está empuje el dispositivo Qleaf Pro con el pulgar insertado en su totalidad en el molde blando. en el molde blando y tire del tirador. Español...
-
Page 130: Quitando Qleaf Pro Del Molde Blando
• Tome el dispositivo Qleaf Pro (la parte que queda sin el molde blando a su alrededor) entre los dedos y tire del mismo fuera del molde blando. 130 Español * La parte frontal del Qleaf Pro es la parte que primero se introduce en el oído. -
Page 131: Colocando Qleaf Pro En El Oído
Colocando Qleaf Pro en el oído • Ponga el extremo del molde blando con el domo(s) en el oído sin apretar. El tirador está situado detrás del tragus, en dirección a la nariz. Insertar un nuevo molde blando puede ser un... - Page 132 El uso diario de Qleaf Pro • Inserte el aparato en el oído apretando el lado plano del aparato. Ahora empuja el aparato con suavidad hacia adentro del oído. Si se abre la boca durante inserción será más fácil. Lo ideal es que el lado del módulo (donde está situado el micrófono) esté...
-
Page 133: Quitando Qleaf Pro Del Oído
Cambiar entre del oído programas Sujete el tirador firmemente y estírelo –siempre Cuando se haya configurado el Qleaf Pro con despacio – hacia fuera del oído. más de un programa (memoria) se pueden seleccionar los programas mediante la funcionalidad AirTAP. Para cambiar entre los Proceso de ajuste y programas, la persona que lleva el audífono... - Page 134 El uso diario de Qleaf Pro cambiar al programa siguiente. Este último Por favor, tenga en cuenta que mientras lo modo de programación, previene que el golpea la mano toca el molde suave de forma audífono cambie solo de memoria en casos incómoda. Se puede acortar el molde suave como cuando se cierra fuerte una puerta.
- Page 135 Español...
-
Page 136: Mantenimiento Y Uso
Mantenimiento y uso A pesar que el módulo Qleaf Pro puede ser Comprueba el módulo(s) y el molde(s) blando(s) usado tanto para el oído derecho como el diariamente por si hay obstrucciones o daños. izquierdo, la configuración normalmente es Esto te garantiza un funcionamiento óptimo y diferente para el oído derecho o izquierdo. -
Page 137: Guardado
Guardado Molde blando: • Limpiar diariamente con un pañuelo suave y seco. • En caso de suciedad severa, puedes limpiarlo Por la noche: con pañuelos de limpieza especiales Recomendamos quitar el molde blando del (húmedos), con pastillas solubles para módulo por la noche: quita la pila del aparato productos de audición o, alternativamente, y guárdala en un sitio seguro fuera de su caja. -
Page 138: Advertencias
Advertencias El molde blando es una parte Reemplaza el molde blando de tu aparato esencial del Qleaf Pro. Sin el molde regularmente, incluso si no está dañado blando, el Qleaf Pro no podrá o ensuciado visiblemente, ver capítulo funcionar correctamente. Y esto podría causar ‘Mantenimiento y uso’... - Page 139 • exponer a la humedad o agua. micrófono. • sumergir en agua. • usar mientras nadas, tomas una ducha, te Mantén el Qleaf Pro alejado de niños pequeños bañas o en la sauna. y mascotas. En caso de tragar uno de los • lavar con líquidos.
-
Page 140: Servicios De Reparación
Servicios de reparación El Qleaf Pro ha sido desarrollado por cualquiera de los derechos del Cliente contra el ExSilent BV, Overschiestraat 63, Ámsterdam. vendedor/concesionario del Producto. Para quejas o peticiones de servicios de 2. El periodo de garantía es de veinticuatro indemnización, deberías contactar al proveedor (24) meses desde la fecha en la que el primer al que compraste tu aparato. - Page 141 (iii) condiciones termales o ambientales extremas el Producto no fue devuelto a ExSilent o su o cambios rápidos en dichas condiciones, proveedor aprobado de servicio dentro de un corrosión, oxidación, alteraciones o conexiones periodo de treinta (30) días de la ocurrencia...
- Page 142 Servicios de reparación adicional que no fue fabricado o suministrado funcionamiento del Producto. Esta garantía por ExSilent o usado para otro propósito que limitada reemplaza todas las otras garantías aquel para el que fue hecho; (vi) El defecto fue y responsabilidades, incluyendo las verbales,...
-
Page 143: Renuncia De Responsabilidad
ExSilent, está prohibida. este documento. Esto incluye, pero no está limitado a, garantías implícitas en relación a ExSilent se reserva el derecho a cambiar y hacer su comercialidad y adecuación para lograr un mejoras en sus productos que están descritos objetivo concreto. -
Page 144: Los Datos De Su Qleaf Pro
Los datos de tu Qleaf Por favor, anota los datos de tu Qleaf Pro abajo. Fecha de compra: Número de serie de Aparato - Derecho: Número de serie de Aparato - Izquierdo: Número de Serie (6 dígitos) 144 Español... -
Page 145: Garantía
Garantía Nombre: Dirección: Código Postal: Ciudad: País: Teléfono: Fecha de compra: Número de serie- Derecho: Número de serie- Izquierdo: Ciudad y país de compra: Nombre de la tienda: Dirección de la tienda: Código postal: Ciudad: País: Español... -
Page 147: Manufacturer
ExSilent BV Overschiestraat 63 1062 XD Amsterdam The Netherlands Phone +31 (0)20 675 1004 Fax +31 (0)20 675 9048 info@exsilent.com www.exsilent.com ExSilent USA 11485 Valley View Road Eden Prairie, MN 55344 United States Phone +1 (866) 742 0808 Toll free Fax +1 (877) 722 8014 info@exsilentusa.com...
Need help?
Do you have a question about the Qleaf Pro and is the answer not in the manual?
Questions and answers