Table of Contents
Advertisement
Quick Links
Advertisement
Table of Contents

Related Manuals for Swissvoice Xtra 2355


Summary of Contents for Swissvoice Xtra 2355
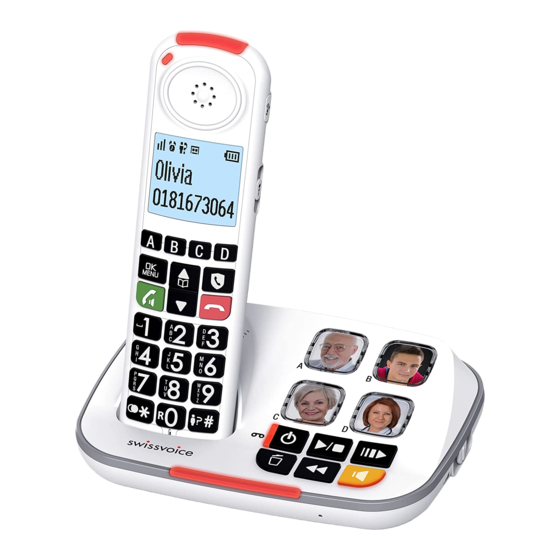
- Page 1 Xtra 2355 USER MANUAL...
- Page 2 QUICK SETUP Set Language After first time power up (base station is also connected to main power, for details, refer to Section 4). LANGUAGE? will appear on the screen. Language ENGLISH Press on the handset. Press to select the desired language. Press .
- Page 3 Package Contents of Xtra 2355 The package contains the following items: Cordless handset Cordless base unit Mains power adaptor Telephone line cord Telephone plug convertor (optional) 3pcs of AAA 500mAh NiMH rechargeable batteries User Guides 4 pcs of spare transparent photo covers The additional duo and trio package contains the following items: •...
-
Page 4: Table Of Contents
Table of Content IMPORTANT SAFETY INSTRUCTIONS LOCATION INSTALLING YOUR PHONE 3.1. Installing and Charging the Batteries 3.2. Connecting the Base Station GETTING TO KNOW YOUR PHONE 4.1. Handset Overview 4.2. Base station Overview 4.3. Display Icons and Symbols of LCD MENU TREE USING YOUR PHONE 6.1. - Page 5 7.3. Set Date and Time Format 7.4. Talking Digit 7.5. Change the Flash Time 7.6. Reset Your Phone 7.7. Registration 7.8. Find the Handset 7.9. Conference call 7.10. Transfer a call 7.11. Intercom 7.11.1. Intercom initiated from cordless handset: 7.12. Answer a Call 7.13.
- Page 6 11.4.1. Delete a number from blocklist 11.4.2. Delete all numbers from blocklist Automatic call block mode 12.1. VIPs only 12.2. Contacts only Anonymous call block mode 13.1. Block Private Calls 13.2. Block All Anonymous Calls 13.3. Set Block Anonymous Calls OFF REMINDER 14.1.
-
Page 7: Important Safety Instructions
IMPORTANT SAFETY INSTRUCTIONS When using your telephone equipment, basic safety precautions should always be followed to reduce the risk of fire, electric shock and injury, including the followings: Read and understand all the instructions. Follow all warnings and instructions marked on the product. Unplug this product from the wall outlet before cleaning. -
Page 8: Location
LOCATION For maximum coverage and reduce the interference, here are some guidelines you should consider when you place the base unit, place it at a convenient, high, and central location with no obstructions between the handset and base unit in an indoor environment. place it away from electronic appliances such as televisions, microwave ovens, radios, personal computers, wireless devices or other cordless phones. -
Page 9: Connecting The Base Station
Slide the battery compartment cover back. Put the handset on the base and charge for 15 hours before using the handset for the first time. Notes: Use only the supplied NiMH rechargeable batteries. If the handset will not be used for a long time, disconnect and remove the batteries to prevent possible leakage. -
Page 10: Getting To Know Your Phone
If you have a Broadband line If you connect your telephone to a line with a broadband connection, you will need to insert a micro-filter between the telephone and the telephone line, otherwise you may get interference between the telephone and the broadband, which could cause problems. - Page 11 INCOMING CALL LED • Flashes when there is an incoming call/ the base is paging the handset. CHARGE LED • On when the handset is charging in the charger or base. • In menu mode: Press to scroll up the menu items. •...
- Page 12 ALPHANUMERIC KEYPAD/ */ # • In idle / pre-dial / editing mode / during a call: Press to enter characters /numbers. • Press any key to answer an incoming call. • Press to switch between upper case and lower case while entering characters.
-
Page 13: Base Station Overview
4.2. Base station Overview INCOMING CALL LED • Flashes when there is an incoming call. • On when there the phone is in use. • On when a device is being registered. • On when another telephone is in line on the same. MESSAGE LED( •... - Page 14 DIRECT MEMORY KEYS (A, B, C, D) • Press to dial out phone number stored. • Press to repeat playing the current message from the beginning. • Press twice to skip backward to the previous message. • Press to play the message. •...
-
Page 15: Display Icons And Symbols Of Lcd
4.3. Display Icons and Symbols of LCD Display icons Description Full battery power level. 2/3 battery power level. 1/3 battery power level. Flashes when the battery is low and needs charging. The speakerphone is in use. On: if the handset ringer is turned off. On: when there are received new Voice Message Waiting (VMWI) not yet read*. -
Page 16: Menu Tree
MENU TREE MAIN MENU Level 1 Level 2 Level 3 Level 4 Level 5 Call List FIRST ENTRY View …. Add To PB VIP X VIP Y LAST ENTRY Add To Block Delete Confirm? DeleteAll Confirm? Phonebook FIRST ENTRY Add new Number Name …. - Page 17 Language English * Francais Deutsch Italiano Nederlands Espanol Portugues HS Se�ng Ring Setup Ext.Ring Melody 1 Melody 2 * ….. Melody 12 Int.Ring Melody 1 Melody 2 Melody 3 * ….. Melody 12 Ring Volume Volume 1 * ….. Ring Off Tone Setup Key Tone On *...
-
Page 18: Using Your Phone
USING YOUR PHONE 6.1. Set Date & Time and Language 6.1.1. Set Date & Time Input Date, Time directly after first time power up Press on the handset in idle mode. Press to select HS SETTING, then press Press to select DATE&TIME, then press Press to select SET DATE, then press , Input the day, month, year,... -
Page 19: Make, Answer, End A Call
6.2. Make, Answer, End a Call 6.2.1. Make a Call 6.2.1.1. Preparatory Dialing Handset: Enter the phone number and press to dial the number. Press to clear the entry. 6.2.1.2. Direct Dialing Handset: Press to take the line and enter the phone number. 6.2.1.3. -
Page 20: Set Photo A, B, C, D Key Memories
6.3. Set Photo A, B, C, D key memories 6.3.1. Input number and name Press on the handset in idle mode. Press to select DIRECT MEM, then press Press to select A, B, C, D, then press Select ADD, , then press , enter the telephone number, then enter his/her name, then press . -
Page 21: View Record Of Photo Memory
6.3.4. Delete Voice tag Repeat the step 1 to 4 in Section 6.3.1.3. PLAY apppears, then press to select DELETE, press RESET TO DEFAULT will display. You hear confirmation tones. 6.3.5. View record of Photo memory Press on the handset in idle mode. Press to select DIRECT MEM, then press Press... -
Page 22: Audio Boost
6.5. Audio Boost Use the audio boost feature to enhance the clarity and loudness of your caller’s voice on the cordless handset earpiece when you are listening to a message or an announcement. To turn on Audio Boost: While you are on a call or listening to a message or an announcement using the handset earpiece. -
Page 23: Phone Settings
PHONE SETTINGS Before phone settings, the base station has to be connected to AC mains. 7.1. Set Ringer Melody and Volume Set Handset ringer: During ringing, • Press in the handset to adjust ringer volume of handset Press on the handset in idle mode. Press to select HS SETTING, then press Select RING SETUP by pressing... -
Page 24: Set Date And Time Format
7.3. Set Date and Time Format Press when idle. Press to select HS SETTING, then press Press to select DATE&TIME then press Press to select DATE FORM, then press select your desired date format (DD-MM-YY or MM-DD-YY), OR Press to select TIME FORM, then press select your desired time format (24 HR or 12HR). -
Page 25: Registration
7.7. Registration Your handset and telephone base is pre-registered. If for some reason, the handset is not registered to the base station, PUT ON BS TO POWER will be displayed on the handset screen If it is out of base and disappears on the screen, register your handset according to the following procedure. -
Page 26: Transfer A Call
7.10. Transfer a call During an external call, you can transfer the call from a cordless handset or the telephone base to another system device. To transfer a call from a cordless handset: During a call, Press , then press to select INTERCOM, then press If you have two or more cordless handsets, press to select the... -
Page 27: Answer A Call
7.12. Answer a Call If the handset is not on the charging cradle: When the phone rings, press to answer a call. If the handset is on the base station and if AUTO ANSWER is set to ON: When the phone rings, pick up the handset to answer a call. Press when idle. -
Page 28: View The Call List
If the caller number is disabled to send caller information, UNAVAIL will display. If the caller number is not provided, PRIVATE will display. In standby, if three unanswered calls with different calling number are received, “3 NEW CALLS” will be displayed. Each time you review a call list entry marked with icon, the number of new calls decreases by one. -
Page 29: Delete An Entry In The Call List
8.4. Delete an entry in the call list Select a desired entry in the call list. Press to select DELETE, and then press CONFIRM? appears press to confirm. You hear confirmation tones. 8.5. Delete all entries in the call list Select a desired entry in the call list. -
Page 30: Phonebook
PHONEBOOK The phonebook stores up to 100 entries, which are shared by all handsets. 9.1. Add a new phonebook entry In idle mode, Press Press , press to select PHONEBOOK, then press to select ALL, press Press , ADD appears press Enter a telephone number, press Enter a name, then press . -
Page 31: Delete A Phonebook Entry
9.6. Delete a phonebook entry Select a desired entry in the phone book, and then press Add new appears then press to select DELETE, press CONFIRM? will display, press to confirm. You hear confirmation tones. 9.7. Add to speed dial key Select a desired entry in the phone book, and then press ADD appears then press to select ADD TO SD, press... -
Page 32: View A Speed Dial Entry
10.2. View a speed dial entry Repeat the step 1 to 3 in Section 10.1. VIEW will display, then press The record (number and name) can be viewed. Press to return previous menu or long press to return to standby mode. 10.3. -
Page 33: Call Blocker
CALL BLOCKER This telephone is built-in with Smart Call Block feature*. This feature will help you avoid nuisance calls by only allowing some numbers to make your phone ring. Default setting of Smart Call Block in this telephone is OFF but you can enable it via your phone settings, as explained in the following paragraphs. -
Page 34: Manual Call Block Mode
11.1. Manual call block mode Manual call block is the easiest option when starting out. When you chose ON in the call block settings, all calling numbers registered in your blacklist will be blocked. You can add/remove numbers from that list at any time. How to block an incoming call: When the phone is ringing and before answering, press . -
Page 35: Edit Numbers In Blocklist
11.3. Edit numbers in Blocklist In idle mode, Repeat step 1 and 2 in Section 11.2. to select the stored numbers. Press , press to select Edit, start to edit selected number press to save. 11.4. Delete numbers in Blocklist 11.4.1. -
Page 36: Anonymous Call Block Mode
Anonymous call block mode This feature allows you to block numbers that do not display a number on your phone. It can be enabled or disabled independently from the previous call block modes. Menu Call block Block anonym Private* Press Menu, press and Press to select Call block. -
Page 37: Reminder
REMINDER The reminder feature helps remind you of important events. You can set the reminder to record your voice, or use alarm sound in order to remind you only once, or in daily, Monday to Friday or Saturday to Sunday. Once you set the reminder, the system will alarm you at the alarm time. -
Page 38: Record Voice Memo Of The Alarm Reminder
14.4. Record Voice memo of the alarm reminder Repeat step 1 to 3 in Section 14.1. ON/OFF appears then press to select VOICE MEMO, press PLAY appears then press to select RECORD, press to start recording. RECORDING… appears after beep sound, you can record your voice. Press to finish your voice recording. -
Page 39: Message Playback
15.2. Message Playback If 2 new voice messages are stored in the phone, “2 NEW MESSAGES” will appear and the icon will flash on the handset screen, the red message LED the telephone base will flash. If memory is full, MEM FULL will display in the screen. Listen new messages through the Cordless Handset: Press in idle mode. -
Page 40: Delete Old Message In The Answering Machine
Options during playback: • Slide left and right on the side of base to adjust the speaker volume • Press to repeat the message currently playing. • Press to delete the current message. • Press to stop. • Press to reduce the playback speed. 15.3. -
Page 41: Record A Memo
15.4. Record a Memo You can record your memo message for another user. Press in idle mode to enter the main menu. Press to select Ans.Machine, then press MSG Playback appears and then press to select MEMO, then press RECORDING shows on the screen. After the tone, speak towards the microphone. -
Page 42: Record Your Own Outgoing Message (Ogm)
15.5.2. Record your own outgoing message (OGM) Repeat step 1 to 4 in Section 15.5.1. PLAY appears on the screen, then press to select RECORD, and then press RECORDING… appears and then you can record your outgoing message after beep tone. After finishing record, press , PLAYING ANNC…... -
Page 43: Call Screening
15.6.3. Call Screening When the answering machine is set to ON and when there is an incoming message, the base will start call screening if call screening is set to ON after the preset numbers of rings of answer delay, press to screen the call on your handset too. -
Page 44: Message Alert Tone
To remotely access your answering machine remotely: You can ring your phone from another tone-dialing phone to switch on or off the answering machine and listen to your messages remotely. Place a call from a tone-dialing phone to your phone. When the answering machine answers the calls and starts playing the outgoing message, enter key and then 4-digit remote access code... -
Page 45: Technical Specifications
TECHNICAL SPECIFICATIONS Free Field Range Up to 300 metres* Indoor Range Up to 50 metres* Handset Battery Life 10 hours talk time** (average values) 100 hours standby** Number of Handsets Up to 4 Intercom Mode Three-Way Conference Yes (1 outside correspondent + 2 internal correspondents) Electrical Base:... -
Page 46: Troubleshooting
TROUBLESHOOTING If you have difficulty with your phone, please try the suggestions listed below. As a general rule, if a problem occurs, remove the batteries from all the handsets in your installation for about 1 minute, then disconnect and reconnect the power supply to the base and reinstall the handset batteries. - Page 47 Your own voice cannot be announced when the telephone number of incoming call is same as 1 of 4 photo memories stored • The ringer volume may be switched off. • Voice recording in 1 of 4 photo memories was not done successfully. Please refer to Section 6.3.2.
-
Page 48: Guarantee
GUARANTEE Please read carefully the user guide included in this box. Xtra 2355 is an approved equipment in accordance with the European regulations, attested by the CE marking. The product you just bought is a technological product, it must be handled with care. - Page 49 period of immobilization of the Product of at least seven (7) days will be added to the warranty period remaining to run. This warranty does not apply in the following cases: - Installation or use not in accordance with the instructions in the guide of the user, - Incorrect connection or abnormal use of the Product, especially with noncom- patible...
-
Page 50: Safety
Hereby, ATLINKS EUROPE declares that the radio equipment type DECT is in compliance with Directive 2014/53/EU. The full text of the EU declaration of conformity is available at the following internet address: www.swissvoice.net Average power per channel: 10mW Maximum Output Power (NTP) : 24dBm... -
Page 51: Environment
ENVIRONMENT This symbol means that your inoperative electronic appliance must be collected separately and not mixed with the household waste. The European Union has implemented a specific collection and recycling system for which producers are responsible. This appliance has been designed and manufactured with high quality materials and components that can be recycled and reused. - Page 54 147 avenue Paul Doumer 92500 RUEIL-MALMAISON France RCS Nanterre 508 823 747 www.swissvoice.net Swissvoice is a trademark of Swissvoice International SA. © Copyright Swissvoice International SA 2021 The Manufacturer reserves the right to modify the specifications of its products in order to make technical improvements or comply with new regulations.
Need help?
Do you have a question about the Xtra 2355 and is the answer not in the manual?
Questions and answers
i cant ring out but can receive calls.
The Swissvoice Xtra 2355 may not be able to make outgoing calls but can still receive them due to one or more of the following reasons:
- The mains power is not correctly connected.
- The battery needs recharging.
- There has been a power cut; try placing the handset on the base for 10 seconds, or disconnect the batteries and mains power for 10 minutes, then reconnect.
- If connected to a PABX system, an access code may be required to dial out.
This answer is automatically generated
How can I see on my Swiss voice extra 2355 phone if someone has called me, I don’t want to use the answerphone?
The Swissvoice Xtra 2355 has a built-in display that shows caller information. You can check missed calls directly on the phone’s screen without using the answerphone by viewing the caller information displayed.
This answer is automatically generated
answer a missed call