Table of Contents
Advertisement
Available languages
Available languages
Item #1004612899(805109), 1004612881(805089)
1004612902(805149), 1004612893(805129)
1004612993(805049), 1004612904(805029), 1004613002(805069)
1004613000(805319)
Model #DC9557BK-B-3, DC9557WH-B-3
DC9997BK-3, DC9997WH-3
DC11001BK-3, DC11001WH-3, DC11001SBA-3
DC5150WH-F
USE AND CARE GUIDE
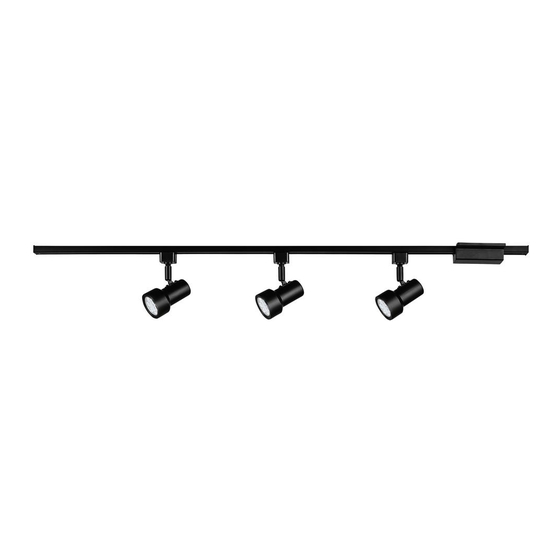
3 Light Linear Track Kit
Questions, problems, missing parts? Before returning to store,
call Hampton Bay Customer Service
7 a.m. - 6 p.m., EST, Monday - Friday, 9 a.m. - 6 p.m., EST Saturday
1-855-HD-HAMPTON
HAMPTONBAY. COM
THANK YOU
We appreciate the trust and con dence you have placed in Hampton Bay through the purchase of this LED linear track kit. We strive to
continually create quality products designed to enhance your home. Visit us online to see our full line of products available for
your home improvement needs. Thank you for choosing Hampton Bay!
Advertisement
Table of Contents

Related Manuals for HAMPTON BAY DC9557BK-B-3


Summary of Contents for HAMPTON BAY DC9557BK-B-3
- Page 1 THANK YOU We appreciate the trust and con dence you have placed in Hampton Bay through the purchase of this LED linear track kit. We strive to continually create quality products designed to enhance your home. Visit us online to see our full line of products available for...
-
Page 2: Table Of Contents
CAUTION: Do not install any lamps closer than 6 in. from any curtain □ IMPORTANT: For use with Hampton Bay EC series line or similar combustible material. voltage track systems only. This track system is not intended for use with a power supply □... -
Page 3: Warranty
Warranty ve years from the date of purchase. If within this period the product is found to be defective in material or workmanship, the product must be returned, with a copy of the bill of sale as proof of purchase, to the original place of purchase. The manufacturer will, at its option, repair, replace, or incidental, or consequential damages. -
Page 4: Package Contents
Pre-installation (continued) PACKAGE CONTENTS Description Quantity Part Track mounting screw [preassembled to mounting plate (B)] Mounting plate Twist-lock connector [preassembled to mounting plate (B)] Canopy [preassembled to mounting plate (B)] Canopy screw [preassembled to canopy (D)] Track section Track head Connector’s locking tab [preassembled to track head (G)] Note: Some fixture shapes may vary, not shown for all models but the same assembly method. -
Page 5: Installation
Installation Field cuttin g the track to special lengths (Optional) NOTE: Cutting should be done preferably from the dead end of the track. □ Align the track so the open side is facing upward (the side where the copper bus bars are exposed). □... - Page 6 Installation (continued) Outlet Box Connecting the wires □ Connect the wires (white wires from connector to the white wires from the supply circuit, black wires from the connector to the black wires from the supply circuit, and the green ground wire from the connector to the ground wire of the supply circuit) using the wire connectors (DD).
- Page 7 Installation (continued) Anchor installation □ Drill a 7/32 in. hole at each mark on the ceiling, and insert the anchors (CC) into the mounting surface. □ Insert the Phillips screws (BB) through the track section (F), and tighten to the anchors (CC). Attaching the mounting plate to the track Tighten the track mounting screws (A) to secure the track □...
-
Page 8: Operation
Operation Removing the track head from the track □ track head (G) to cool down. □ Pull down on the track head connector’s locking tab (H), and twist until the track head (G) disengages. Care and Cleaning □ □ Use a dry or slightly dampened, clean cloth (use clean water, never use a solvent) to wipe the interior and exterior surfaces of the □... - Page 9 Questions, problems, missing parts? Before returning to store, call Hampton Bay Customer Service 7 a.m. - 6 p.m., EST, Monday - Friday, 9 a.m. - 6 p.m., EST Saturday 1-855-HD-HAMPTON HAMPTONBAY. COM Retain this manual for future use.
- Page 10 ¿Preguntas, problemas o piezas faltantes? Antes de regresar a la tienda, llama al servicio al cliente de Hampton Bay, de lunes a viernes de 7 a.m. a 6 p.m., hora estándar del Este, y sábados de 9 a.m. a 6 p.m., hora estándar del Este 1-855-HD-HAMPTON HAMPTONBAY.
- Page 11 □ IMPORTANTE: Para uso con sistemas de riel de tensión distancia de cortinas o material combustible similar. de línea de la serie Hampton Bay EC solamente. Este sistema de riel no está diseñado para funcionar con un □ cable de alimentación o un adaptador de receptáculo común.
- Page 12 Garantía El fabricante garantiza que esta lámpara estará libre de defectos en materiales y mano de obra por un periodo de cinco años a partir de la fecha de su compra. Si durante este lapso, el producto resulta defectuoso en cuanto a material omano de obra, deberá devolverlo al lugar de la compra original, junto con una copia de la factura de venta comocomprobante de la compra.
- Page 13 Pre-Instalación (continuación) CONTENIDO DEL PAQUETE Descripción Cantidad Pieza Tornillos de montaje del carril [preensamblado de placa de montaje (B)] Placa de montaje Suministro de Electricidad [preensamblado de placa de montaje (B)] Cubierta [preensamblado de placa de montaje (B)] Tornillos de la Cubierta [preensamblado de la cubierta (D)] Sección del carril Cabezal del carril Lengüeta de seguridad del conector [preensamblado en el cabezal del carril (G)]...
- Page 14 Instalación Riel de corte de área para longitudes especiales (Opcional): NOTA: El corte se debe realizar preferiblemente desde el extremo cerrado del riel. □ Alinea el riel de modo que el lado abierto quede hacia arriba (el lado donde las barras de distribución de cobre quedan expuestas).
- Page 15 Instalación (continuación) Caja desalida Conectar los cables □ Conecte los cables (los cables blancos del conector a los cables blancos del circuito de suministro, los cables negros del conector a los cables negros del circuito de suministro y los cables de verde del conector a los cables de verde del circuito de suministro) con los conectores de cables (DD).
- Page 16 Instalación (continuación) Instalación de los anclajes □ montaje. □ Inserte los tornillos Phillips (BB) a través de la sección del carril (F) y apriete las anclas de expansión (CC). Fijar la placa de montaje al riel □ Apriete los tornillos de montaje (A) del carril para asegurar la sección del carril lineal (F) a la placa de montaje (B).
- Page 17 Funcionamiento Desmontar el cabezal del riel □ Para retirar el cabezal del carril (G) de la sección del carril (F), primero permita que se enfríe el cabezal del carril (G). □ Jale hacia abajo la lengüeta de bloqueo del conector (H) del cabezal del carril y gire hasta que el cabezal del carril (G) se libere.
- Page 18 ¿Preguntas, problemas o piezas faltantes? Antes de regresar a la tienda, llama al servicio al cliente de Hampton Bay, de lunes a viernes de 7 a.m. a 6 p.m., hora estándar del Este, y sábados de 9 a.m. a 6 p.m., hora estándar del Este 1-855-HD-HAMPTON HAMPTONBAY.
Need help?
Do you have a question about the DC9557BK-B-3 and is the answer not in the manual?
Questions and answers