Table of Contents
Advertisement
Available languages
Available languages
Quick Links
Item # 1000 000 000 / 1000 000 000
1000 000 000 / 1000 000 000
Model # DS19069 / DS19070
DS19074 / DS19075
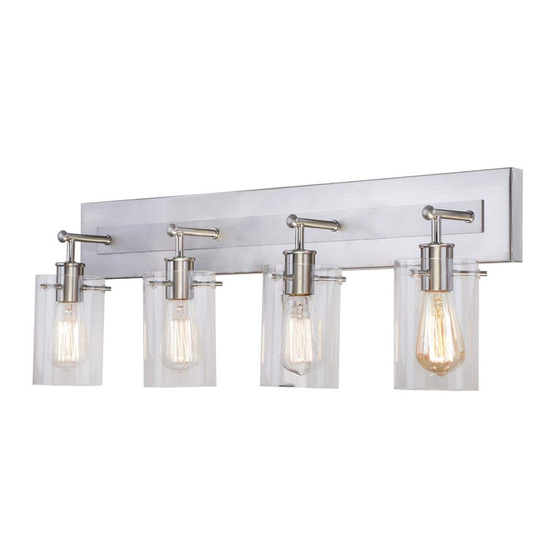
USE AND CARE GUIDE
4-LIGHT VANITY
Questions, problems, missing parts? Before returning to the store,
call Hampton Bay Customer Service
8 a.m. - 7 p.m., EST, Monday-Friday, 9 a.m. - 6 p.m., EST, Saturday
1-855-HD-HAMPTON
HAMPTONBAY.COM
THANK YOU
We appreciate the trust and confidence you have placed in Hampton Bay through the purchase of this light fixture. We strive to continually
create quality products designed to enhance your home. Visit us online to see our full line of products available for your home improvement
needs. Thank you for choosing Hampton Bay!
Advertisement
Chapters
Table of Contents

Related Manuals for HAMPTON BAY DS19069


Summary of Contents for HAMPTON BAY DS19069
- Page 1 THANK YOU We appreciate the trust and confidence you have placed in Hampton Bay through the purchase of this light fixture. We strive to continually create quality products designed to enhance your home. Visit us online to see our full line of products available for your home improvement...
-
Page 2: Table Of Contents
Table of Contents Table of Contents ............2 Hardware Included ..............3 Safety Information ............2 Package Contents ..............4 Warranty ................. 2 Installation ..............5 Three (3) Year Warranty ............. 2 Care and Cleaning ............7 What is Covered ................ 2 Troubleshooting ............. -
Page 3: Pre-Installation
Pre-Installation PLANNING INSTALLATION Read all instructions before installing. To avoid damaging this product, place it on a soft, non-abrasive surface, such as carpet or cardboard. NOTE: You may use four Max 60W medium base (E26) IMPORTANT: Inspect the wire insulation for any cuts, type "ST64"... -
Page 4: Package Contents
Pre-Installation (continued) PACKAGE CONTENTS Part Description Quantity Bracket plate Fixture body Glass shade... -
Page 5: Installation
Installation Preparing the bracket plate Installing the bracket plate □ □ Unscrew the four support screws (short) (FF) from the Place the flat side of the bracket plate (A) against the wall and mark the location of the two key holes with a pencil (not bracket plate (A). - Page 6 Installation (continued) Attaching the fixture body to the outlet box □ Place the fixture body (B) against the outlet box, align the four holes of the bracket plate (A) and fixture body (B), then tighten the support screws (short) (FF). □...
-
Page 7: Care And Cleaning
Care and Cleaning □ Do not use any cleaners with chemicals, solvents, or harsh abrasives. Use only a dry, soft cloth to dust or wipe carefully. □ To clean the fixture, disconnect power by turning off the circuit breaker or by removing the fuse at the fuse box. Use a dry or slightly dampened, clean cloth to wipe the exterior surface of the fixture. -
Page 8: Service Parts
Service Parts MODEL: DS19069 / DS19070 / DS19074 / DS19075 Part Description Part Description Outlet box screw (long) Support screw (short) (Pre-assembled to bracket plate (A)) Green ground screw Thumbscrew (Pre-assembled to bracket plate (A)) Wire connector Bracket plate Plastic anchor... - Page 9 Questions, problems, missing parts? Before returning to the store, call Hampton Bay Customer Service 8 a.m. - 7 p.m., EST, Monday-Friday, 9 a.m. - 6 p.m., EST, Saturday 1-855-HD-HAMPTON HAMPTONBAY.COM Retain this manual for future use.
- Page 10 GRACIAS POR TU COMPRA Apreciamos la confianza que has depositado en Hampton Bay al comprar esta lámpara. Nos esforzamos para continuamente crear productos de calidad diseñados para mejorar tu hogar. Visítanos en Internet para ver nuestra línea completa de productos disponibles para las...
- Page 11 Tabla de contenidos Tabla de contenidos............2 Tornillería incluida..............3 Información de seguridad..........2 Contenidos del paquete.............. 4 Garantía................2 Instalación............... 5 Garantía de tres (3) años............2 Mantenimiento y limpieza..........7 Reparación de averías............ 7 ¿Qué cubre?................2 ¿Qué no cubre?................2 Piezas de repuesto............
-
Page 12: Preinstalación
Preinstalación PLANIFICACIÓN DE LA INSTALACIÓN Lea las instrucciones antes de comenzar la instalación. Para evitar dañar este producto, colóquelo sobre una superficie suave, no abrasiva, como una alfombra o un cartón. OBSERVACIÓN: Puede usar cuatro bombillas de base IMPORTANTE: Revisa que el aislamiento de los cables media (E26) de 60 W máx. -
Page 13: Contenidos Del Paquete
Preinstalación (continuación) CONTENIDOS DEL PAQUETE Pieza Descripción Cantidad Placa de montaje Cuerpo de la lámpara Pantalla de cristal... -
Page 14: Instalación
Instalación Preparación de la placa de montaje Instalación de la placa de montaje □ □ Desenrosque los cuatro tornillos de soporte (cortos) (FF) de Coloque el lado plano de la placa de montaje (A) contra la pared y marque la posición de los dos orificios principales con un lápiz la placa de montaje (A). - Page 15 Instalación (continuación) Fijación del cuerpo de la lámpara a la caja de distribución □ Coloque el cuerpo de la lámpara (B) contra la caja de distribución, alinee los cuatro orificios de la placa de montaje (A) y el cuerpo de la lámpara (B) y, a continuación, apriete el tornillo de soporte (corto) (FF). □...
-
Page 16: Mantenimiento Y Limpieza
Mantenimiento y limpieza □ No emplee productos de limpieza que contengan químicos, disolventes ni abrasivos. Utilice únicamente un paño seco para quitar el polvo o limpiar con cuidado. □ Para limpiar la lámpara, desconecte la alimentación apagando el disyuntor del circuito o retirando el fusible de la caja de fusibles. Utilice un paño suave seco o ligeramente mojado para limpiar la superficie exterior de la lámpara. -
Page 17: Piezas De Repuesto
Piezas de repuesto MODELO: DS19069 / DS19070 / DS19074 / DS19075 Pieza Descripción Pieza Descripción Tornillo de la caja de distribución (largo) Tornillo de soporte (corto) (preinstalado en la placa de montaje [A]) Tornillo de toma a tierra verde Tornillo de ajuste manual... - Page 18 ¿Preguntas, problemas o piezas faltantes? Antes de regresar a la tienda, llame al Servicio al Cliente de Hampton Bay, de 8 a.m. a 7 p.m., hora estándar del Este, de Lunes a Viernes, y de 9 a.m. a 6 p.m., hora estándar del Este, Sábados.
Need help?
Do you have a question about the DS19069 and is the answer not in the manual?
Questions and answers