Table of Contents
Advertisement
Available languages
Available languages
Item #418916
Model #HB-4132-MB
USE AND CARE GUIDE
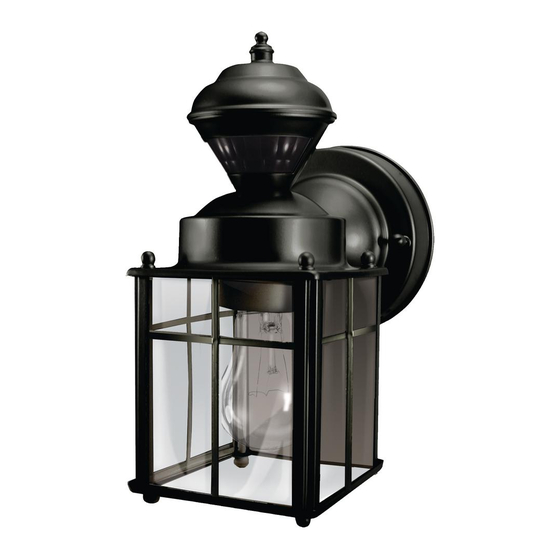
DECORATIVE MOTION LIGHT
Questions, problems, missing parts?
Before returning to the store, call Hampton Bay Customer Service
8 a.m.-7 p.m., EST, Monday-Friday, 9 a.m. - 6 p.m., EST, Saturday
1-855-HD-HAMPTON
HAMPTONBAY.COM
THANK YOU
We appreciate the trust and confidence you have placed in Hampton Bay through the purchase of this decorative
motion light. We strive to continually create quality products designed to enhance your home. Visit us online to see
our full line of products available for your home improvement needs. Thank you for choosing Hampton Bay!
Advertisement
Chapters
Table of Contents

Related Manuals for HAMPTON BAY HB-4132-MB


Summary of Contents for HAMPTON BAY HB-4132-MB
- Page 1 HAMPTONBAY.COM THANK YOU We appreciate the trust and confidence you have placed in Hampton Bay through the purchase of this decorative motion light. We strive to continually create quality products designed to enhance your home. Visit us online to see...
-
Page 2: Table Of Contents
Table of Contents Hardware Included .........4 Table of Contents ........2 Package Contents ........4 Safety Information ........2 Installation ..........5 Warranty ...........2 Wiring Options ..........7 2-Year Limited Warranty ......2 Operation...........8 Pre-Installation .........3 Care and Cleaning ........10 Planning Installation ......3 Troubleshooting ........10 Specifications ........3 Tools Required ........3 Safety Information PRECAUTIONS... -
Page 3: Pre-Installation
Pre-Installation PLANNING INSTALLATION Before installing the light fixture, ensure that all parts are present. Compare parts with the Hardware Included and Package Contents sections. If any part is missing or damaged, do not attempt to assemble, install, or operate this light fixture. -
Page 4: Hardware Included
Pre-Installation (continued) HARDWARE INCLUDED NOTE: Hardware shown to actual size. Part Description Quantity Mounting bracket screw Wire connector Decorative fixture nut (pre-installed) Large mounting screw (pre-installed) Mounting bracket (pre-installed, not to scale) PACKAGE CONTENTS Part Description Quantity Light fixture Motion sensor... -
Page 5: Installation
Installation Removing the mounting bracket □ Remove the two decorative fixture nuts (CC) from the light fixture (A). □ Remove the mounting bracket (EE) from the light fixture (A). Installing the mounting bracket WARNING: Turn the power off at the circuit breaker or fuse. - Page 6 Installation (continued) □ Connect all ground wires to the pigtail Wiring the light fixture wire (2) attached to the green ground screw. NOTE: This light fixture can be wired to control another standard or motion sensing light fixture(s). See Wiring Black to black Options for additional wiring methods.
-
Page 7: Wiring Options
Wiring Options Determining maximum wattage Maximum Lamp when adding light fixtures Wattage Rating for Light Fixture – 100 Watts Maximum Load for CONTROLLING Fixture NOTE: All wiring should be run in accordance with Motion Sensor – the National Electrical Code through conduit or another 500 Watts acceptable means. -
Page 8: Operation
Wiring Options (continued) Wiring motion sensing lights to NOTE: In most installations, an additional wire (same control each other gauge as existing house wire) will have to be installed in the house to connect the two fixtures as primary / primary. White to white IMPORTANT: Total fixture ratings must not exceed 500 Watts (4.1 A). - Page 9 Operation (continued) Adjusting the SENSITIVITY Adjusting the ON-TIME switch switch □ To increase the detection zone, slide the NOTE: The “ON-TIME” switch determines the amount of “SENSITIVITY” switch toward the “HI” position. time the light will stay on full bright after all motion has stopped.
-
Page 10: Care And Cleaning
Care and Cleaning □ To prolong the original appearance, clean the light fixture with clear water and a soft, damp cloth only. □ Do not use paints, solvents, or other chemicals on this light fixture. They could cause a premature deterioration of the finish. - Page 11 Troubleshooting (continued) Problem Possible Cause Solution □ □ The lights stay on The motion sensor may be picking Decrease the “Sensitivity” continuously. up a heat source, such as an air setting or use the lens shield to vent, dryer vent, or brightly painted, reduce the coverage area.
- Page 12 Questions, problems, missing parts? Before returning to the store, call Hampton Bay Customer Service 8 a.m.-7 p.m., EST, Monday-Friday, 9 a.m. - 6 p.m., EST, Saturday 1-855-HD-HAMPTON HAMPTONBAY.COM Retain this manual for future use. 208363-03A...
- Page 13 HAMPTONBAY.COM GRACIAS Agradecemos la confianza que ha depositado en Hampton Bay al comprar esta luz decorativa detectora de movimiento. Procuramos crear continuamente productos de calidad diseñados para mejorar su hogar. Visítenos en internet para ver nuestra línea completa de productos disponibles que necesita para el mejoramiento de su hogar.
-
Page 14: Contenido
Contenido Ferretería Incluida ........16 Contenido ..........14 Contenido del Paquete ......16 Información de seguridad ......14 Instalación ..........17 Garantía...........14 Opciones de cableado ......19 2 años de garantía limitada ....14 Operación ..........20 Antes de la instalación ......15 Cuidado y limpieza .........22 Planificación de la Instalación .....15 Análisis de averías .........22 Especificaciones ........15 Herramientas Requeridas ....15... -
Page 15: Antes De La Instalación
Antes de la instalación PLANIFICACIÓN DE LA INSTALACIÓN Antes de instalar el aparato de luz, esté seguro que estén todas las piezas. Compare las piezas con la Ferretería incluida y las secciones de Contenidos del paquete. Si cualquier pieza falta o está dañada, no intente ensamblar, instalar ni operar este aparato de luz. -
Page 16: Ferretería Incluida
Antes de la instalación (continuación) FERRETERÍA INCLUIDA NOTA: La ferretería se muestra en su tamaño real Pieza Descripción Cantidad Tornillo del soporte de montaje Capuchón para cable Tuerca decorativa del aparato (pre-instalado) Tornillo grande de montaje (pre-instalado) Soporte de montaje (pre-instalado, no está a escala) CONTENIDO DEL PAQUETE Pieza Descripción... -
Page 17: Instalación
Instalación Retiro del soporte de montaje □ Retire los dos tornillos decorativos (CC) de la lámpara (A). □ Retire el soporte de montaje (EE) de la lámpara (A). Instalación del soporte de □ Hale con firmeza el soporte de montaje (EE) montaje para verificar que esté... - Page 18 Instalación (continuación) □ Conecte todos los cables de tierra al cable Cableado del aparato de luz flexible (2) sujetado al tornillo verde de tierra. NOTA: Este aparato puede cablearse para controlar otro(s) aparato(s) de luz estándar o detectores de Negro a Negro movimiento.
-
Page 19: Opciones De Cableado
Opciones de cableado Cómo determinar la potencia Potencia nominal máxima de la máxima al añadir lámparas lámpara para el aparato de luz – 100 vatios Carga máxima para el Aparato NOTA: Todo el cableado debe ser hecho de acuerdo al detector de movimiento –... -
Page 20: Operación
Opciones de cableado (continuación) Cableado de las luces NOTA: En la mayoría de las instalaciones se deberá detectoras de movimiento para instalar un conductor adicional (del mismo calibre que el conductor de la casa) dentro de la casa para conectar los controlarse mutuamente dos aparatos como primaria / primaria. - Page 21 Operación (continuación) Cómo calibrar el interruptor Regulación del interruptor de SENSITIVITY DURACIÓN □ Para aumentar la zona de detección, deslice el NOTA: El interruptor de DURACIÓN determina el lapso de interruptor “SENSITIVITY” hacia la posición “HI”. tiempo que la luz permanece encendida con todo su brillo luego que ha cesado el movimiento.
-
Page 22: Cuidado Y Limpieza
Cuidado y limpieza □ Para prolongar la apariencia original, limpie la lámpara solo con agua limpia y un paño suave y húmedo. □ No use pinturas, solventes ni otros químicos en este aparato de luz. Podrían ser la causa de una prematura deterioración del acabado. - Page 23 Análisis de averías (continuación) Problema Causa Probable Solución □ □ Las luces permanecen El detector de movimiento puede estar Disminuya el ajuste “Sensitivity” encendidas constante- absorbiendo calor de una fuente de calor o use el protector de lente para mente. como una ventosa de aire, una secadora reducir el área de cobertura.
- Page 24 ¿Tiene preguntas, problemas o piezas faltantes? Antes de devolverlo a la tienda, llame a Servicio al Cliente de Defiant de 08 a.m.-7 p.m., EST, Lunes - Viernes, 09 a.m.-6 p.m., EST, sábado. 1-855-HD-HAMPTON HAMPTONBAY.COM Guarde este manual para uso futuro. 208363-03A...
Need help?
Do you have a question about the HB-4132-MB and is the answer not in the manual?
Questions and answers
I cannot get my lights to turn off after installing HB-4132-MB-G, they are wired correct, settings are correct, inside light switch is on? What am I doing wrong?
The lights may not turn off after installing the HAMPTON BAY HB-4132-MB-G due to the following possible reasons:
1. The ON-TIME switch may be set to the "TEST" mode.
Solution: Set the ON-TIME switch to 1, 5, or 10 minutes.
2. The motion sensor may be detecting continuous movement (e.g., small animals or traffic).
Solution: Lower the "Sensitivity" setting or use the lens shield to reduce the coverage area.
3. The outdoor temperature may be too close to body temperature, causing false triggers.
Solution: Reduce the "Sensitivity" setting.
This answer is automatically generated