
Related Manuals for Gorenje IT 606 ASC


Summary of Contents for Gorenje IT 606 ASC
- Page 1 Instructions for use, installation, and connection Glass ceramic built-in induction hob...
-
Page 2: Table Of Contents
Glass ceramic built-in induction hob Dear customer ! Built-in glass ceramic induction hob is intended solely for use in households. Our products are packed in environment- friendly materials which can be safely recycled, disposed of, or destroyed. Respective packaging materials are labeled accordingly. -
Page 3: Important Warnings
Important warnings • Installation of the appliance into a kitchen worktop and its connection to the power mains and the gas supply may only be performed by an adequately qualifi ed technician. • Do not leave small children unattended when the appliance is in operation. Risk of burning and scalding! •... -
Page 4: Ceramic-Glass Cooktop
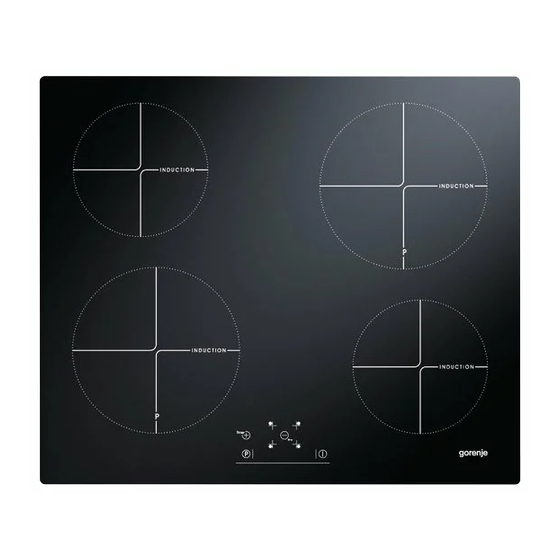
Ceramic-glass cooktop 1. Induction hotplate rear (left - A) 4. Induction hotplate front right 2. Induction hotplate rear right 5. Hob control panel 3. Induction hotplate front left Operating the cooking hob A On/off sensor G Timer on/off sensor, (+) B Hotplate power or remaining heat displays H Timer display B1 Decimal dot on the power displays:... - Page 5 Induction hotplate • Ceramic glass hob is fi tted with three or four hotplates. Hob function principle surface is completely fl at and smooth, without edges to accumulate dirt. • The hob is fi tted with high power induction hotplates. Heat is generated directly at the bottom of the dish, where it is most needed, without any losses through the ceramic glass surface.
- Page 6 The magnet test Using a small magnet, it is possible to check whether the bottom of your cookware can be magnetized .Use only cookware to which the magnet will stick. Pan recognition One of the many advantages of an induction cooking hob is the pan, or cookware, recognition.
- Page 7 Power setting Purpose Off, using remaining heat 1 - 2 Maintaining warm food, slow simmer of smaller quantities (lowest setting) Slow simmer (continuation of cooking after a powerful start-up) 4 - 5 Slow cooking (continuation) of larger quantities, roasting larger chunks Roasting, browning 7 - 8 Roasting...
-
Page 8: Hob Control
Hob control • After connecting the glass ceramic hob to the power mains, all symbols on the display will light up briefl y. The cooking hob is then ready for operation. • The cooking hob is fi tted with electronic sensors which are activated by touching the designated surface areas with your fi... - Page 9 Instant power-off • The desired cooking zone must be activated, which is indicated by a lit up decimal point (B1). • The cooking zone is powered off if the sensors (+) and (–) (C and E) are touched simultaneously.(+) in (-) (C in E). Powering off the cooking •...
- Page 10 hotplate was switched off, the remaining heat may be used for warming up food or for melting. Even when the symbol “H” disappears, the hotplate may still be hot. Be careful of burns! Power boost function In order to quickly heat up the food on cooking zones with the (cooking zones with symbol “P”, activate the Power Boost function.
- Page 11 hotplate switches to the preselected power setting, displayed constantly on the indicator. • If you remove the dish from the hotplate and then within the next ten minutes return it on the hotplate, the fast heating function will resume operating fully to the end. If you activated the automatic fast heating function and also switched on extra powerful heating, the latter will prevail over the automatic setting.
- Page 12 Operation time limit Safety switch off Hours lapse prior safety switch Power setting Maximum continuous operation of a particular hotplate is limited, and the duration is displayed in the above chart. When the hotplate is switched off by the safety mechanism, the indicator displays symbols “0”, or “H”...
- Page 13 Activating the timer • Touch the cooking zone on/off sensor (C) to select the desired cooking zone. Decimal point (B1) will light up. • Use the sensor “+” or “-” (C or E) to select the power level 1-9. • Touch the timer on/off sensor (G) to activate the timer. “00” will appear on the timer display (H).
- Page 14 Instant timer deactivation • Touch the cooking zone on/off sensor (C) to activate the desired cooking zone. The decimal point (B1) will light up. • Simultaneously press the sensors “+” and “-” (G and E) to turn off the timer. “00” will appear on the timer display (H) while the cooking zone display will continue to indicate the selected power level.
-
Page 15: Cleaning And Maintenance Of Ceramic-Glass Hob
Safety functions and The cooking hob is fi tted with overheating protection sensors. error display If the temperature rises too high, individual cooking zones or even the entire cooking hob can be temporarily switched off automatically. Error, possible cause, remedy •... - Page 16 Make sure any residues of cleaning agents are thoroughly removed, as they could damage the glass-ceramic hob when the cooking zones heat up (Figure 3). Remove stubborn and burnt residues with a scraper (fi gure 4). Be careful when handling the scraper to prevent injury. Only use the scraper when dirt cannot be removed with a wet cloth or special cleaners for glass ceramic surfaces.
-
Page 17: Installation
Installation Important warnings • Installation of the appliance into a kitchen worktop and its connection to the power mains may only be performed by an adequately qualifi ed technician. • Veneer or other fi nish of the piece of kitchen furniture into which the hob is to be built in should be treated with heat resistant glue (100°C);... - Page 18 Worktop cutout dimensions ( )* - SIVK7 • Cooking hobs can be installed into worktops that are 30 to 50 mm thick. • If the board is thicker than 40 mm, its inner edge should be trimmed, or ground (Figure A). Thus, suffi cient air circulation will be provided.
- Page 19 placed near the hob. Danger of explosion! There should be a clearance of 20 mm between the drawer contents and the fan entry slots. B Lower kitchen cabinet with an oven • Installing the oven under an induction hob is possible with oven types EVP4.., EVP2.., which are fi...
-
Page 20: Connection To The Power Supplay
Connection to the power supplay • Connections may be carried out by a qualifi ed technician only. The earthing protection must comply with the standing regulations. • Connection terminals are revealed when the connection box cover is removed. • Prior any attempted connection check that the voltage indicated on the rating plate is in line with your home power supply. - Page 21 Installation diagram Connection may be carried out by means of: - rubber coated connection cables, model H05 RR-F 4x1,5 with yellow-green earthing cable; - PVC insulated connection cables, model H05 VV-F 4x1,5 with yellow-green earthing cable; or any other suitable cables.
-
Page 22: Technical Information
Technical information Rating plate A Serial number B Code C Model D Type E Trademark F Technical information G Compliance indications / symbols WE RESERVE THE RIGHT TO ALTER THE SPECIFICATIONS WITH NO INFLUENCE TO THE OPERATION OF THE APPLIANCE. - Page 24 BAZNA INDUKCIJA en (03-12)
Need help?
Do you have a question about the IT 606 ASC and is the answer not in the manual?
Questions and answers