Table of Contents
Advertisement
Quick Links
Quick Start Guide
for Magnum Shear Models #909, #913, #920, #926
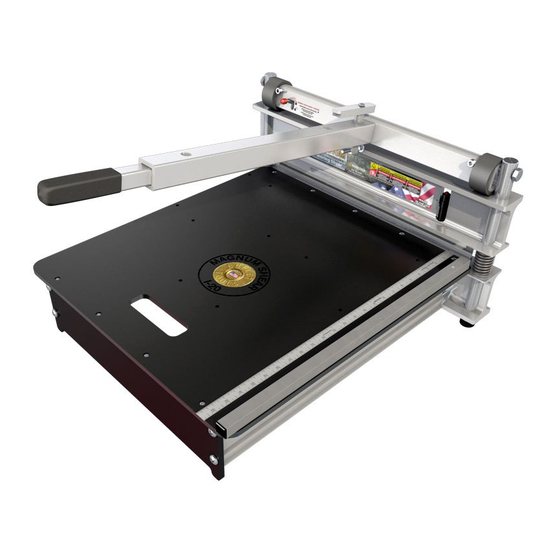
In the Box:
(1) Power Assembly
(1) Tail
(1) Handle Assembly
(2) Rails
(1) Fence
(1) Hone Stone
(1) Table
(1) Hardware Kit
ASSEMBLING YOUR SHEAR
IMPORTANT! Start all screws BY HAND when assembling your shear. This will help avoid cross-threading.
1. ATTACH RAILS
Attach rails to Power Assembly base using
Item A screws, fitted with Item B star washers.
Power Assembly
3. ATTACH TABLE
A. Attach front of table to base, using Item D screws.
Tighten with #3 Phillips.
B.
Attach back of table to tail using Item E screws.
Tighten with #2 Phillips.
4. ATTACH HANDLE
Remove handle bolt Item F
from handle, and install in
camshaft. Insert handle into
camshaft. Note: Backstroke
Stop must be on top! Tighten
with 10mm hex wrench
Item G.
Do NOT remove plastic
tie and orange tag until
handle is bolted in place
HANDLE UNDER
EXTREME PRESSURE
DO NOT ALLOW TO
SLAM BACK!
Item A. (4) 8mm x 60mm PH Phillips Machine Screws
Item B. (4) M8 Star Washers
Item C. (4) 8mm x 25mm PH Phillips Machine Screws
Item D. (6) 6mm x 16mm PH PHillips Machine Screws
The Hardware Kit is used in multiple models. Your Shear may not use all of the items listed.
Tools needed: #2 & #3 Phillips head screwdrivers.
1
4
Item F
In the Hardware Kit:
2. ATTACH TAIL
Attach tail to rails using Item C screws.
Make sure holes in tail are facing up.
2
3A
Item D
5.
ATTACH FENCE
Insert fence into one of the six hole sets on the table:
there are two 90º and four 45º locations. The fence is
friction fit (requires effort to insert or remove).
Item E. (5) #10 x 1 PH Phillips Self Tapping Screws
Item F. (1) M16 x 50 BHCS (Pre-Installed in Cam)
Item G. (1) 10mm Hex Wrench
Tail
Item E
3B
5
Advertisement
Table of Contents

Subscribe to Our Youtube Channel
Related Manuals for Bullet tools Magnum 909


Summary of Contents for Bullet tools Magnum 909
- Page 1 Quick Start Guide for Magnum Shear Models #909, #913, #920, #926 In the Box: In the Hardware Kit: (1) Power Assembly (1) Tail Item A. (4) 8mm x 60mm PH Phillips Machine Screws Item E. (5) #10 x 1 PH Phillips Self Tapping Screws Item B.
- Page 2 Please note: Approved materials may vary in density and hardness. If extreme pressure is required to cut a product, it may result in damage to your machine. Please contact Bullet Tools before proceeding. Warranty is void if an unapproved product damages the machine.
Need help?
Do you have a question about the Magnum 909 and is the answer not in the manual?
Questions and answers