Table of Contents
Advertisement
Quick Links
Advertisement
Table of Contents

Subscribe to Our Youtube Channel
Related Manuals for infobit iCam P30


Summary of Contents for infobit iCam P30
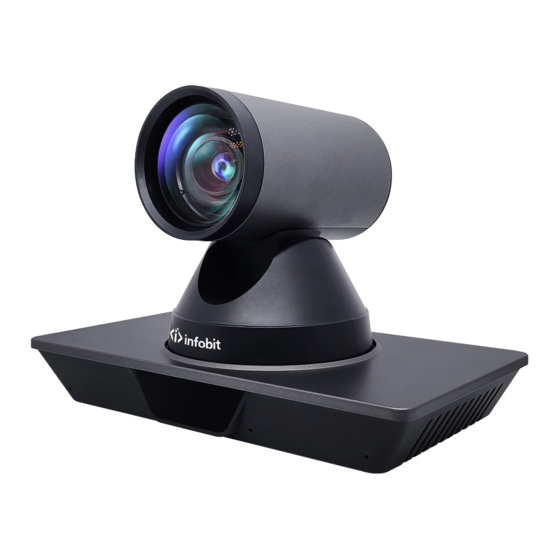
- Page 1 User Manual iCam P30 4K60 PTZ Conference Camera User Manual English (V1.0)
-
Page 2: Table Of Contents
User Manual Catalogue 1 Note..........................1 2 Packing List ........................1 3 Quick Start ........................1 4 About Product ......................3 4.1 Features ............................3 4.2 Product Specification ........................3 4.3 Interfaces and Buttons ........................5 4.4 Dimension ............................5 4.5 Remote Control ..........................6 4.6 RS232 Interface .......................... - Page 3 6.6.3 Image Settings ........................19 6.6.4 Audio Settings ........................19 6.6.5 System Settings ........................20 6.6.6 Network Settings ......................... 20 6.6.7 Device Information ......................21 6.7 Download the Upgrade Program ....................21 7 Maintenance and Troubleshooting ................21 INFOBIT AV www.infobitav.com info@infobitav.com...
-
Page 4: Note
User Manual environment to avoid any cover (plastic Note material) damage. Make sure there is no obstacle within rotation range. Electric Safety Please never power on before installation is Installation and operation must accord with completed. electric safety standard. Do not Dismantle the Camera Use Caution to Transport We are not responsible for any unauthorized Avoid stress, vibration or soakage in transport,... - Page 5 User Manual INFOBIT AV www.infobitav.com info@infobitav.com...
-
Page 6: About Product
User Manual can be controlled remotely. 2) Connect the power adapter to the power connector on the rear panel of the camera. 4.2 Product Specification The power indicator on the front panel of 4K Video Conference the camera is on. Name Camera 3) After the camera is powered on, it starts to... - Page 7 User Manual Pan Speed Audio 1.6°/s ~ 76°/s Range Compression Tilt Speed Audio Bit Rate 96K, 128K, 256K 0.5°/s ~ 15°/s Range TCP/IP, HTTP, RTSP, H & V Flip Support Protocols RTMP/RTMPS, ONVIF, DHCP, SRT, Multicast Image Freeze Support Input/Output Interface Number of Preset Network...
-
Page 8: Interfaces And Buttons
User Manual 4.3 Interfaces and Buttons Item Name Restore Button Network Interface RS232 IN Interface RS485 Interface LINE IN Interface HDMI Interface 3G-SDI Interface USB 3.0 Interface DC 12V Interface Power Switch 4.4 Dimension... -
Page 9: Remote Control
User Manual 5. HOME Key 4.5 Remote Control Confirm menu, enter the submenu or the PTZ will back to the middle position after pressed it 6. Return Key Return back the last level menu 7. Zoom Key Slow Zoom: Zoom In [+] or Zoom Out [-] slowly Fast Zoom: Zoom In [+] or Zoom Out [-] fast 8. -
Page 10: Rs232 Interface
User Manual 16. Backlight Key BLC ON/OFF: Press this button to enable the backlight compensation. Press it again to disable the backlight compensation. NOTE: Effective only in auto exposure mode. If a light behind the subject, the subject will become dark. In this case, press the backlight ON/OFF button. -
Page 11: Gui Settings
User Manual RS232 Communication Control GUI Settings The camera is controlled via RS232. The RS232 serial port parameters are as follows: 5.1 MENU Baud rate: 2400/4800/9600/38400; Press [MENU] button to display the main menu Starting position: 1 bit on the normal screen, using arrow button to Data bits: 8 bits move the cursor to the item to be set. -
Page 12: Color
User Manual ExpComp: Exposure the compensation value, COLOR Change Value optional items: -7 ~ 7 (Effective only in [Menu] Back ExpCompMode item to On). Backlight: Set the backlight compensation, optional items: On, Off (Effective only in Auto mode). Bright: Intensity control, optional items: 0 ~ 17 (Effective only in Bright mode). -
Page 13: Image
User Manual WB-Mode: White balance mode, optional 0 ~ 14. items: Auto, Indoor, Outdoor, One Push, Sharpness: Sharpness adjustment, optional Manual, VAR. items: Auto, 0 ~ 15. RG Tuning: Red gain fine-tuning, optional Flip-H: Image flipped horizontally, optional items: -10 ~ +10 (Effective only in Auto, One items: On, Off. -
Page 14: Noise Reduction
User Manual Call Preset Speed: Optional items: 1 ~ 24. Pre Attr: Optional items: On, Off. Pre Zoom Speed: Optional items: 0 ~ 7. 5.6 NOISE REDUCTION Move the main menu cursor to [NOISE REDUCTION], and press [HOME] key enter the noise reduction page, as shown in the following figure. -
Page 15: Communication Setup
User Manual optional items: Yes, No. 5.8 COMMUNICATION SETUP Move the main menu cursor to [COMMUNICATION SETUP], and press [HOME] key enter the communication setup page, as shown in the following figure. COMMUNICATION SETUP Protocol VISCA V_Address V_AddrFix Net Mode Serial Baudrate 9600... -
Page 16: Network Function
User Manual 6.4.1 Setup IP Address Network Function If you don't know camera IP, view as below: Method 1: Press * and # and 4 on remote 6.1 Operating Environment controller one by one, the camera IP address Operating System: Windows 7/8/10, Mac OS X, will be shown on screen. -
Page 17: Visit/Access Camera
User Manual Change IP address: Step 1 Search the IP address of camera. Step 2 Select the camera IP of you want to change. Step 3 Select the config dialog of upgrade applets. Step 4 Change the IP address, netmask and gateway, then click “Set”. -
Page 18: Camera Controlled By Wan
User Manual http://www.videolan.org/vlc/#download and If the camera port default is 80, then Install the 32-bit VLC (player software). After unnecessary to input port number, use host installation, login again, will show as above. name can access camera directly. 6.5 Camera Controlled by WAN 6.5.3 VLC Stream Media Player Monitor 6.5.1 Setup IP Controlled by Dynamic DNS Visit VLC Media Server Procedure... -
Page 19: Camera Parameter Setup
User Manual B. PTZ Setup 6.6 Camera Parameter Setup 6.6.1 Homepage Introduction Menu All pages include two menu bars: Real time monitoring: displaying video image Parameter setup: with function buttons. 1) Pan and Tilt Control A. Video Viewing Window Up, Down, Left and Right arrows and the home Video viewing window must be same as video button allow you to manually drive the camera resolution, the bigger the resolution is, the... - Page 20 User Manual between 0 and 254 into the Preset box. to change the language of the webpage. Click the "Set" button to save the current location with that preset number. Click the “Call” button to cause the camera to return to that position.
-
Page 21: Video Settings
User Manual 4) Resolution 6.6.2 Video Settings First stream support 3840x2160, 1920x1080, 1280x720, 1024x576, 960x540, 640x480, 640x360. Second stream support 1920x1080, 1280x720, 1024x576, 720x576 (50Hz support), 720x480 (60Hz support), 720x408, 640x360, 480x270, 320x240, 320x180; The bigger resolution is, the clearer the image will be, more network bandwidth will be taken. -
Page 22: Image Settings
User Manual 11) Split Mode 5) Hue Select split mode, optional items: Fixed blocks, Hue 0 ~ 14, slider control, on the right shows Fixed bytes. the corresponding numerical. Default value is 7. 12) Slice Size 6) Flip & Mirror Set the size of slice. -
Page 23: System Settings
User Manual 6.6.5 System Settings 1) Work Mode The default work mode is RTSP. Optional items: RTSP, SDK, Multicast. 2) Reboot Click the “Reboot” button, system restart. 3) Username and password The user can modify the password (letters and Numbers only). 6.6.6 Network Settings 1) Lan Settings Default the IP address is 192.168.100.88, the... -
Page 24: Device Information
User Manual protocol, use the VLC tools broadcast, default port: 554. C. PTZ Port Support TCP connection then control camera, default port: 5678. D. UDP Port Support UDP protocol, default port: 1259. 6.7 Download the Upgrade Program 3) Control Protocol Settings If you need the camera upgrade program, Setting the camera control communication please contact the manufacturer. - Page 25 User Manual Troubleshooting Unable to access video conference camera Image through IE Browser The monitor shows no image 1) Using PC to access the network to test 1) Check that the camera power supply is whether the network access can work connected, the voltage is normal, and the properly, first of all, the network fault power indicator light is always on.
- Page 26 User Manual Forget the IP address or login password Please remember (The default IP address: 192.168.100.88; default user name: admin; default password: admin). Control Remote control cannot control 1) Check and replace the new battery for the remote controller. 2) Check whether the camera working mode is correct.
Need help?
Do you have a question about the iCam P30 and is the answer not in the manual?
Questions and answers