Table of Contents
Advertisement
Quick Links
Advertisement
Table of Contents

Related Manuals for Global Water Water Box


Summary of Contents for Global Water Water Box
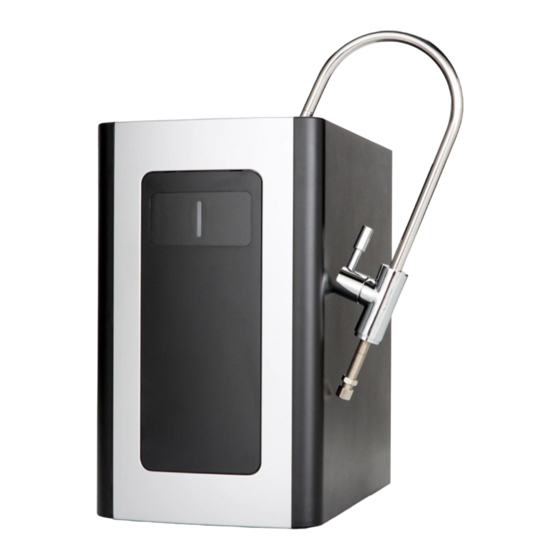
- Page 1 WATER BOX OPERATION MANUAL P a g e...
-
Page 2: Table Of Contents
Table of Contents Introduction…….……………………………………………………………………………………..pg.3 Setting up the Water Box.……………………………………………………………………….pg.3 How The Water Box Works…….……………………………………………………………...pg.4 Water Connections………………….…………………………………………………………..…pg.5 Feed Water Connections………………………………………………………………….……p.g.6 Drain Connections………..……………………………………………………………………….p.g.7 Installing the Faucet…….……………….……………………………………………………..pg.8,9 Battery Installation……………………….…………………………………………………..pg.9 EZ Connections…………………………….……………………………………………………….pg.10 System Start Up………………………….…………………………………………………………pg.11 Filter Replacement…………………….………………………………………………………….pg.12 Reverse Osmosis Membrane Replacement.…………………………………….……pg.13 Troubleshooting……………………………………….………………………………………..pg.14 Specifications………………………………………….………………………………………..….pg.14 Warranty……………………………………………………….……………………………………..pg.15 List of Figures Figure 1 Water Connections…………….. -
Page 3: Introduction
The Water Box is connected to your city or well water supply to efficiently filter out tastes and odor, and to remove microscopic contaminants by using reverse osmosis purification technology. The Water Box only dispenses room temperature water. -
Page 4: How The Water Box Works
How the Water Box works The Water Box Reverse Osmosis (RO) System uses a semipermeable membrane to reduce dissolved salts and minerals, improving the taste and odor of your water. The RO membrane is made of layers of micron- thin film wound around a hollow center core. Water molecules can pass through the membrane, but dissolved salts and minerals are rejected. -
Page 5: Water Connections
Water Box Connections When you receive the water cooler, the water connections on the back have tube plugs in them. These tube sections must be removed before making all your connections. To remove the tube sections see Page 9 “Disconnect”. The 1/4" plastic tubing should be used for making the Feed Water, Drain connections and Faucet connections. -
Page 6: Feed Water Connections
Feed Water Connections Figure 2. Feed Water Connection P a g e... -
Page 7: Drain Connections
Drain Connection (Applies to models with Reverse Osmosis “RO” only) The drain line in the back (Fig. 4) must be hooked to the drain line ahead of the normal sink water trap. See Figure 3 below. Place the 2 part drain saddle on the drain pipe before the drain trap. -
Page 8: Installing The Faucet
Installing the Faucet 1. Faucet base 2. Small washer and chrome plate 3. Large washer 4. Kitchen sink 5. Bottom plate 6. Lock Washer 7. Lock Nut 8. Tube Insert 9. Sleeve 10. Faucet Nut Figure 4. Faucet Installation Drill 5/8” hole on sink The Faucet should be positioned with aesthetics, function and convenience in mind. -
Page 9: Battery Installation
Battery Installation To install the batteries simply unscrew the top cover of the water box. The 2 screws are located in the back of the Water Box on the top cover. Install the batteries and LED light will illuminate. P a g e... -
Page 10: Ez Connections
EZ Connections The standard tubing connections on the water coolers are EZ connect fittings. Use the tubing provided and follow the instructions below to make the connections. If you cut the tubing, make sure it is a square cut, fits squarely in the fitting and seals properly. -
Page 11: System Start Up
To do this simply turn on the water and open the faucet. You will notice water coming out of the drain line. This is normal and will stop when the Water Box is completely filled with water. Let the system flush through the faucet for about an hour. In that time you will notice fine black carbon particles. -
Page 12: Filter Replacement
Open the water supply and let water flow through filters. Leave the faucet on and let the water activate the filters for 1 hour. i) Let the Water Box fill up ensuring you don’t have any leaks then re-install the panels. -
Page 13: Reverse Osmosis Membrane Replacement
Reverse Osmosis Membrane Replacement (every three years) (RO) a) Use the same procedure as above sec a-c. b) Remove the RO stage from the clips. Disconnect the white tubing from the RO housing cap. c) Remove the cap from the housing by unscrewing it. d) Using a pair of pliers, remove the RO element from the housing by grasping the tube end and pulling it out. -
Page 14: Troubleshooting
Leaks at connections Depress plastic collar Open the water box and pull tube out. and make sure each Cut off 1 inch of tube. and every tube is (Make sure you cut pushed in. -
Page 15: Warranty
Warranty All Global Water products are warranted to be free from defects in materials and workmanship under normal use within the condition of operation listed for a period of 1 year from date of purchase. There is no liability assumed by the company for damage due to water leakage or other secondary effects from any component defect. - Page 16 Cleaner, Healthier Water. 3937 Pembroke road, Hollywood, Florida 33021 www.Bluline.com Tel. (786) 235-2518 Fax (786) 207-2570 Email Info@Bluline.com 16 | P a g e...
Need help?
Do you have a question about the Water Box and is the answer not in the manual?
Questions and answers