Table of Contents
Advertisement
Quick Links
Advertisement
Table of Contents

Subscribe to Our Youtube Channel
Summary of Contents for Global Water RO6
- Page 1 Reverse Osmosis Systems RO6 Pomp model User's Manual...
-
Page 2: Dear Customer
Thank you for purchasing this water treatment system. Congratulation, you made the perfect choice. We're sure, that the product will meet your expectations to enjoy drinking healthy, pure water. We make every effort to ensure that the devices manufactured by Global Water are reliable and can be operated for many years. -
Page 3: The Kit Includes
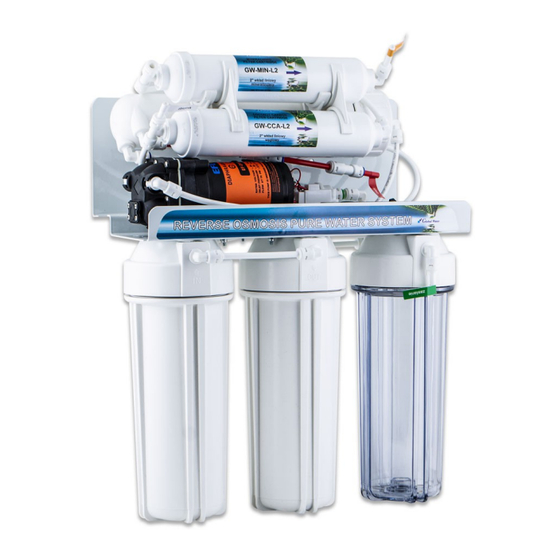
The Kit Includes: 1. Reverse Osmosis System: 1 set. 2. Clean Water Storage Tank: 1 pc. 3. Tank Valve: 1 pc. 4. Water Supply Connection: 1 set. 5. Drain Clamp: 1 set. 6. Clean Water Tap: 1 pc. 7. Flexible Hoses: 1 set. 8. -
Page 4: Technical Specification
Safety: Before the installation please read carefully all instructions below and follow all safety rules concerning starting and operating the device. Any questions? Please contact the Global Water T echnical Support. Following all the recommendations in this manual will ensure a safe and optimal use of your device. -
Page 5: Installation
Installation: Good to know: All seals during assembly and service should only be made with generally available Teflon tape. Non-threaded connections are made with quick couplings. How to Use the Quick Couplings To connect a hose to a quick coupling correctly, cut it straight at right angles. After cutting the hose, check its tip at a length of about 2.5 cm, to make sure there are no cuts, scratches or other damage. - Page 6 Water Supply Connection Installation: After pointing the cold water supply pipe before the kitchen tap, turn off the raw water shut-off valve and install the integrated connection. Fix the flexible hose to the quick coupling and cut it to the appropriate length. We recommend to leave a little more hose between the valve and the unit for later use.
- Page 7 Filter Tap Installation: Determine the location for the clean water tap. Be sure to position it in a way the water stream from the tap spout is aiming the sink. Before installation, make sure that there are no obstructions under the countertop or the edge of the sink where you intend to drill the holes.
- Page 8 Filter taps equipped with quick couplers for the hose: install the tap as described on the previous page. After screwing the tap to the kitchen counter or sink, connect the quick couplings to the tap pins, and then connect the flexible hoses to the quick couplings. If the quick couplings are equipped with the locking clips, before installing the hose, remove the locking clip, then push in the hose and lock with the clip.
-
Page 9: Drain Clamp Installation
Drain Clamp Installation The drain clamp should be mounted after the drain trap on the drain pipe from the sink. When the clamp is mounted, drill a 5 mm hole in the sewer pipe through the hole for the hose. Then push the red hose into the coupling in the clamp. -
Page 10: Storage Tank Installation
Storage Tank Installation: Clean water tank can be placed anywhere in the cabinet under the sink. Depending on the model, the tank has a connector for the ball valve located on the top or on a side. The ball valve is in the installation kit. Metal tanks threads must be sealed with Teflon Tape. Plastic tanks are fitted with rubber gasket—no additional seal is required. - Page 11 Leak Detector (Optional): The leak detection shut-off valve should be installed on the water supply line of the system. To do this, cut the hose in the correct length and connect it to the leak detector in accordance with the water flow direction shown on the leak detector housing.
- Page 12 Hoses Installation: mineralized water clean water tank drain line water supply...
-
Page 13: System Operation Test
1. Turn off the tank valve. Don't take water through the filter tap. 2. After 2-3 minutes or so the pump should switch off itself. 3. If in doubt, please contact Global Water Technical Support. Your reverse osmosis system is ready to go! - Page 14 Cartridges Replacement Schedule: Regular cartridges replacement is necessary for your device to work properly. The local conditions and feed water quality determine the time of replacement. We recommend not to exceed the following cartridge replacement periods: Pre-Filter 5 microns, GW-PS5-10: - recommended replacement: max every 6 months Pre-Filter 1 micron, GW-PS1-10: - recommended replacement: max every 6 months...
-
Page 17: Storing The Device
Service and Maintenance: 1. Never use the device when it is broken down or malfunctioning. Turn off the water supply and contact the Global Water T immediately. echnical Support 2. For all repairs, periodical cartridges replacement and maintenance only manufacturer-approved parts should be used. - Page 18 Your Personal Water Expert „Water filters are our specialty” Clean and soft water in the whole house, lifetime warranty: Kinetico water softener Global Water Sp. z o.o. [Ltd.] tel. +48 32 360 25 43, +48 733 709 605 (English) sklep@osmoza.pl sklep.osmoza.pl...


Need help?
Do you have a question about the RO6 and is the answer not in the manual?
Questions and answers