Advertisement
Available languages
Available languages
Quick Links
Advertisement

Related Manuals for Joy Sport Life Fit


Summary of Contents for Joy Sport Life Fit
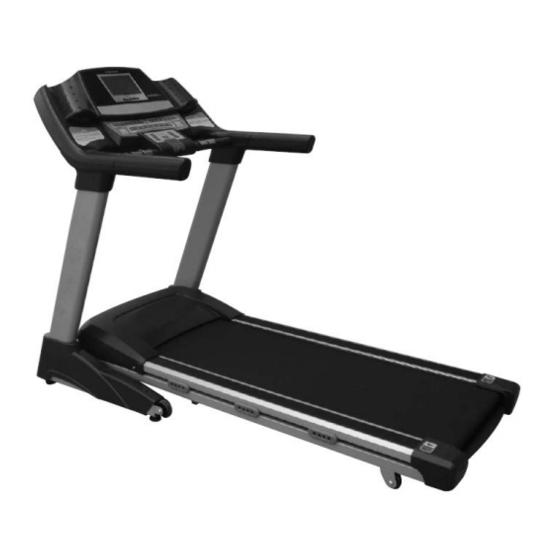
- Page 1 HANDLEIDING Joy Sport Life Fit...
-
Page 2: Table Of Contents
CONTENTS SAFETY CONSIDERATION TECHNOLOGICALDATA INSTALLATION GUIDE THE PARTNAME OF THE CONTROL METER 4 DEBUGGING GUIDE FOLDING OPERATION OPERATING GUIDE DAILY MAINTENANCE LIST OF ITEM IN THE PACKAGE 15 COMMON FAULT AND THE PROCESSING METHOD 16 APPENDIX:PULSE LEVEL TABLES... -
Page 3: Safety Consideration
Ⅰ SAFETY CONSIDERATION FRIENDLY REMIND: Because of the improvement of technology, if there have any changes, all the right for interpretation belong to our company. WARNINGS: - The treadmill should be put inside of room and avoid aquosity, water on the treadmill is prohibited and any object is forbidden to be put on or inserted into treadmill. -
Page 4: Technologicaldata
- The heart disease patient should not use the treadmill alone, and should not use the automatic speed change function, either. - Please confirm the speed according to your physical condition. The patient should use the machine under the direction of the doctor. - Please shut off the treadmill power in time after finishing using it. -
Page 5: Installation Guide
Ⅲ INSTALLATION GUIDE 1. Open the packing chest and 2. Connect the polings and carry out the mainframe of the the mainframe with treadmill, put theconnect line in M10x70, locknut M10 and the mainframe through the right bolt M10x20 poling. Fix the base sheathings on 4. - Page 6 7. Fix the meter sheathings with 8. Loosen the pack fixed stick, self-tapping M4.2×16. and move to the suitable place to avoid scotching. ⅣTHE PARTS NAME&FUNCTION OF CONTROL METER HX—0918LCD: 13 14 15 16 18 19 17 20 21 1 Start key When the treadmill is in stop state, it begins to work if we press this key;...
- Page 7 4 Grade rise and decline keys 5 Speed up and down keys When the treadmill is running,press „speed up‟ and „speed down‟ key,the speed will increase or decrease;when in the set state, press this key to amend the data. 6 Handle pulse sensor: 7 Setup key It is used to set the time,distance and pulse,and to choose the speed programmes.
-
Page 8: Debugging Guide
Ⅴ DEBUGGING GUIDE 1 After finish assembling, insert safe key into the corresponding jack. 2 Before start, checking whether the voltage is normal, 3-core cable has a good earth and pull the running belt to check whether it moves well and if there is exceptional noise. - Page 9 Ⅶ OPERATION 1. Switch on power: Insert three poles plug into socket (note: it must have a complete earthing); and insert safe key, then switch on power, the monitor will moo, and all data become zero, here the treadmill is in stop state. 2.
- Page 10 5. Direct speed choice key Under the electric meter are 2--16, all the 8 keys are direct speed choice key, when start treadmill, on non-pulse control speed state, choose any number key, the treadmill will auto adjust to the chosen key speed. 6.
- Page 11 Long Start/Stop/Shut Short time time NEXT The next one down press press Play/Stop Short Long time Speediness time Play/Pause press volume added press Short Play state:switch Short time Single step time press volume added press Long Speediness Short time volume time press reduced...
-
Page 12: Daily Maintenance
Ⅷ DAILY MAINTENANCE: 1. Running board and running belt ●Brief: The motorized treadmill use imported running belt, it‟s with lower friction coefficient, higher intensity of tension, the running board is specially with double shock absorption system, its special smoothness and abrasion prevention make the movement more comfortable and fluent . - Page 13 3. Clean Please eliminate the dust regularly after a period of use, to keep the power panel and the head of the sensor clean. 4. Evaluation of friction The friction between running belt and board will be increased as dust or reduced lubrication, this perhaps can harm motor, controller increased friction is with following character: (1) When shut off power of treadmill, the running belt can‟t be moved or it‟s difficult for user to move by foot.
- Page 14 7. Adjust motor belt All motor belts are adjusted before the treadmill leave the factory, but after a period of time of use, the belt will become flab and skid, this can be adjusted under the help of the professional person. Adjusting supporting plate Adjusting spring Pinch roller device...
-
Page 15: List Of Item In The Package
ⅨLIST OF ITEM IN THE PACKAGE: DESCRIPTION UNIT QUANTITY Mainframe Poling SUIT Electrical Head Safety Switch Silicon Oil BOTTLE Base sheathing SUIT Meter sheathing SUIT Audio frequency line(no one in 0918TV) Earphone PAIR Specification Power line Standard component... -
Page 16: Common Fault And The Processing Method
ⅩCOMMON FAULT AND THE PROCESSING METHOD Fault Symptom Possible Causes Solution 1. The attaching plug is Either turning on or turning not inserted well. 2 .The 1. Insert it again. 2. off the switch power, the electrical head‟s Connect it once treadmill can not display attaching plug is not more. -
Page 17: Appendix:pulse Level Tables
APPENDIX:PULSE LEVEL TABLES Attention: All the pulse test value above is just an reference. If the pulse data is too high, we can adjust it by the heart rate control speed function. We can choose the control speed numerical value according to the age , the time we exercises, and the table. - Page 18 HANDLEIDING Joy Sport Life Fit...
- Page 19 Inhoud Veiligheids voorschriften blz. 1 Technische gegevens blz. 2 Installatie overzicht blz. 3 Overzicht display blz. 4 Test voor gebruik blz. 8 Op- en uitvouw instructies blz. 8 Bedienings overzicht blz. 9 Dagelijks onderhoud blz. 13 Onderdelenlijst blz. 15 Storingen en wat te doen blz.
- Page 20 Ⅰ Veiligheidsvoorschriften LET OP: Omdat er vanwege de vooruitgang van technologie veranderingen plaats kunnen vinden, blijven alle rechten voor interpretatie aan ons bedrijf. Waarschuwingen: - Lees deze handleiding goed door, en hou u aan de regels tijdens het gebruik voor uw eigen veiligheid.
- Page 21 - Een patient met hartslagproblemen mag de loopband niet alleen gebruiken en mag ook niet de functie voor automatische snelheidsverandering gebruiken. - Bevestig de snelheid naar aanleiding van uw lichamelijke conditie. - Schakel de loopband op tijd uit nadat u klaar bent met het gebruik. - De loopband moet geplaatst worden op een ruime plaats.
- Page 22 Ⅲ Installatie instructies 1. Open het pakket en til het hoofdframe 2. Verbind de palen en het eruit. Stop de kabel door de rechter paal. hoofdframe met bout M10×70, borgmoer M10 and bout M10×20. 3. Bevestig de basiskappen op de linker 4.
- Page 23 7. Bevestig de displaykapjes met 8. Draai de tranportvergrendeling los, zelftappende bout M4.2×16. en verplaats deze naar een passende plaats. ⅣOnderdelen & Functies van de display: 1 Start knop Als de loopband stilstaat, begint hij te draaien als u deze knop indrukt. Als de machine in “set-status”...
- Page 24 4 Graden omhoog en omlaag knoppen. 5 Snelheid omhoog en omloog knoppen Wanneer de loopband draait, druk dan op de “snelheid omhoog” of “snelheid omlaag” knop en de snelheid neemt toe of af. Tijdens de “set-status”, drukt u op deze knoppen om de data aan te passen. 6 Handvat hartslagmeters.
- Page 25 Ⅴ Test voor gebruik 1 Na het monteren, plaats de veiligheidssleutel in de bijbehorende aansluiting. 2 Voordat u start, controleer of het voltage normaal is en de hoofdkabel een goede aarde heeft. Trek aan de band om te controleren of hij normaal loopt en geen herrie maakt.
- Page 26 Ⅶ Bedienings overzicht 1. Schakel stroom aan: Doe de 2-polige stekker in het stopcontact (opmerking: hij moet compleet geaard zijn) en doe de veiligheidssleutel erin. Zet daarna de knop aan, de monitor piept en alle data komt op nul te staan. De loopband is hier in stop-stand. 2.
- Page 27 5. Directe snelheidskeuze Op het display ziet u knoppen van 2 tot 16, alle 8 knoppen zijn directe snelheids snelheidskeuzes. Als u de loopband start, of niet hartslaggestuurd traint, kunt u een van de directe snelheidsknoppen kiezen en de loopband past zich automatisch aan aan de snelheid die u gekozen heeft.
- Page 28 5、Alle toetsen functioneren als volgt: 6、Opmerking: Als eerste, druk op de schakelaar aan/uit om de stroom te activeren (rood lampje aan). Druk dan 3 seconden lang op de knop “PLAY/STOP”, dan kan het SD-kaart systeem gestart worden (rode licht aan). Als u nu op “PLAY/STOP” drukt kan hij afgespeeld of gepauzeerd worden.
- Page 29 V Dagelijks onderhoud. 1. Loopplank en loopband. ●Beschrijving: Joy sport series gemotoriseerde loopbanden zijn voorzien van speciale loopbanden. Met een lage wrijvingsweerstand, de loopplank is speciaal met een dubbel schokabsorptie systeem, waardoor deze soepel en comfortabel loopt. ● Schoonmaken. Het schoonhouden van de loopband zal de levensduur bevorderen, let vooral op het schoonhouden van de loopplank en bord.
- Page 30 5.Herstel van scheeflopende loopband: Alle loopbanden worden afgesteld voor ze de fabriek verlaten. Maar na een periode van gebruik kan de band scheef gaan lopen door verscheidene redenen. (1) De loopband staat niet vlak op de ondergrond. (2) De loper loopt niet midden op de band of ongelijkmatig. (3) Als de band scheef gelopen is kan deze zich automatisch herstellen door hem enige tijd onbelast te laten draaien.
- Page 31 7. Spannen van de motorriem Alle motorriemen zijn afgesteld voordat de loopband de fabriek verlaat, maar na een tijd gebruik kan de riem rekken en gaan slippen. Dit kan aangepast worden met behulp onder toezicht van professional. Aanpassen gaat als volgt: (1) Open de motorkap en haal de kant eruit welke de verbinding is met de aanspanveer en motorspanner.
- Page 32 Ⅸ Lijst van onderdelen in het pakket: NR. OMSCHRIJVING AANTAL Hoofdframe Palen Bedieningspaneel Veiligheidsschakelaar Siliconen olie Base sheathing Meter sheathing Koptelefoon Specificaties Stroomkabel Standaard component...
- Page 33 Ⅹ Mogelijke foutmeldingen en de procesmethode Vanwege bepaalde redenen , kan de technische parameter een klein beetje verschil hebben. Dus u kunt het niet als een criteria nemen om de status van uw gezondheid te meten. Alle data is alleen een referentie. Schakel de stroom direct uit en neem contact op met de leverancier als er een speciale foutmelding komt.
- Page 34 APPENDIX Ⅱ:Hartslagtabellen Attentie: Alle hartslagtest gegevens zijn enkel bedoeld als referentie. Als de hartslag te hoog is kunnen we deze reguleren met de hartslag snelheidscontrole. We kunnen deze instellen afhankelijk van de leeftijd, de tijd van de oefening en de tabel.
Need help?
Do you have a question about the Life Fit and is the answer not in the manual?
Questions and answers