
Related Manuals for Proline FP35


Summary of Contents for Proline FP35
- Page 1 FP35 FOOD PROCESSOR ROBOT MÉNAGER KEUKENMACHINE PROCESADOR DE ALIMENTOS INSTRUCTION MANUAL MANUEL D’INSTRUCTIONS GEBRUIKSAANWIJZING...
- Page 2 WARNINGS This appliance is intended to be used in household and similar applications such as: staff kitchen areas in shops, offices and other working environments; farm houses; by clients in hotels, motels and other residential type environments; bed and breakfast type environments. If the supply cord is damaged, it must be replaced by the manufacturer, its service agent or similarly qualified persons in order...
- Page 3 sieve or the protecting cover is damaged or has visible cracks. For the details on how to clean surfaces in contact with food please see section Switch off the appliance and disconnect from supply before changing accessories or approaching parts that move in use. Appliances can be used by persons with reduced physical, sensory or mental capabilities or lack of experience and...
-
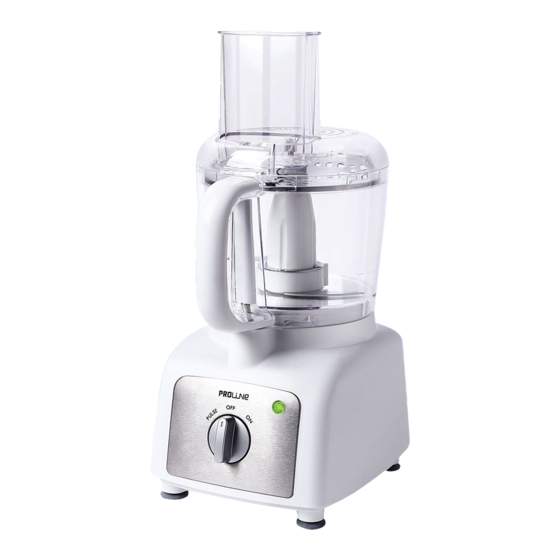
Page 4: Identification Of Parts
Never use this appliance to mix or stir anything other than foods. Avoid contacting moving parts. Keep hands and utensils away from moving blades or disc while processing food to reduce the risk of injury to persons or damage to the appliance. Make sure that bowl cover is securely locked in place before operating the appliance. -
Page 5: Operation
ASSEMBLY Make sure that the appliance is switched off and unplugged from the mains socket. 1. Place the appliance base on a dry, level surface with the control knob facing forward. 2. Place the bowl on the base, fitting the centre opening of the bowl over the power shaft. - Page 6 Do not operate the appliance for more than 3 minutes without interruption. Allow it to cool down for at least 5 minutes before continuing operation. To stop the appliance, turn the control knob to the OFF position. The indicator light will go out. Wait until the blade or disc comes to a complete stop before removing the cover or bowl.
-
Page 7: Cleaning And Maintenance
If using the chopping blade, place it over the centre pole of the bowl and allow it to fall freely to the bottom of the bowl. Cut food into small pieces for best processing results. Use the pulse control to prevent over-processing. Most foods should take 15 to 30 seconds to process. -
Page 8: Specifications
SPECIFICATIONS Ratings: 220-240V~ 50/60z 350W We apologise for any inconvenience caused by minor inconsistencies in these instructions, which may occur as a result of product improvement and development. Darty Plc © UK : EC1N 6TE 18 / 11 / 2014... - Page 9 AVERTISSEMENTS Cet appareil est destiné à être utilisé dans des applications domestiques et analogues telles que: des coins cuisines réservés au personnel dans des magasins, bureaux et autres environnements professionnels; des fermes; et autres environnements à caractère résidentiel; des environnements du type chambres Si le câble d'alimentation est endommagé, il doit être remplacé...
- Page 10 la manipulation des couteaux affûtés, Touj surveillance et avant montage, démontage ou nettoyage. N'utilisez pas l'appareil si la passoire rotative ou le couvercle de protection est endommagé ou présente des fissures visibles. Les détails sur la façon de nettoyer les surfaces en contact avec les aliments sont définis en page 15 dans la section Mettre l'appareil à...
-
Page 11: Instructions Importantes De Sécurité
l'utilisation de l'appareil en toute sécurité et dans la mesure où ils en comprennent bien les dangers potentiels. Les enfants ne doivent pas utiliser l'appareil comme un jouet. Être vigilant si un liquide chaud est versé dans le préparateur culinaire dans la mesure où... -
Page 12: Description Des Pièces
DESCRIPTION DES PIÈCES 1. Poussoir d'aliments 2. Couvercle du bol avec tube d'alimentation 3. Disque éminceur / déchiqueteur 4. Tige du disque 5. Bol 7. Bouton de contrôle 8. Bloc moteur 9. Lames de coupe AVANT LA PREMIÈRE UTILISATION Avant d'utiliser votre robot ménager pour la première fois, lavez le bol, le couvercle du bol, le poussoir, le disque et les lames (voir le paragraphe NETTOYAGE ET ENTRETIEN). - Page 13 Assurez-vous que la poignée du bol s'aligne avec le symbole de déverrouillage du bloc moteur. 3. Saisissez la poignée du bol et tournez le bol vers la gauche jusqu'à ce qu'il se verrouille en position. 4. Insérez l'accessoire désiré dans le bol. Si vous utilisez les lames, insérez-les sur le montant central du bol et laissez-les glisser jusqu'en bas du bol.
- Page 14 Ne faites pas fonctionner cet appareil pendant plus de 3 minutes sans interruption. Laissez-le refroidir pendant au moins 5 minutes avant de continuer. L'indicateur lumineux s'éteindra. couvercle ou le bol. Utilisation du bouton de contrôle par impulsions Le bouton de contrôle par impulsions permet un contrôle précis de la durée et de la fréquence de traitement.
- Page 15 Utilisation des lames de coupe Il est recommandé d'utiliser les lames pour hacher, émincer et réduire en purée les fruits, les légumes, le fromage, la viande etc. Si vous utilisez les lames de coupe, insérez-les sur le montant central du bol et laissez-les glisser jusqu'en bas du bol. Coupez les aliments en petits morceaux pour de meilleurs résultats.
-
Page 16: Nettoyage Et Entretien
NETTOYAGE ET ENTRETIEN Attention: Éteignez et débranchez toujour Nettoyez immédiatement toutes les pièces amovibles dans de l'eau chaude savonneuse après l'utilisation. AVERTISSEMENT Veuillez manipuler les lames et le disque de coupe avec précaution. ILS SONT TRÈS COUPANTS. Nettoyez les surfaces extérieures du bloc moteur avec un chiffon doux légèrement humide. - Page 17 WAARSCHUWINGEN Dit apparaat is geschikt voor huishoudelijk gebruik en gelijksoortige toepassingen zoals: kantines voor personeel in winkels, kantoren en andere werkruimtes; boerderijen; door gasten in hotels, motels en andere verblijfplaatsen; bed & breakfasts en vergelijkbare instellingen. Een beschadigd netsnoer mag uitsluitend worden vervangen door de fabrikant, een erkende reparatieservice of personen met gelijkwaardige kwalificaties om gevaar te...
- Page 18 Haal altijd de stekker van het apparaat uit het stopcontact als het onbewaakt wordt achtergelaten en tijdens het monteren, demonteren en reinigen. Gebruik dit apparaat niet wanneer de draaiende zeef of beschermkap beschadigd is of zichtbare barsten vertoont. 22 voor informatie over het reinigen van oppervlakken die met levensmiddelen in contact komen.
-
Page 19: Belangrijke Veiligheidsvoorzorgen
spelen. Wees voorzichtig bij het gieten van hete vloeistof in de keukenmachine, omdat deze door plotse stoomvorming uit het apparaat kan worden gestoten. WAARSCHUWING: gevaar van verwonding als dit apparaat niet correct wordt gebruikt. BELANGRIJKE VEILIGHEIDSVOORZORGEN Schakel de knop van het apparaat altijd in de UIT-stand voordat u de stekker in een stopcontact stopt. -
Page 20: Identificatie Van De Onderdelen
IDENTIFICATIE VAN DE ONDERDELEN 1. Stamper 2. Deksel van de kan met toevoeropening 3. Rasp/snijschijf 4. Schijfschacht 5. Kan 6. Motorschacht 7. Schakelaar 8. Motorblok 9. Hakmes VOOR DE EERSTE INGEBRUIKNAME Was voor de eerste ingebruikname van uw keukenmachine de kan, het deksel van de kan, de stamper, de messchijf en het hakmes af (zie paragraaf REINIGEN EN ONDERHOUD). - Page 21 3. Houd de kan bij de handgreep vast en draai de kan naar links tot deze vastklikt. 4. Zet het gewenste hulpstuk in de kan. Om het hakmes te gebruiken zet u het hakmes op de schacht in het midden en laat u dit vrij zakken tot op de bodem van de kan.
- Page 22 deksel opent of de kan van het apparaat neemt. De pulseerfunctie gebruiken Met de pulseerfunctie krijgt u nauwkeurige controle over de duur en frequentie van de verwerking. Om de pulseerfunctie te gebruiken draait u de knop naar de stand PULSE en houdt u deze ingedrukt.
-
Page 23: Reinigen En Onderhoud
wordt. Voor de meeste levensmiddelen is een verwerkingsduur van 15 tot 30 seconden voldoende. Richtlijnen voor het verwerken Voedsel Aanbevolen Stand Aanbevolen duur maximale schakelaar van verwerking hoeveelheid Vlees 500g Kaas 300g PULSEREN/AAN 15-30 seconden Groente, fruit 500g Chocolade (geraspt) 300g Tips voor het verwerken Snijd het voedsel zo voor dat het in de toevoeropening past. -
Page 24: Technische Gegevens
Gebruik geen chemische reinigingsmiddelen of schuurproducten op dit apparaat. TECHNISCHE GEGEVENS Nominale waarden: 220-240V~ 50/60z 350W Onze verontschuldiging voor eventueel ongemak door kleine onnauwkeurigheden, die in deze gebruiksaanwijzing kunnen voorkomen omdat wij onze producten voortdurend ontwikkelen en verbeteren. Darty Plc © UK : EC1N 6TE 18 / 11 / 2014... - Page 25 ADVERTENCIAS Este aparato está concebido para su uso en aplicaciones domésticas y similares, como pueden ser: Áreas de cocina del personal en tiendas, oficinas y otros entornos de trabajo. Casas rurales. Hoteles, moteles y otros entornos residenciales para uso de la clientela. Lugares de hospedaje.
- Page 26 No utilice el electrodoméstico si el tamiz giratorio o la tapa protectora presentan daños o grietas visibles. Para conocer más detalles acerca de cómo limpiar las superficies en contacto con los Apague el electrodoméstico y desconéctelo de la corriente antes de cambiar accesorios o de aproximarse a piezas móviles en uso.
-
Page 27: Instrucciones Importantes De Seguridad
correctamente. INSTRUCCIONES IMPORTANTES DE SEGURIDAD Asegúrese de que la perilla de control esté en la posición de APAGADO antes de conectar a la alimentación eléctrica. Siempre opere este electrodoméstico sobre una superficie nivelada, seca y segura. Nunca coloque alimentos en forma manual. Utilice siempre el empujador de alimentos. El uso de accesorios no recomendados por el fabricante puede causar incendios, descargas eléctricas o lesiones. -
Page 28: Identificación De Piezas
IDENTIFICACIÓN DE PIEZAS 1. Empujador de alimentos 2. Tapa de tazón con tubo de alimentación 3. Disco para rebanar/rallar 4. Vástago del disco 5. Tazón 6. Eje eléctrico 7. Perilla de control 8. Base 9. Cuchilla picadora ANTES DE USAR Antes de utilizar su procesador de alimentos por primera vez, lave el tazón, su tapa, el empujador de alimentos, el disco y las cuchillas (ver sección LIMPIEZA Y MANTENIMIENTO). - Page 29 4. Inserte el accesorio deseado dentro del tazón. Si utiliza la cuchilla picadora, colóquela sobre el soporte central del tazón y déjela caer libremente hasta el fondo del tazón. Si utiliza el disco para rebanar/rallar, primero coloque el vástago del disco sobre el eje eléctrico con el orificio grande mirando hacia abajo.
- Page 30 Uso del control de pulsos El control de pulsos permite tener un control preciso sobre la duración y la frecuencia del procesamiento. Para utilizar el control de pulsos, gire la perilla de control a la posición PULSOS y manténgala. Libere la perilla de control para que se detenga. El indicador luminoso se encenderá...
-
Page 31: Limpieza Y Mantenimiento
Guía de procesamiento Alimento Cantidad Posición de la Tiempo de máxima perilla de control procesado recomendada recomendado Carne 500 g Queso 300 g PULSOS/ENCENDIDO 15-30 segundos Vegetales, frutas 500 g Chocolate (rallado) 300 g Consejos para procesar Antes de procesar un alimento, córtelo para que se adapte al tubo de alimentación. Nunca procese alimentos que sean demasiado duros o que estén muy congelados y que no se puedan perforar con la punta de un cuchillo filoso. - Page 32 350W Rogamos disculpas por cualquier inconveniente generado por pequeñas inconsistencias en estas instrucciones, que pueden producirse como resultado de mejoras y desarrollo del producto. Darty Plc © UK: EC1N 6TE 18 / 11 / 2014...
Need help?
Do you have a question about the FP35 and is the answer not in the manual?
Questions and answers