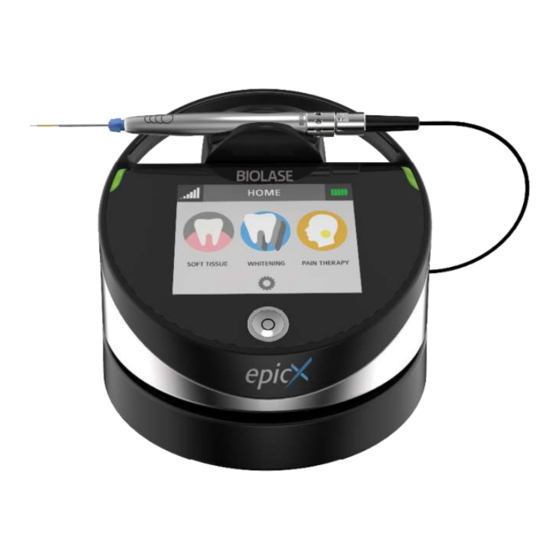
Biolase Epic X User Manual
Hide thumbs
Also See for Epic X:
- Quick setup manual (7 pages) ,
- User manual (64 pages) ,
- Quick start manual (6 pages)
Table of Contents
Advertisement
Advertisement
Table of Contents

Related Manuals for Biolase Epic X


Summary of Contents for Biolase Epic X
-
Page 2: Table Of Contents
ACCESS KEY CODE ......................16 CONTROL BUTTON ......................16 WIRELESS FOOTSWITCH ....................17 REMOTE INTERLOCK ......................17 EMERGENCY STOP ......................17 FUNCTIONAL DISPLAY .......................17 7 INSTALLATION AND SET-UP ..................18 7.1 SYSTEM SETUP ........................18 FACILITY REQUIREMENTS: ....................18 7.2 THE FIBER OPTIC CABLE ....................18 Epic X User Manual... - Page 3 7.3 SURGICAL HANDPIECE ASSEMBLY ................. 20 7.5 CONNECTING THE WHITENING HANDPIECE (OPTIONAL ACCESSORY) ...... 22 7.6 CONNECTING THE DEEP TISSUE HANDPIECE (OPTIONAL ACCESSORY) ....22 7.7 OPERATION - TURN ON THE Epic X .................. 24 7.8 HOME SCREEN ........................24 7.9 SETTINGS SCREEN ......................25 7.10 PAIRING THE FOOTSWITCH TO THE LASER CONSOLE ..........
- Page 4 NON-INITIATED ........................48 PRE-INITIATED ........................48 APPENDIX B ACCESSORIES .................... 49 APPENDIX C LABELING ....................50 APPENDIX D SAFETY - LITHIUM-ION BATTERY PACKS ..........54 APPENDIX E ELECTROMAGNETIC COMPATIBILITY ............56 APPENDIX F WIRELESS EQUIPMENT STATEMENT ............60 Epic X User Manual...
-
Page 5: Introduction
The Epic X utilizes a solid-state diode as a semiconductor source for invisible infrared radiation. The energy is delivered to the treatment site via a flexible fiber connected at one end to the laser source and the other end to the Handpiece. -
Page 6: Indications For Use
Indications for Use Use of the Epic X device may be appropriate for incision, excision, vaporization, ablation and coagulation of oral soft-tissues including marginal and inter-dental gingival and epithelial lining of free gingiva and the following specifications: • • Excisional and incisional biopsies Vestibuloplasty •... -
Page 7: Contraindications, Warnings, And Precautions
Contraindications, Warnings, and Precautions 3.1 CONTRAINDICATIONS All clinical procedures performed with Epic X must be subjected to the same clinical judgment and care used with traditional techniques. Patient risk must always be considered and fully understood before clinical treatment. The clinician must completely understand the patient’s medical history prior to treatment and exercise caution for general medical conditions that might contraindicate a local procedure;... -
Page 8: Adjacent Structures
Contraindications, Warnings, and Precautions ADJACENT STRUCTURES Epic X is designed to remove soft tissues. Therefore, always be aware of adjacent structures and substructures during use. Be extremely careful not to inadvertently penetrate or ablate underlying or adjacent tissues. Do not direct energy toward hard tissue such as tooth or bone. Do not direct energy towards amalgam, gold or other metallic surfaces. -
Page 9: Specifications
• MPE (Maximum Permissible Exposure) 30W/m2 • Beam Divergence 7- 25.4° per side angle • Standard Fiber Cable Length 79 inches (2 meters) 4.4 OTHER LIGHT SOURCES • Aiming Beam Laser diode, max 5 mW, 625nm – 670nm, Class 2 Epic X User Manual... -
Page 10: Equipment Description
Equipment Description 5.1 SYSTEM COMPONENTS The Epic X laser system includes the following: Laser Console Peel-off Screen Protectors (qty. 30) Assorted Surgical Tips Surgical Handpiece (qty. 2) Laser Protective Eyewear (qty. 3) DC Power Supply Module Power Cord (one (1) U.S, one (1) International) -
Page 11: General
Equipment Description 5.2 GENERAL The Epix X system consists of three components: Base Console Fiber Delivery System LED Indicators LED Indicators Control Button Fiber Storage Channel Handpiece Fiber Optic Cable Wireless Footswitch Figures 5.1 Epic X User Manual... -
Page 12: Base Console
Figure 5.3 contamination (See Section 9). WHITENING HANDPIECE (OPTIONAL) The Whitening Handpiece is a re-usable Handpiece used in conjunction with the Biolase LaserWhite 20 Whitening Gel for teeth whitening; packaging includes disposable non- sterile shields for single-patient use (Figure 5.4) which are installed over the Handpiece lens prior to each use. -
Page 13: Deep Tissue Handpiece (Optional)
Figure 5.5 after one-time use. WIRELESS FOOTSWITCH The Epic X laser will only emit laser energy when the user presses down on the Footswitch Cover while the laser is in Ready mode. It is designed... -
Page 14: Safety Instructions
Always place the system into Standby mode (by pressing the control button while in Ready mode) before exchanging Handpieces or disposable Tips. • Always ensure that the proper laser parameters are set before the Epic X laser is used in a clinical procedure. •... -
Page 15: Safety Classification
Degree of protection against electrical shock – Type B applied part • Not protected against water ingress – Ordinary equipment • Not suitable for use in presence of flammable anesthetic mixture • Operation mode – Continuous wave and pulse mode • Wireless Footswitch – IPX6 Epic X User Manual... -
Page 16: Safety Features
“LASER CURRENT HIGH/LOW”. The laser console will not operate until the system first clears the error and then goes into Ready mode. If the error message persists, please contact BIOLASE Service at 1-800-321-6717 or your BIOLASE-authorized service representative. Figure 6.1: Power Switch, DC... -
Page 17: Wireless Footswitch
Safety WIRELESS FOOTSWITCH The Epic X will not emit laser energy until the user presses down on the Footswitch while the laser is in Ready mode. The Footswitch is designed to work using wireless technology and is paired to the laser console at the factory. -
Page 18: Installation And Set-Up
7.2 THE FIBER OPTIC CABLE The Epic X ships with the Fiber Optic Cable built into the laser console and cannot be disconnected from the console For storage, wind the Fiber Optic Cable in the fiber storage channel around the base of the console in a counterclockwise direction. -
Page 19: Surgical Handpiece Assembly
(Figures 7.1, 7.2). If no click is audible, disconnect the Handpiece and then re-install it. Fiber Shaft Protective Cap Handpiece Collar Figure 7.1: Connecting the Handpiece to the Fiber Optic Cable Figure 7.2: Surgical Handpiece Assembly fully assembled Epic X User Manual... -
Page 20: Single-Use Tips
Figure 7.4: Insert the fiber Tip into the Handpiece and twist clockwise until snug Remove the fiber Tip by twisting the Tip counterclockwise (Figure 7.5). Figure 7.5: Remove the fiber Tip by twisting the Tip counterclockwise. Epic X User Manual... - Page 21 LASER WARNING: Never operate the laser without a fiber Tip attached to the Handpiece. Never point the laser at a person’s eyes. All persons present in the operatory must wear protective eyewear when the laser is in use. Epic X User Manual...
-
Page 22: Connecting The Whitening Handpiece (Optional Accessory)
For instructions on how to clean and disinfect the Handpiece, refer to Section 9. Always wipe the disposable shield with alcohol prior to use. These shields are for single-use only to avoid cross-contamination and must be discarded after one-time use. Epic X User Manual... - Page 23 Cable, press and hold both buttons at the base of the fiber shaft and gently pull the Handpiece to separate. NOTE: Refer to the individual Instructions for Use included with the Deep Tissue Handpiece packaging for additional details. Figure 7.14 Epic X User Manual...
-
Page 24: Operation - Turn On The Epic X
Turn the power switch at the rear of the console to the ON ( I ) position. The “BIOLASE” logo screen will appear. After three (3) seconds the Epic X “Welcome” screen will be displayed. -
Page 25: Settings Screen
1. Go to the settings menu on the laser console display by pressing the settings icon; select the “Wireless” icon. 2. A screen will appear indicating that pairing of the Footswitch to the laser console has been lost (Figure 7.19); press the green PAIR button. Figure 7.19 Epic X User Manual... -
Page 26: Control Button
Fiber Optic Cable. If the aiming beam is not on, turn off the laser console, then remove and re- install the Fiber Optic Cable assembly. If the aiming beam is still not on, turn off the laser console and call your authorized service representative. Epic X User Manual... -
Page 27: Wireless Footswitch
Footswitch is activated. In Pulse mode, laser power is delivered in repetitive pulses, controlled by the Pulse Length and Pulse Interval settings. Pressing the Pulse mode button will allow switching between Pulsed and Continuous modes (Figure 7.27). Epic X User Manual... - Page 28 *CP = Comfort pulse; P3 = Pulsed mode which is the standard for most diode lasers currently available to the dental market Figure 7.25 NOTE: Operating the laser at a shorter pulse duration typically results in lower tissue temperature. Peak Power Average Power Figure 7.26 Epic X User Manual...
-
Page 29: Using The Epic X Touch Screen Display
Installation and Set-Up 7.17 USING THE Epic X TOUCH SCREEN DISPLAY Figure 7.27 Epic X User Manual... -
Page 30: Procedures Button
Installation and Set-Up 7.18 PROCEDURES BUTTON The Epic X has the ability to store up to 20 pre-set procedures; Epic X is factory-installed with 14 pre- programmed procedural presets and 6 empty slots for custom pre-sets. All of them can be customized to your preference. -
Page 31: Clinical Application
Clinical Application 8.1 OVERVIEW To efficiently treat tissues, it is imperative to understand the nature of the Epic X device. Please review this section carefully, practice on model tissues, and attend a diode laser training session before using this device in a clinical situation. -
Page 32: Pre-Programmed Settings For Dental Procedures
Always use clinical judgement when selecting power, pulse, length, and pulse interval parameters to ensure optimal clinical results. The recommended settings apply only to the 300µm and 400µm tips. At all times observe the clinical effects on the treatment area and adjust parameters accordingly. Epic X User Manual... -
Page 33: Table Of Pre-Programmed Surgical Settings
Pulpotomy, pulpotomy as an Pulpotomy(*) 0.1 W 0.1 W adjunct to root canal (*) Minimum defaults provided for user setting of Endodontic Procedures such as Pulpotomy and Pulpotomy as an adjunct to root canal therapy. Epic X User Manual... -
Page 34: Table Of Pre-Programmed Surgical Settings (Continued)
Unerupted Teeth Custom 0.1 W 0.1 W Custom 0.1 W 0.1 W (*) Minimum defaults provided for user setting of Endodontic Procedures such as Pulpotomy and Pulpotomy as an adjunct to root canal therapy. Figure 8.6 Epic X User Manual... -
Page 35: Teeth Whitening
8.5 PAIN THERAPY The Epic X diode laser is designed to provide near-infrared laser energy to a tissue surface for the purpose of temporary pain relief when applied with the Deep Tissue Handpiece. The pain therapy procedure elevates tissue temperature for the temporary relief of minor pain, the temporary increase in local blood circulation, and the temporary relaxation of muscle, as stated in the indications for use. -
Page 36: Pain Therapy - Adverse Effects
If any discomfort or redness of the skin occurs during the treatment, apply the following: • Move the Handpiece relative to the affected anatomy • Defocus the energy by moving the Handpiece further away from the skin • Decrease the power setting • Stop treatment Epic X User Manual... -
Page 37: Pain Therapy - Warnings And Precautions
This device contains no user-serviceable parts and therefore no servicing instructions are available other than the regular maintenance procedures described in this manual. Any attempt to modify or repair the laser by anyone other than an authorized BIOLASE technician may lead to exposure to laser radiation and collateral radiation. -
Page 38: Maintenance
Use disinfectant to wipe down the front panel and Handpiece Holder of the Epic X system after each procedure. Do not use bleach or abrasive cleansers. -
Page 39: Step 2 - Sterilization Process - Surgical Handpiece
To disinfect the Deep Tissue Handpiece, wipe the entire outer surface of the Handpiece with cotton gauze and isopropyl alcohol or a mild chemical disinfectant. • Always wipe the disposable shield with alcohol prior to use. Discard after single use. Epic X User Manual... -
Page 40: Fiber Optic Cable Lens Inspection And Cleaning
4. Repeat as needed using a new lint free swab each time until no residue appears on the swab. CAUTION: If blemishes appear below or inside the lens, contact BIOLASE or your authorized service representative to order a replacement lens. Figure 9.5... -
Page 41: Installing/Replacing The Console Battery Pack
6. Dispose of the used Lithium Ion battery as regulated. Do not discard in a trash bin. Figure 9.6 NOTE: Only use the battery pack supplied by BIOLASE. The battery pack is a separate accessory (BIOLASE P/N 4400268). Epic X User Manual... -
Page 42: Changing The Wireless Footswitch Batteries
Figure 9.8 Pairing button (internal view). NOTE: To ensure the longevity of the battery power, only BIOLASE-supplied batteries are recommended as replacements (BIOLASE p/n 2400203); these are industrial-grade batteries which under normal use have a longer life than conventional AAA batteries. -
Page 43: Transportation
Cover the unit when not in use for extended periods of time. Store the system in a place where it will not be accidentally bumped or banged. The Epic X is shipped inside a custom shipping box. Please save and store the box in a cool, dry place for use when transporting the laser, or for long-term storage. -
Page 44: Calibration
Laser calibration is recommended every twenty-four (24) months in order to maintain the required accuracy of output power versus displayed power. The calibration can be performed at a certified depot repair facility. Call BIOLASE Service at 1-800-321-6717 or your Authorized Service Representative to schedule an appointment. -
Page 45: Software Specification
Software Specification BIOLASE respects the intellectual property of others, and we ask our users to do the same. Epic X software is protected by copyright and other intellectual property laws. This product contains proprietary, copyrighted software developed by BIOLASE. All rights reserved in the USA and other countries. -
Page 46: Troubleshooting
NOTE: For any on-screen message not listed in Figure 12.1, re-power the laser console; if the message does not clear, call BIOLASE Service at 1-800-321-6717 or your Authorized Service Representative. Screen... - Page 47 Check remote interlock closed Error 12 Battery critically low Battery is critically low Plug in DC supply Error 13 Internal error Internal error occurred Restart unit Footswitch battery critically Error 14 Footswitch battery Replace Footswitch battery Figure 12.2 Epic X User Manual...
-
Page 48: Appendix A Tip Guide
Appendix A Tip Guide NOTE: All BIOLASE tips for diode lasers are sold non-sterile and are for single-use only. See Section 9 in this User Manual for cleaning and sterilization instructions. NON-INITIATED Length Name Diameter Application Part Number (mm) E4-4 400µm... -
Page 49: Appendix B Accessories
Laserwhite 20 Whitening Gel Kit (5-pack) 7420001 Deep Tissue Handpiece 6400310 Deep Tissue Handpiece Disposable Shields (qty. 20) 6400465 Peel-off Clear Screen Covers (qty. 30) 6400268 Lithium-Ion Battery Pack for Console 6400463 Battery Pack (2 x AAA) 5400242 Laser Warning Sign Epic X User Manual... -
Page 50: Appendix C Labeling
EMERGENCY LASER STOP SWITCH: The switch used in emergencies to stop laser output. LOCATION: Right side of laser console. LASER APERTURE WARNING: Indicates visible and/or invisible laser radiation is emitted from this aperture. LOCATION: Back of laser console. Epic X User Manual... - Page 51 The Footswitch and laser console comply with Part 15 of FCC Rules regarding unlicensed transmissions LOCATION: Bottom of Footswitch INGRESS PROTECTION CODE: IPX6 The Footswitch is water-resistant, protected from splashes of water SINGLE USE ONLY – DO NOT REUSE Epic X User Manual...
- Page 52 FRAGILE: HANDLE WITH CARE LOCATION: Outer carton (shipping box) KEEP DRY LOCATION: Outer carton (shipping box) TRANSPORTATION TEMPERATURE LIMITATIONS LOCATION: Outer carton (shipping box) HUMIDITY LIMITATIONS LOCATION: Outer carton (shipping box) ATMOSPHERIC PRESSURE LIMITATIONS LOCATION: Outer carton (shipping box) Epic X User Manual...
- Page 53 DC POWER, USB, REMOTE INTERLOCK LABEL: Identifies input ports POWER INPUT RATING: 12 Volts Direct Current, 5 amps MINI USB INPUT: For external programming REMOTE INTERLOCK: Input for Remote Interlock Connector Epic X User Manual...
-
Page 54: Appendix D Safety - Lithium-Ion Battery Packs
Contact your sales location or BIOLASE if any of these problems are observed. Do not place the batteries in microwave ovens, high-pressure containers, or on induction cookware. - Page 55 CAUTION: The temperature range over which the battery can be discharged is -20°C to 60°C. Use of the battery outside of this temperature range may damage the performance of the battery or may reduce its life expectancy Epic X User Manual...
-
Page 56: Appendix E Electromagnetic Compatibility
WARNING: The use of accessories other than those supplied or sold by BIOLASE, Inc. as replacement parts for internal or external components may result in increased EMISSIONS or decreased IMMUNITY of the Epic X diode laser system. Epic X User Manual... - Page 57 Appendix E Electromagnetic Compatibility Epic X User Manual...
- Page 58 Appendix E Electromagnetic Compatibility Epic X User Manual...
- Page 59 Appendix E Electromagnetic Compatibility Epic X User Manual...
-
Page 60: Appendix F Wireless Equipment Statement
Increase the separation between the equipment and receiver • Connect the equipment into an outlet on a circuit different from that to which the receiver is connected • Consult the dealer or an experienced radio/TV technician for help Epic X User Manual... - Page 61 Epic, iLase, ezLase, ezTip, LaserWhite, Deep Tissue Handpiece, ComfortPulse, Waterlase, and Waterlase iPlus are either trademarks or registered trademarks of BIOLASE, Incorporated in the United States and/or other countries. All other trademarks are property of their registered owners. Subject to change without notice.
Need help?
Do you have a question about the Epic X and is the answer not in the manual?
Questions and answers
The laser unit has no light & seems inactive after starting the power switch
The Biolase Epic X laser unit may not be lighting up and appears inactive after turning on the power switch due to one or more of the following reasons:
1. Emergency Stop Engaged – If the red emergency laser stop button was pressed, the system will display “Emergency Switch Error” and remain inactive. To reset, press the emergency stop button again and wait 2 to 5 seconds for the system to go into Standby mode.
2. Battery Not Charged or Improperly Installed – Ensure the lithium-ion battery is fully charged for at least 3 hours before first use and is correctly installed with the red wire on the left.
3. Power Supply Issue – Verify that the DC power supply module is properly connected to both the unit and the wall outlet. Use only the BIOLASE-supplied power module.
4. Remote Interlock Activated – If the system has a remote interlock feature, check if it is engaged, as it could prevent activation.
5. Environmental Conditions – Ensure the unit is placed in a clean, dry, and well-ventilated area within the required temperature (15-35 ºC) and humidity (10-90%).
Check these factors to determine the cause and resolve the issue.
This answer is automatically generated