Table of Contents
Advertisement
Advertisement
Table of Contents
Troubleshooting

Related Manuals for Biolase Waterlase iPlus


Summary of Contents for Biolase Waterlase iPlus
- Page 1 User Manual...
- Page 2 PAGE INTENTIONALLY LEFT BLANK...
-
Page 3: Table Of Contents
Tip Changing ..........................13 Water Splashing ..........................13 Plume Removal ..........................13 Dental Materials..........................13 Crown and Veneer Materials......................13 4 SPECIFICATIONS ......................14 Dimensions ............................14 Electrical .............................. 14 Air and Water Output ........................... 14 Optical ..............................14 Waterlase iPlus User Manual... - Page 4 Water Bottle Release ........................18 Footswitch Support Bracket ......................18 Telescopic Fiber Cable Support Arm....................19 Waterlase iPlus Delivery System ....................19 Delivery System Connection on the Laser Console ............... 20 6 SAFETY WITH THE WATERLASE ................21 Precautions ............................21 Safety Instructions ..........................
- Page 5 Operation............................. 31 Overview ............................31 Starting the Waterlase iPlus ......................31 Activating the Waterlase iPlus ......................32 Turning the Waterlase iPlus Off ......................32 User Interface / General Navigation ....................32 Applications Menu .......................... 33 Changing and Saving the Pre-Sets ....................35 Settings/Memory Menu ........................36 Functions for the Setting Buttons ....................
- Page 6 Accessories List ..........................63 APPENDIX C: TIPS ......................64 Tip Types ............................. 64 Tip Ferrule Colors ........................... 64 Tip Settings: Waterlase iPlus / Gold Handpieces ................64 Z - Glass Tips ..........................64 Sapphire Tips ..........................65 Turbo Tips ............................65 APPENDIX D: TIP INSPECTION ..................
-
Page 7: Overview
Overview The Waterlase iPlus tissue cutting system is a When used and maintained properly, the Waterlase unique device with diverse, hard- and soft-tissue iPlus proves a valuable addition to a practice. dental applications. It utilizes advanced laser Please contact BIOLASE Customer Service at and water atomization technologies to safely 1-800-321-6717 in the U.S and Canada for any... -
Page 8: Indications For Use
Indications for Use IMPORTANT: Review all Contraindications, Warnings and Precautions presented in Section 5 before proceeding with using this device on patients. WATERLASE IPLUS IS INDICATED FOR: HARD-TISSUE BONE SURGICAL INDICATIONS GENERAL INDICATIONS* • Cutting, shaving, contouring and resection of •... - Page 9 • Gingivectomy • Gingivoplasty • Gingival incision and excision • Hemostasis • Implant recovery • Incision and drainage of abscesses • Laser soft-tissue curettage of the post- extraction tooth sockets and the periapical area during apical surgery Waterlase iPlus User Manual...
-
Page 10: Contraindications, Warnings, And Precautions
Contraindications, Warnings, and Precautions CONTRAINDICATIONS All clinical procedures performed with the Waterlase iPlus must be subjected to the same clinical judgment and care as with traditional techniques. Patient risk must always be considered and fully under stood before clinical treatment. The clinician must completely understand the patient’s medical history prior to treatment. -
Page 11: Treatment, Technique And Settings
In general, the same care and precautions should be taken when using the Waterlase iPlus as are taken when using any air and water emitting cutting device, including the high speed drill. -
Page 12: Root Canal Procedures
Use a sterile field and aseptic technique with all procedures, especially for surgical interventions. TISSUE EVALUATION Any tissue growth (i.e. cyst, neoplasm and other lesions), whether removed with Waterlase iPlus or conventionally, must be submitted to a qualified laboratory for histopathology assessment. -
Page 13: Water Splashing
Water from spray may splash during treatment. Use protective eyewear and/or a face shield to protect from splashing. Use high-speed suction, as needed, to maintain a clear field of vision during treatment. Do not use the Waterlase iPlus if the user cannot clearly see the treatment site. PLUME REMOVAL Laser plume may contain viable tissue particulates. -
Page 14: Specifications
• Output divergence: ≥ 8° per side • Mode: Multimode 625-670 nm (red) laser, 1mW max (Laser Class 1) • Aiming Beam: • Nominal Ocular Hazard Distance (NOHD): 3.46 X 10⁵W/m² • Maximum Permissible Exposure (MPE): Waterlase iPlus User Manual... -
Page 15: Equipment Description
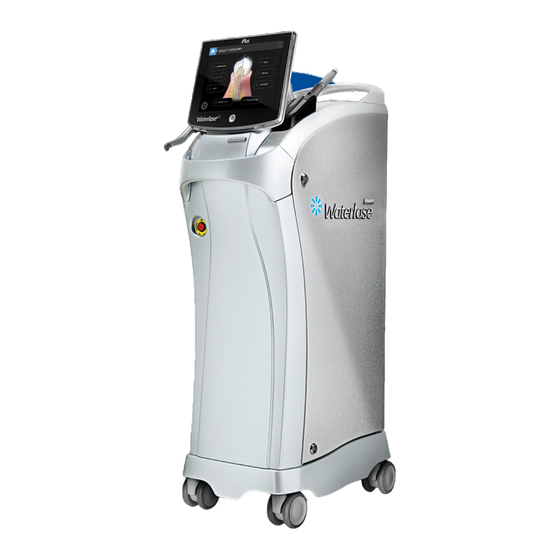
• Main Laser Console (shown in Figures 5.1, 5.2, and 5.3) • WaterLase iPlus Fiber Delivery System (the Delivery System, shown in Figures 5.1, 5.2, and 5.3, consists of the Fiber Cable, Handpiece, and Tips) MAIN LASER CONSOLE ELEMENTS Figures 5.1, 5.2, and 5.3 show the front, rear and top views of the laser console. -
Page 16: Energy Monitor
"Next" arrow at the top of the touch screen. If the error message persists, please contact BIOLASE Service or the authorized BIOLASE representative for your area. -
Page 17: Footswitch, Footswitch Connector
Equipment Description FOOTSWITCH, FOOTSWITCH CONNECTOR The Footswitch activates the laser; the Waterlase iPlus laser will not activate until the user presses down on the Footswitch. Connect and secure the Footswitch to the Footswitch connector located on the back panel of the console. -
Page 18: Water Bottle Release
Interlock Outlet Keyswitch Emergency Stop Switch Footswitch Cable Wrap Plate Power Cable Power Wrap Plate Connection & Circuit Breaker Ground Pin Footswitch Footswitch Support Bracket Connector Locking Wheels Air Inlet (front only) Connector Fig 5.1 Fig 5.2 Waterlase iPlus User Manual... -
Page 19: Telescopic Fiber Cable Support Arm
NOTE: Proper placement of the Delivery System Cable in the Support Arm and of the Handpiece in the Handpiece holder is important for the convenient and safe handling of the delivery system. WATERLASE IPLUS DELIVERY SYSTEM (See Section 4 for detailed description and instructions) Fiber Delivery System... -
Page 20: Delivery System Connection On The Laser Console
Delivers laser radiation from the laser console to the Handpiece. HANDPIECE The Handpiece (gold or turbo) is rotatable and detachable from the optical shaft. It delivers optical energy, illumination, and atomized water spray to the treatment area. Waterlase iPlus User Manual... -
Page 21: Safety With The Waterlase
CAUTION: Periodically inspect eyewear for pitting and cracking. For replacement or additional protective eyewear, please contact BIOLASE Customer Service or the authorized BIOLASE representative. 6. Press the Standby button on the control panel before changing the water in the reservoir and before turning off the laser system. -
Page 22: Safety Classification
Danger from radiation exposure and high voltage may exist. NOTE: Please direct any safety questions to the local BIOLASE representative, or call BIOLASE at (888) 424-6527, or BIOLASE Service at (800) 321-6717 (US only). -
Page 23: Installation
Installation INSTALLATION INSTRUCTIONS The Waterlase iPlus laser system must be installed by a qualified BIOLASE employee or representative who will unpack and install the laser. Please leave all crates and shipping containers unopened until the trained representative arrives. Complete installation, testing, and demonstration require approximately one full day. -
Page 24: Set-Up Requirements
FILLING THE INTERNAL COOLING WATER RESERVOIR The Waterlase iPlus may have been shipped with a full cooling water Fig 7.3 reservoir. In the event the user needs to fill the reservoir, please follow the instructions below. -
Page 25: Filling The Self-Contained Water System Bottle
3. Twist the bottle clockwise and pull up the lid to open (Fig 7.10). 4. Fill the self-contained water bottle with only distilled or de-ionized water. DO NOT USE TAP WATER OR FILTERED WATER, which can leave deposits that may damage the Fiber Cable or Handpiece. Fig 7.10 Waterlase iPlus User Manual... -
Page 26: Installing The Surefire Delivery System
Fig 7.12 NOTE: BIOLASE, Inc. recommends replacing the self-contained water system bottle once every 5 years. Refer to the expiration date noted on the bottle label. - Page 27 NOTE: If the laser head is not aligned properly within the cover of the laser console, it will not be possible to connect the Fiber Cable to the laser console; call BIOLASE, Inc. or the authorized BIOLASE representative for additional support.
-
Page 28: Connecting The Handpiece To The Fiber Cable
NOTE: Connecting and disconnecting the Handpiece and removal of the protective cover should be done carefully, without applying excessive force. WARNING: To prevent the internal Fiber Cable from breaking, do not bend the flexible part of the Fiber Cable shaft. Waterlase iPlus User Manual... -
Page 29: Disconnecting The Handpiece
WARNING: Be careful not to hit the input (proximal) end of the Tip against the Handpiece head and not to break the retainin�� ngers of the plastic ferrule. PLASTIC FERRULE SHAFT 1. Place the system into Standby. Fig 7.27 2. Remove the Tip plug from the Handpiece head. Waterlase iPlus User Manual... - Page 30 Tips. Refer to the Turbo Handpiece instructions for use for more information. NOTE: Turbo Tips are unique to the Turbo Handpiece and are not interchangeable with other tips and not compatible with any Handpiece other than the Turbo Handpiece. Waterlase iPlus User Manual...
-
Page 31: Operating Instructions
OVERVIEW Before using the Waterlase iPlus, be sure the system has been installed properly, as described previously in this User Manual. STARTING THE WATERLASE IPLUS 1. Verify that all connections have been properly secured and the Fiber Optic Cable properly attached. -
Page 32: Activating The Waterlase Iplus
Operating Instructions ACTIVATING THE WATERLASE IPLUS Push the Ready button to enable the Waterlase iPlus, and depress the Footswitch when ready. NOTE: It’s possible to evaluate the effect of each parameter setting prior to a procedure by directing the Handpiece into a sink or paper cup and adjusting the values as desired. -
Page 33: Applications Menu
Fig 8.4 procedure, as well as several steps recommended for the procedure. Each step has its own name and its own recommended settings. Fig 8.5 Waterlase iPlus User Manual... - Page 34 4. Once a new Tip is attached to the Handpiece, press the Handpiece image again; a progress timer will again re-appear for 3-4 seconds, and the Handpiece will be primed with water. To return to the Procedure screen, press either the Back or Handpiece button located at the bottom of the display. Waterlase iPlus User Manual...
-
Page 35: Changing And Saving The Pre-Sets
To restore the factory pre-programmed settings for the customized procedure mode (indicated by "locked lock" symbol), press and hold the corresponding name of the step for 2 seconds. The "star" symbol will re-appear in place of the Waterlase iPlus User Manual... -
Page 36: Settings/Memory Menu
“Favorites,” press and hold one of the nine buttons for 2 seconds; the name of the procedure and step will appear inside the button (in the Advanced screen, the name for the button will be given as “Custom 1”, “Custom 2”, etc.). Waterlase iPlus User Manual... -
Page 37: Functions For The Setting Buttons
0.10 7.25 0.10 7.25 0.10 9.00 0.10 9.00 0.10 10.00 0.10 10.00 0.25 10.00 0.25 10.00 0.25 10.00 0.25 9.00 0.25 9.00 0.25 8.00 0.25 8.00 0.25 6.00 0.50 6.00 0.00 0.00 0.50 4.00 0.00 0.00 Waterlase iPlus User Manual... -
Page 38: Description Of The Functional Buttons
• Error screen - appears when a system error is detected. It will give the Error name and recommendations for correcting the error (Fig 8.12). Fig 8.12 • Service - provides a pass code to allow entry to authorized Service Personnel only (Fig 8.13). Fig 8.13 Waterlase iPlus User Manual... -
Page 39: System Flow Chart
Frenectomy Biopsy Endo Expanded Root Canal Therapy Troughing Pulpotomy Laser Bandage Apicoectomy REPAIR Perio REPAIR Implant Steps 1-4 Steps 1-4 Steps 5-7 Steps 5-7 Fig 8.14 Waterlase iPlus User Manual... -
Page 40: Clinical Application
Clinical Application Overview The Waterlase iPlus laser is designed to cut and remove hard and soft tissues. Cutting is achieved in a contact or non-contact mode by application of direct laser energy either with water for cooling and hydration, or without water for coagulation. To efficiently remove tissues it helps to understand the unique nature of the Waterlase iPlus laser. -
Page 41: Soft-Tissue Cutting
D. Step on the Footswitch and slowly move the tip along the tissue surface. The incision will be noticed immediately after laser activation. NOTE: Bleeding is controlled through a reduction in water. The most effective hemostasis is achieved when the water spray is eliminated completely. Waterlase iPlus User Manual... -
Page 42: Laser Parameters
Clinical Application Laser Parameters The settings chosen for a procedure will contribute to its overall success. Waterlase iPlus uses a spray combining air and water to effectively cut tissue, in conjunction with pulse repetition rate and mode, which must be balanced appropriately to obtain optimal clinical outcomes and positive patient results. -
Page 43: Waterlase Laser Removal Of Porcelain And Ceramic Crowns And Veneers
5. When finished, to save the current settings into one of the Favorites, return to the Settings screen by pressing the Settings icon, then press and hold one of the nine "Custom" buttons for 2 seconds. The procedure parameters will appear inside the button. Figure 9.1 Recommended Settings Waterlase iPlus User Manual... - Page 44 2. For crowns, option to treat in 1 minute cycles; attempt to remove the restoration with a mechanical instrument after each cycle; if the crown is still bonded to the underlying tooth, repeat up to no more than a cumulative total of 5 minutes. Figure 9.3 Figure 9.4 Waterlase iPlus User Manual...
-
Page 45: Cleaning And Sterilization
6. Unwrap the Handpiece and Tip. Using a soft-bristled brush dipped in the cleaning solution, gently brush around the Tip ferrule, crevices, and other hard-to-clean areas for 15 seconds. The brush should be wet, but not dripping. Waterlase iPlus User Manual... -
Page 46: Step 2-Handpiece Sterilization Process
The product packaging is NOT suitable for steam sterilization. 1. Prior to sterilization, remove the Rear and Tip plugs, if installed. 2. Place the Handpiece inside a single-wrap, self-sealed pouch. Waterlase iPlus User Manual... -
Page 47: Step 3-Disinfecting The Fiber Cable
Use of damaged or worn Tips may cause damage to the delivery system and will compromise the clinical performance of the Waterlase iPlus Laser System. The Tips must be inspected prior to each use for damage or wear as described in Appendix D:... -
Page 48: Maintenance And Troubleshooting
If dark areas and irregularities are present, inspect the mirror (Applies to both Turbo and Gold Handpieces). NOTE: If the plastic Tip ferrule is continuously getting damaged at the input end, the mirror should be checked and cleaned, and mirror alignment should be checked. Waterlase iPlus User Manual... -
Page 49: Removing The Handpiece Mirror
• Wipe off the contamination by a quick turn and removal of the swab; • Repeat several times until all contamination is removed. 5. If the mirror has remaining burn marks or scratches, it should be replaced. Waterlase iPlus User Manual... -
Page 50: Mirror Alignment Check
2. Verify the laser is in Standby mode. Fig 11.11 3. Check the polished reflective surface of the window at the distal end of the Fiber Optic Cable (Fig 11.11, 11.12). WHEN ILLUMINATION SCREEN IS DISPLAYED GOOD Fig 11.12 Waterlase iPlus User Manual... - Page 51 Fig 11.14 Rectangular opening DANGER: Invisible and/or visible laser radiation when the laser is firing - avoid eye or skin exposure to direct or scattered radiation. Protective Window with tab aligned to rectangular opening Fig 11.15 Waterlase iPlus User Manual...
-
Page 52: Annual Maintenance
Maintenance and Troubleshooting ANNUAL MAINTENANCE The Waterlase iPlus should be serviced annually by a qualified, trained BIOLASE-certified technician. As part of the annual maintenance, the following will take place: • The system flash lamp will be inspected; • The system will be calibrated •... -
Page 53: Calibration Schedule
Maintenance and Troubleshooting CALIBRATION SCHEDULE: Calibration requires specialized equipment, and is to be performed only by a BIOLASE-trained service engineer who is provided with the proper calibration procedure and necessary circuit diagrams, component parts list and descriptions, etc. Power calibration is to be performed annually. The Service Engineer will write the date of installation... -
Page 54: Troubleshooting
Maintenance and Troubleshooting TROUBLESHOOTING The Waterlase iPlus constantly monitors its own performance and calibration. If any performance errors occur, the system will automatically go into Standby mode and the screen will show a message indicating the cause of the error and the recommendation for clearing it. -
Page 55: Transportation
STORAGE The Waterlase iPlus should be stored in a cool dry place when not in use. Storage temperature should be -20° to 60°C (-4°F to 140°F), relative humidity 10% to 90%, non-condensing. Cover the Laser Console when not in use for extended periods of time. Store the system in a place where it will not be accidentally bumped or banged. -
Page 56: Appendix A Labels
REFER TO INSTRUCTION MANUAL Location: Back panel TYPE BF APPLIED PART Location: Distal end of Fiber Cable (one side) DUTY CYCLE 2 min. ON MAX. 30 sec. OFF MIN. Location: Distal end of Fiber Cable (opposite side) Waterlase iPlus User Manual... - Page 57 Location: On the top cover, adjacent to Fiber Cable connector AT FIBER END 5200100 REV. B LASER WARNING SIGN Included in the Welcom Kit; must be placed outside of the operatory whenever the laser system is in use. Waterlase iPlus User Manual...
- Page 58 Location: Back panel ETL LISTED: UL/CSA CONFORMANCE LABEL Location: Back panel FOOTSWITCH LABEL Connection to Footswitch Location: Back panel WEIGHT LABEL Location: Back panel Waterlase iPlus User Manual...
- Page 59 Do not throw in trash bin. Dispose of as regulated. Location: Back Panel POTENTIAL EQUALIZATION TERMINAL (PEQ) Potential equalization conductor used to connect the GND terminal of the operatory. 5201487 Rev. A Location: Lower Back Panel Waterlase iPlus User Manual...
- Page 60 Appendix A Labels OUTER PACKAGING THIS END UP HANDLE KEEP DRY WITH CARE 106kPa +60 C 50kPa -20 C NON-CONDENSING ATMOSPHERIC RELATIVE TEMPERATURE HUMIDITY PRESSURE TEMPERATURE HUMIDITY ATMOSPHERIC LIMITATIONS LIMITATIONS PRESSURE LIMITATIONS Waterlase iPlus User Manual...
- Page 61 Appendix A Labels Keyswitch Label Remote Label Identification Calibration ETL Listing Electrical Rating Label Footswitch Label Air Intake Waterlase iPlus User Manual...
- Page 62 Appendix A Labels Laser Explanatory Label Laser Aperture Label Waterlase iPlus User Manual...
-
Page 63: Appendix B Accessories
Gold Mirror Single Refill 6201126 Turbo Handpiece 6201133 Turbo Mirror Refill 7200106 MD Gold Mirror Replacement Kit 3200105 Waterlase Mirror Removal Tool 2200706 Waterlase iPlus Display Covers 7200407 Turbo Tip Holder/Remover 5201281 Danger Sign (Laser Warning Sign) Waterlase iPlus User Manual... -
Page 64: Appendix C: Tips
Tip Type Tip Diameter (MD/iPlus, Radial Firing Tip) Chisel Tips Tapered Tips *Fiber Core Diameter TIP SETTINGS: WATERLASE IPLUS GOLD AND TURBO HANDPIECES Z - GLASS (QUARTZ) TIPS - SINGLE USE Gold Handpiece Ferrule Color/ Tip Type Lengths (mm ) -
Page 65: Sapphire Tips
Tip. Failure to replace the Tip correctly could result in damage of the Tip or the Handpiece mirror. The Tips have a limited lifetime, therefore damage of the cable attributed to overuse of the Single- Use Tips may not be covered by warranty. Waterlase iPlus User Manual... -
Page 66: Appendix D Tip Inspection
To replace the batteries for the built-in microscope light, gently pull apart the upper and lower tubes of the microscope. Locate the battery cover marked with “OPEN”, slide the cover in the direction of the arrow, remove the old batteries and replace with two size AA 1.5 volt (Europe size M) batteries. Waterlase iPlus User Manual... -
Page 67: Tip Cleaning Instructions
WARNING: Use of damaged or contaminated Tip may cause damage to the Fiber Cable and will compromise clinical performance of the Waterlase iPlus. Tips can be inspected using magnifying lenses, a microscope, laser aiming beam, or the BIOLASE Tip Inspection Kit. -
Page 68: Appendix E: Programmed Settings
Class I RapidPrep 5.00 MS75 7.25 MX11 10.00 8.00 Turbo 5.00 3.00 MZ10 7.00 4.50 2.50 2.00 Gold 1.25 MGG6 2.25 BondPrep 2.50 MS75 3.75 MX11 6.25 4.50 Turbo 2.50 1.25 *Yellow indicates the default setting. Waterlase iPlus User Manual... - Page 69 RapidPrep Class II 5.00 MS75 7.25 MX11 10.00 8.00 Turbo 5.00 2.50 MZ10 7.00 4.50 2.50 2.00 Gold 1.25 MGG6 2.25 BondPrep 2.50 MS75 3.75 MX11 6.25 4.50 Turbo 2.50 1.25 *Yellow indicates the default setting. Waterlase iPlus User Manual...
- Page 70 5.25 3.25 2.50 1.75 Gold MGG6 3.25 Class III, IV, V RapidPrep 3.25 MS75 4.75 MS75 4.75 5.25 Turbo 3.25 2.25 4.50 2.50 2.00 Gold 1.25 MGG6 2.25 BondPrep 2.50 MS75 3.75 4.50 Turbo 2.50 1.25 Waterlase iPlus User Manual...
- Page 71 Gold MGG6 2.25 2.75 Rapid Cut Gold 2.75 Smooth Cut Gold Frenectomy Tissue Plasty Gold Laser Bandage Gold (Dry) 2.75 Rapid Cut 2.75 Smooth Cut Biopsy Tissue Plasty Laser Bandage (Dry) *Yellow indicates the default setting. Waterlase iPlus User Manual...
- Page 72 Laser Not Used Filing RFT2 1.25 Clean Gold & Shape RFT3 2.25 RFT2 0.75 Disinfection Gold RFT3 MZ10 Gold MGG6 Access MS75 7.25 Pulpotomy MX11 Turbo Coagulation Gold MS75 1.75 MGG6 *Yellow indicates the default setting. Waterlase iPlus User Manual...
- Page 73 Gold RFPT5 Removal Calculus Gold RFPT5 Removal Pocket Therapy RFPT5 (Closed) Outer Epithelium Gold MGG6 Removal MS75 2.25 Flap Gold Calculus Gold Removal Pocket Therapy (Open) Osseous Gold MGG6 Recontouring MS75 *Yellow indicates the default setting. Waterlase iPlus User Manual...
- Page 74 MGG6 Bone Plasty Gold 2.25 MGG6 2.25 Tissue Plasty Gold 2.25 Gingivectomy Gold Flap Gold Osseous Crown Osseous Lengething Gold MGG6 Recontouring (Open) MS75 2.25 MGG6 2.25 Tissue Plasty Gold 2.25 *Yellow indicates the default setting. Waterlase iPlus User Manual...
- Page 75 (As Needed) RFPT8 Sulcular RFPT5 Debridement/ Gold RFPT8 Degranulation REPAIR Debridement Gold RFPT5 Implant Protocol of Implant Bone Gold Decortication RFPT5 Sulcular Gold Debridement RFPT8 Compress LASER NOT USED with 2x2 Gauze *Yellow indicates the default setting. Waterlase iPlus User Manual...
- Page 76 **Laser Bandage Laser bandage is a term generally used to describe using the Waterlase iPlus laser at its lowest settings to put a coating on tissue, either to help with hemostasis, to decrease pain from an oral lesion, or to make small alterations to a soft-tissue surgery.
-
Page 77: Appendix G Electromagnetic Compatibility
Portable and mobile Radio Frequency (RF) communications equipment can affect Medical Electrical Equipment. Accessories: Medical grade power cord, maximum length 10ft (2.44 meters) (BIOLASE part number 2000204). Footswitch: includes shielded, coiled Footswitch cable, Footswitch, 5 conducting wires. (BIOLASE part... - Page 78 Appendix G Electromagnetic Compatibility Waterlase iPlus User Manual...
- Page 79 Appendix G Electromagnetic Compatibility Waterlase iPlus User Manual...
- Page 80 Appendix G Electromagnetic Compatibility Waterlase iPlus User Manual...
- Page 81 PAGE INTENTIONALLY LEFT BLANK...
- Page 82 EPIC, iLase, ezLase, ezTip, LaserWhite, Deep Tissue Handpiece, ComfortPulse, Waterlase, and Waterlase iPlus are either trademarks or registered trademarks of BIOLASE, Incorporated in the United States and/or other countries. All other trademarks are property of their registered owners. Subject to change without notice.
Need help?
Do you have a question about the Waterlase iPlus and is the answer not in the manual?
Questions and answers