Table of Contents
Advertisement
Quick Links
Advertisement
Table of Contents

Related Manuals for Vornado 5303DC


Summary of Contents for Vornado 5303DC
-
Page 3: Table Of Contents
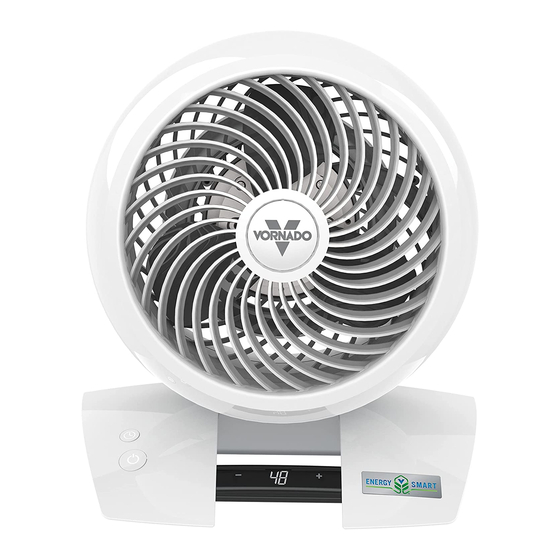
MODELS 5303DC, 6303DC, 6803DC OWNER’S GUIDE GUÍA DEL PROPIETARIO DE MODELOS 5303DC, 6303DC, 6803DC GUIDE D’UTILISATION – MODÈLES 5303DC, 6303DC, 6803DC CONTENTS Important Instructions ................ 2 Getting Started ................... 6 Features ....................8 Controls ....................9 How To Use ..................11 Remote Control ................. -
Page 4: Important Instructions
See www.vornado.com/circulators- children. If you think batteries might have been swallowed or placed manuals to view, download and print the most current version of inside any part of the body, seek immediate medical attention. - Page 5 - This appliance (models 5303DC, 6303DC only) has a polarized plug dimmer control switch. (one blade is wider than the other). To reduce the risk of electric - Do not operate any fan with a damaged cord or plug.
- Page 6 3. Risk of Fire. Replace fuse only with 2.5 Amp, 125 Volt fuse as the FCC Rules. Operation is subject to the following two conditions: approved by Vornado Consumer Service. For an authorized (1) This device may not cause harmful interference, and (2) this device replacement fuse, please contact Vornado Consumer Service.
- Page 7 - Connect the product into an outlet on a circuit different from that to which the receiver is connected. - Contact Vornado Consumer Service or dealer or an experienced radio/TV technician for help. This Class B digital apparatus complies with Canadian ICES-003.
-
Page 8: Getting Started
GETTING STARTED Installing Circulator Head (Model 6803DC Only) Stand Assembly (Model 6803DC Only) No tools required! 1. The upper pole and lower pole are pre-assembled, with the 1. Gently place the circulator head face down on the ground on a fastening nut (E) secured on the underside of the base. - Page 9 GETTING STARTED (Continued) Cord Management (Models 5303DC, 6303DC Only) Adjusting Height (Model 6803DC Only) 1. Wrap cord around Air Accelerator, located on back of 1. Before adjusting the height of the circulator, support the unit. Secure cord with three clips (G) located at 2, 6 and 10 circulator head with one hand.
-
Page 10: Features
FEATURES DIRECTABLE AIRFLOW Direct the airflow where you want it. CORD MANAGEMENT Integrated cord wrap. FINGER FRIENDLY DESIGN Resists curious fingers. ENERGY-SAVING TIMER 1–12 hour timer. TOUCH-SENSITIVE CONTROLS (99 SPEEDS) A speed setting for every comfort level. SILICON FEET REMOTE CONTROL Non-marking feet added Convenience at your fingertips. -
Page 11: Controls
CONTROLS Models 5303DC, 6303DC Only TIMER BUTTON SPEED/TIMER INDICATOR DISPLAY POWER ON/OFF SPEED/TIMER ADJUSTMENT BUTTONS -/+ English... - Page 12 CONTROLS Model 6803DC Only SPEED/TIMER ADJUSTMENT BUTTONS -/+ SPEED/TIMER INDICATOR DISPLAY POWER ON/OFF TIMER BUTTON 1. Insert DC power cord plug into port that extends from the bottom of circulator. POWER SUPPLY Note: The external 2. Connect the AC power (24V DC/2.5 AMP) power supply may cord to the power supply.
-
Page 13: How To Use
HOW TO USE 1. Touch 4. To adjust timer, repeat Step Three. to power on. 5. To cancel timer, repeat Step Three and Your circulator returns to last saved memory setting. set timer for 2. Select desired speed by pressing CORD MANAGEMENT Press and hold to adjust speed up... -
Page 14: Remote Control
REMOTE CONTROL Screwdriver required. Your circulator remote includes (1) coin style 3V CR2032 battery. Battery comes pre-installed. Remove battery pull tab before first use. 1. For battery replacement, the remote The remote control functions are the same as requires one coin style 3V CR2032 battery. the control panel on the circulator. -
Page 15: Grille & Blade Removal
GRILLE & BLADE REMOVAL Screwdriver required. WARNING: To reduce the risk of electrical shock and injury to persons, unplug the circulator before removing grille or blade. REMOVABLE GRILLE 1. Using a phillips head screwdriver, remove grille by unscrewing the 4 screws located along the perimeter of the inlet grille at roughly 2, 5, 7, and 10 o’clock positions. -
Page 16: Cleaning
CLEANING Because your product moves a substantial amount of air, it will need regular cleaning to remove lint, dust and grime. Never clean the product in any manner other than instructed in this owner's guide. WARNING Observe the following safety information to avoid risks and property damage. -
Page 17: Troubleshooting
GFCI has tripped. when the user is changing speeds on a Vornado circulator. In this event, change to an outlet that is not connected to a GFCI device. It could also indicate a weak or defective GFCI outlet. Contact a qualified electrician to check the GFCI outlet. -
Page 18: 16 Français
Assurez-vous d’avoir sélectionné un réglage de vitesse. Le fusible de la fiche électrique a sauté (modèles des É.-U. seulement 5303DC, 6303DC, 7503DC). Remplacez le fusible (voir INSTRUCTIONS DE RÉPARATION À L’INTENTION DE L’UTILISATEUR. L’appareil est endommagé ou il doit être réparé. Cessez d’utiliser l’appareil et débranchez-le. Contactez le service à la clientèle pour obtenir de l’aide. - Page 19 RÉPARATION OU Vornado ® ensemble salle circulateur ("produit") est exempt de tout défaut de matériau ou de REMPLACEMENT SELON LES TERMES DE CETTE GARANTIE EST LE RECOURS EXCLUSIF fabrication pendant une période de dix (10) ans à...
Need help?
Do you have a question about the 5303DC and is the answer not in the manual?
Questions and answers