Nautilus Hyosung MX5300CE Service Manual
Hide thumbs
Also See for MX5300CE:
- Manual (180 pages) ,
- Operator's manual (51 pages) ,
- Installation manual (28 pages)

Related Manuals for Nautilus Hyosung MX5300CE


Summary of Contents for Nautilus Hyosung MX5300CE
- Page 1 Service Manual MX5300CE System V01.00.03 (2013.05.30) © Nautilus Hyosung, Inc. All Rights Reserved.
- Page 2 Delete “Functional Description”. Add the “Précautions pour la sécurité (French)” Chapter 1 © Nautilus Hyosung All Rights Reserved. The content of this specification is protected by copyright laws. 2013. 05. 30. 4rd Release © Nautilus Hyosung, Inc. All Rights Reserved.
-
Page 3: Table Of Contents
Chapter6. Safe Unit Cencon System S2000 ·································································································································· 6-1 ELECTRONIC COMBINATION LOCK ·········································································································· 6-4 Chapter7. Receipt Printer Receipt Printer : K-SPR1 Type ( 728656-10) ································································································ 7-1 Option A. Receipt Printer : K-SPR1E Type (70200000-35) ········································································· 7-20 © Nautilus Hyosung, Inc. All Rights Reserved. - Page 4 How to Set the new password ······················································································································· 9-2 Chapter10. Magnetic Card Unit External Appearance/ Functional Diagram ·································································································· 10-1 Unit Block Diagram ······································································································································ 10-5 Cable Connection Diagram ························································································································· 10-6 Interface Specifications ································································································································ 10-7 Repair and Maintenance ····························································································································· 10-9 © Nautilus Hyosung, Inc. All Rights Reserved.
- Page 5 What is in This Manual ............................1-1 Conventions ................................. 1-2 Abbreviations of ATM ............................1-2 Safety Precautions ............................... 1-4 Précautions pour la sécurité (French) ......................... 1-6 Related Documents ............................. 1-8 Overview ................................1-9 Basic Features ..............................1-10 © Nautilus Hyosung, Inc. All Rights Reserved. Chapter1-I...
-
Page 6: Chapter1. Preface
▶ This manual is produced to provide the MX5300CE maintenance guide for field technician. Audience ▶ This manual is for persons related to maintenance MX5300CE in branches of banks, such as field technician and repair center engineer, to work efficiently and conveniently. Supported Information ▶... -
Page 7: Conventions
Battery Switch Camera Unit Cash Dispenser Unit Control Electronics Earphone Jack Voice Converter for Visually Disabled Persons (ADA) Europay, Mastercard, Visa Elementary Program Encryption PIN Pad Hardware Interface International Standard Organization Journal Printer © Nautilus Hyosung, Inc. All Rights Reserved. - Page 8 On Screen Display Board Power Supply Personal Identification Number Panel Control Board Printer (mainly Receipt Printer) Switch Sensor and Indications Unit Service Provider Slip Printer (Receipt Printer) Text Terminal Unit (OPL or SPL) Vacuum Fluorescent Display © Nautilus Hyosung, Inc. All Rights Reserved.
-
Page 9: Safety Precautions
▪ Do not touch the equipment when it is running. ▪ The equipment can get extremely hot and may cause a burn. ▪ Make sure to close the cover before running the equipment. © Nautilus Hyosung, Inc. All Rights Reserved. - Page 10 TYPE. DISPOSED OF USED BATTERIES ACCORDING TO THE INSTRUCTIONS 3. FOR PLUGGABLE EQUIPMENT, THE SOCKET-OUTLET SHALL BE INSTALLED NEAR THE EQUIPMENT AN SHALL BE EASILY ACCESSIBLE 4. THE EQUIPMENT IS TO BE SECURED TO THE BUILDING STRUCTURE BEFORE OPERATION © Nautilus Hyosung, Inc. All Rights Reserved.
-
Page 11: Précautions Pour La Sécurité (French)
• Ne pas retirer le couvercle. Seul le technicien d'entretien est autorisé à ouvrir le couvercle. • Ne pas toucher. Vous pouvez avoir un choc électrique. • Assurez-vous d'éteindre l'appareil lors de l'entretien de l'équipement. © Nautilus Hyosung, Inc. All Rights Reserved. - Page 12 INCORRECT. DISPOSER POUR UTILISATION DES BATTRIES SELON LES INSTRUCTIONS 3. POUR LES APPAREILS RACCORDES, LA PRISE DOIT ETRE INSTALLEE PRES D’EQUIPEMENT POUR ÊTRE FACILEMENT ACCESSIBLE 4. L’EQUIPEMENT DOIT ETRE SECURISE A LA STRUCTURE DU BATIMENT AVANT D'UTILISER © Nautilus Hyosung, Inc. All Rights Reserved.
-
Page 13: Related Documents
▪ Operator Manual ▪ Operator Function Manual ▪ Installation Manual ▪ Error Code List For the contact of maintenance staffs of Nautilus Hyosung, see the E-mail addresses and telephone numbers provided separately. © Nautilus Hyosung, Inc. All Rights Reserved. -
Page 14: Overview
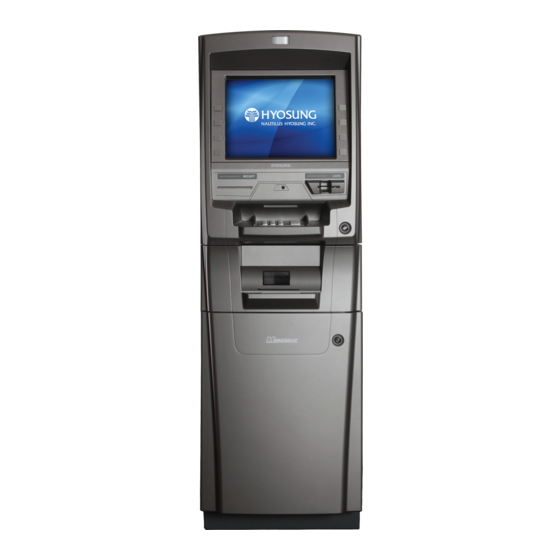
Model MoniMax 5300CE ATM is easy to use, easy to be service and is able to support customer’s demands perfectly. © Nautilus Hyosung, Inc. All Rights Reserved. -
Page 15: Basic Features
Chapter1. Preface Service Manual Basic Features ▶ Important features of the model MX5300CE machine is highlighted in the following list: Main Controller PXA270 520MHz SDRAM 64MB (32MB * 2EA) Memory Flash Memory 64MB (32MB * 2EA) NV-RAM 512KB (16bit) Operating System... - Page 16 Safety Option Safety UL 291 Business hour (UL291 Level-1) Electronic Lock & Locking device Dial Lock Cencon Lock Option Additional Function Audio guidance Supported Speaker ADA Audio guidance Supported Ear Phone Jack © Nautilus Hyosung, Inc. All Rights Reserved. 1-11...
- Page 17 Chapter 2 System Configuration Contents About the MoniMax 5300CE ..........................2-1 External Appearance ............................2-2 Hardware Configuration ............................. 2-3 System Block Diagram ..........................2-3 © Nautilus Hyosung, Inc. All Rights Reserved. Chapter2-I...
-
Page 18: About The Monimax 5300Ce
Model MoniMax 5300CE ATM is easy to use, easy to be service and is able to support customer’s demands perfectly. © Nautilus Hyosung, Inc. All Rights Reserved. -
Page 19: External Appearance
External Appearance ▶ Dimensions of MoniMax 5300CE in which a cash dispenser with 1~3 cassettes is installed. <Note!> All the unit in the dimension is millimeter and the unit in the parenthesis is inch. © Nautilus Hyosung, Inc. All Rights Reserved. -
Page 20: Hardware Configuration
Service Manual Chapter2. System Configuration Hardware Configuration System Block Diagram ▶ The system block diagram of 5300 CE © Nautilus Hyosung, Inc. All Rights Reserved. - Page 21 Disassembly and Assembly Procedure ...................... 3-24 Function Key ..............................3-25 Function Key Code ............................. 3-25 Hardware Configuration ..........................3-25 Connector Configuration and Pin Specification ..................3-27 Disassembling the Function Key ........................ 3-29 © Nautilus Hyosung, Inc. All Rights Reserved. Chapter3-I...
-
Page 22: Chapter3. User Handling Unit
The major specification of User handling unit in 5300 CE Appearance (Backside) ▶ Backside appearance for standard specifications Speaker Inverter A/D Board Board Function Key Main Board + Modem + Interface Board Card Reader Encrypted Pin Pad © Nautilus Hyosung, Inc. All Rights Reserved. -
Page 23: Monitor
▶ A monitor is composed of privacy display filter, protective glass, LCD, analog-digital board, inverter, and so on as shown in the figure below. Front Bezel Protective Glass Privacy Filter TFT-LCD LCD Unit Frame Invertors Analog-digital Board Configuration Diagram of Entire Monitor © 2012 Nautilus Hyosung, Inc. All Rights Reserved. -
Page 24: Tft Color Lcd
95℉] and relative humidity of less than 70% 2. Do not store the TFT-LCD module in direct sunlight 3. The module shall be stored in a dark place. It is prohibited to apply sunlight or fluorescent light during the store © Nautilus Hyosung, Inc. All Rights Reserved. -
Page 25: General Specifications Of Lcd
326.50 [12.85] (W) x 253.5 [9.98] (H) x 11.2 [0.44] (D) Module size mm [inch] (typ.) 1000g [0.22lb] (typ.) Weight 450:1 (typ.) Contrast ratio ▪ Horizontal : 120° (typ.) Viewing angle ▪ Vertical : 100° (typ.) © 2012 Nautilus Hyosung, Inc. All Rights Reserved. -
Page 26: Disassembling The Lcd Assembly
304.128 (W) x 228.096 (H) Specifications area Weight 1000 (typ.) ▶ Disassembling the LCD assembly 1. Insert the key and turn it clockwise. 2. Pull the front panel outward and turn off the power. © Nautilus Hyosung, Inc. All Rights Reserved. - Page 27 Chapter3. User Handling Unit Service Manual 3. Unscrew two fixing screws located on front panel’s each side and pull the front panel completely for easy maintenance. 4. Remove 2 screws and separate the board cover. © 2012 Nautilus Hyosung, Inc. All Rights Reserved.
- Page 28 5. Remove 8 screws marked in the below picture and disconnect all connectors and cables connected to the boards. Then disassemble the LCD assembly carefully. 6. Assemble the LCD assembly using the reverse order of disassembly. © Nautilus Hyosung, Inc. All Rights Reserved.
-
Page 29: Outside Drawing Of Lcd: Front
Chapter3. User Handling Unit Service Manual ▶ Outside Drawing of LCD: Front © 2012 Nautilus Hyosung, Inc. All Rights Reserved. -
Page 30: Lcd Block Diagram
Note 1: Connection between GND, FG (Frame ground) and VBLC (Lamp low voltage terminal) in the product. GND-FG Connected GND-VBLC Not connected FG-VBLC Not connected Note 2: These grounds should be connected together in customer equipment. © Nautilus Hyosung, Inc. All Rights Reserved. -
Page 31: Troubleshooting Procedure
2. Backlight of the LCD panel is on. -> Connect/Disconnect the power line of OPL assembly. -> If “Nautilus HYOSUNG” logo is not displayed on the OPL screen, replace the AD board. ▶ The LCD is displayed white. ▶ The LCD is displayed white. -
Page 32: Encryption Pin Pad
2. In case there is a damage caused by any external shock or static electricity 3. In case the EPP is not connected with an earth cable, which makes it vulnerable to static electricity 4. In case the battery is discharged. © Nautilus Hyosung, Inc. All Rights Reserved. 3-11... -
Page 33: Led Operation Check
3. If LED1 is off, check the cable connection to see if the power supply is okay. 4. If LED1 is on and LED2 is off, it means EPP is in abnormal operation. Therefore, replace the EPP. 3-12 © 2012 Nautilus Hyosung, Inc. All Rights Reserved. -
Page 34: Disassembling The Epp Module
4. First remove 2 screws for fixing LED bracket. 5. Remove 4 screws and disconnect the cables as pictured below and disassemble the EPP module. 6. Assemble the EPP module in the reverse order of the disassembly. © Nautilus Hyosung, Inc. All Rights Reserved. 3-13... -
Page 35: Boards
▪ Supporting 720x400(DOS), 640x480(VGA), 800x600(SVGA), 1024x768(XGA) mode full screen ▪ Supporting 1CH/2CH LVDS output ▪ Supporting 5language OSD ▶ Board Block Diagram Power Input Digita RGB Input Signal BACK LIGHT LAMP DRIVE SIGNAL 3-14 © 2012 Nautilus Hyosung, Inc. All Rights Reserved. -
Page 36: Specifications
Sync. polarities Positive/Negative Color data : 5V Signal Level Sync : TTL(<5V) compatible Input Power +12Vdc : 3.5A, Typ. Ampere Power Power 150 mA, (Board only). Watt Comsumption ▶ Mode / Resolution © Nautilus Hyosung, Inc. All Rights Reserved. 3-15... -
Page 37: Board Layout
Chapter3. User Handling Unit Service Manual ▶ Board Layout ▶ Connector Pin Description 1. J5-Digital RGB Input-32P Description Description BLUE0 RED0 BLUE1 RED1 BLUE2 RED2 BLUE3 RED3 BLUE4 RED4 BLUE5 RED5 BLUE6 RED6 3-16 © 2012 Nautilus Hyosung, Inc. All Rights Reserved. - Page 38 2. J17-Power Adaptor Jack Description Description +12V 3. J8-LVDS INTERFACE(1CH) Description Description +3.3V (LCD Power) +3.3V (LCD Power) TCLK- TCLK+ 4. J2-Inverter Interface Description Description +12V (Inverter Power) +12V (Inverter Power) DIM_ADJ INVONOFF © Nautilus Hyosung, Inc. All Rights Reserved. 3-17...
-
Page 39: Cable Harness Specification
1. Digital RGB Input Cable - NAME : TTL INPUT CABLE - Cable Length : 300 mm [11.81inch], Min (Except connector body) - Connector YDW200-32 DMIB-422 Board Side : YDH200-32 Plane View Plane View 3-18 © 2012 Nautilus Hyosung, Inc. All Rights Reserved. -
Page 40: Board Mechanical Drawing
Service Manual Chapter3. User Handling Unit ▶ Board Mechanical Drawing © Nautilus Hyosung, Inc. All Rights Reserved. 3-19... -
Page 41: Disassembly And Assembly Procedure
4. After separating board cover, remove 4 screws marked in the below picture and disconnect all cables and connectors. 5. Disassemble the AD board and replace it as new one. 3-20 © 2012 Nautilus Hyosung, Inc. All Rights Reserved. -
Page 42: Inverter Board
Service Manual Chapter3. User Handling Unit Inverter Board ▶ Electrical Characteristics © Nautilus Hyosung, Inc. All Rights Reserved. 3-21... - Page 43 Chapter3. User Handling Unit Service Manual ▶ Functional Pin Description Input Connector CN1 : 12505WR-10A00 Output Connector CN2,CN3 : 20015WR-05A00 ▶ Mechanical Drawings P.W.B 3-22 © 2012 Nautilus Hyosung, Inc. All Rights Reserved.
- Page 44 Service Manual Chapter3. User Handling Unit Component Max Height Marking © Nautilus Hyosung, Inc. All Rights Reserved. 3-23...
-
Page 45: Disassembly And Assembly Procedure
5. Remove 2 screws from the inverter board cover. 6. Remove 2 screws and cables from the board to disassemble it. 7. Assemble the inverter board in the reverse order of the disassembly. 3-24 © 2012 Nautilus Hyosung, Inc. All Rights Reserved. -
Page 46: Function Key
FK/R TACT SW FK/L TACT SW TACT SW TACT SW MOLEX 6P, R/A TACT SW MOLEX 6P, R/A TACT SW TACT SW TACT SW LEFT FUCTION KEY RIGHT FUCTION KEY © Nautilus Hyosung, Inc. All Rights Reserved. 3-25... - Page 47 Chapter3. User Handling Unit Service Manual Plane view <The PCB appearance in Function Key> 3-26 © 2012 Nautilus Hyosung, Inc. All Rights Reserved.
-
Page 48: Connector Configuration And Pin Specification
Connector Configuration and Pin Specification ▶ Connector Configuration and Pin Specification 1. External interface connector diagram Left Function Key Right Function Key 2. Pin specification FK_L (Function Key_Left): 33300906 (CONN:HDR:BOX:R /A:5268-06A:6P) ① Signal © Nautilus Hyosung, Inc. All Rights Reserved. 3-27... - Page 49 Chapter3. User Handling Unit Service Manual ② FK_R (Function Key_Right): 33300906 (CONN:HDR:BOX:R/A:5268 -06A:6P) Description 3-28 © 2012 Nautilus Hyosung, Inc. All Rights Reserved.
-
Page 50: Disassembling The Function Key
4. Remove 2 screws and separate the board cover. 5. Remove 6 screws marked in the below picture and separate LCD assembly. 6. Remove 3 screws from each function key and disassemble them. © Nautilus Hyosung, Inc. All Rights Reserved. 3-29... - Page 51 Disassemble / Assemble CE Unit ......................... 4-2 Mother Board Specifications ..........................4-5 Detailed functionality ............................ 4-5 Block diagram of motherboard ........................4-6 MAP ................................4-7 External Interface Diagram ......................... 4-13 Cabling ................................4-16 Cable Linking Diagram ..........................4-16 © Nautilus Hyosung, Inc. All Rights Reserved. Chapter4-I...
-
Page 52: Chapter4. Control Electronics
128MB NV-RAM : 256KB(8bit) -> 512KB(16bit) SERIAL 7 PORT 1HOST, 2 PORT 1CLIENT SD/MMC 1 PORT INPUT : +24V DC/DC OUTPUT : +12V(2.5A), +3V(3A) 10.4”TFT LCD 640*480 DS1337 Function Key Direct Keypad (2*4PIN) © Nautilus Hyosung, Inc. All Rights Reserved. -
Page 53: Disassembly/ Assembly Diagram
1. Insert the key and turn it clockwise. 2. Pull the front panel outward and turn off the power. 3. Unscrew two fixing screws located on front panel’s each side and pull the front panel completely for easy maintenance. © Nautilus Hyosung, Inc. All Rights Reserved. - Page 54 4. Remove 2 screws and separate the board cover. 5. Remove 4 screws in the below picture and disconnect all connectors and cables connected to the boards. Then disassemble the upper board carefully. © Nautilus Hyosung, Inc. All Rights Reserved.
- Page 55 6. Remove all of cables connected to control electronics carefully not to hurt the connector pins of cable and 12 screws marked in the below figure to disassemble the main board. 7. Assemble the main board using the reverse order of disassembly. © Nautilus Hyosung, Inc. All Rights Reserved.
-
Page 56: Mother Board Specifications
▪ Vcc MEM : 3.3V (MAX 0.5A) ▪ Vcc PLL : 1.3V, Vcc USIM : 1.8V, Vcc SRAM : 1.1V (Typ 90mA) ▪ Vcc BAT : Battery supply switching ▪ Shutdown Current : 5uA © Nautilus Hyosung, Inc. All Rights Reserved. -
Page 57: Block Diagram Of Motherboard
Chapter4. Control Electronics Service Manual Block diagram of motherboard © Nautilus Hyosung, Inc. All Rights Reserved. -
Page 58: Map
5 : SYSTEM I/O (MODEM, 16C554) nCS 4 : 2700G (Delete) nCS 3 : 2700G (Changing to Boot ROM) nCS 2 : NV-RAM nCS 1 : CS8900A (LAN) nCS 0 : Flash Memory © Nautilus Hyosung, Inc. All Rights Reserved. - Page 59 Chapter4. Control Electronics Service Manual © Nautilus Hyosung, Inc. All Rights Reserved.
- Page 60 LCD 6 (LCD DATA PIN 6) ASDIN) AC97_SYNC(CS4299 GP[31] GP[65] LCD 7 (LCD DATA PIN 7) ASUNC) GP[32] SDCLK GP[66] LCD 8 (LCD DATA PIN 8) GP[33] nCS5 (SYSTEM I/O CS) GP[67] LCD 9 (LCD DATA PIN 9) © Nautilus Hyosung, Inc. All Rights Reserved.
- Page 61 GP[91] GP[92] SDDAT0 GP[93] KP_DKIN0 (FUNCTION KEY) GP[94] KP_DKIN1 (FUNCTION KEY) GP[95] KP_DKIN2 (FUNCTION KEY) GP[96] KP_DKIN3 (FUNCTION KEY) GP[97] KP_DKIN4 (FUNCTION KEY) GP[98] KP_DKIN5 (FUNCTION KEY) KP_DKIN7 (FUNCTION KEY) GP[100] GP[101] 4-10 © Nautilus Hyosung, Inc. All Rights Reserved.
- Page 62 TXDO_7 RXDO_6 RD- (LAN) TXDO_6 RD+ (LAN) DCDO_5 DRTO_5 TTL_O8 CTSO_5 TTL_O7 RTSO_5 TTL_O6 RXDO_5 TTL_O5 TXDO_5 TTL_O4 TTL_O3 DCDO_4 TTL_O2 DTRO_4 TTL_O1 CTSO_4 RTSO_4 TTL_IN8 RXDO_4 TTL_IN7 TXDO_4 TTL_IN6 TTL_IN5 TTL_IN4 © Nautilus Hyosung, Inc. All Rights Reserved. 4-11...
- Page 63 9) CON1 (12 PIN) : SD CARD SOCKET 10) J11 (5 PIN) : INVERTER CONN 11) J9 (2*16 PIN) : 2.0mm [0.79inch] pitch pin header 12) BAT1 (4 PIN) : BATTERY CONN 13) JP1 (4 PIN) : POWER CONN 4-12 © Nautilus Hyosung, Inc. All Rights Reserved.
-
Page 64: External Interface Diagram
ⓑ COM2 : Encryption pin pad (EPP) ⓒ COM3 : Reserved (Full Function UART) ⓓ COM4 : Reserved (Full Function UART) ⓔ ⓕ COM5 : Cash dispenser COM6 : Debug Port ⓖ © Nautilus Hyosung, Inc. All Rights Reserved. 4-13... - Page 65 - 1, 2 short : 16bit mode 2, 3 short : 32bit mode (Default) J73 : Flash Memory size Setting - 1, 2 short : 64MB - 2, 3 short : 128MB 4-14 © Nautilus Hyosung, Inc. All Rights Reserved.
- Page 66 J8 : Connect with Inverter B/D J11 : Option Modem Connection CN1 : LAN & 7 Serial Port CN2 : Speaker Connection CN3 : Earphone Jack detect CONN CN4 : +24V Power Supply CONN © Nautilus Hyosung, Inc. All Rights Reserved. 4-15...
-
Page 67: Cabling
Chapter4. Control Electronics Service Manual Cabling Cable Linking Diagram ▶ The rear panel provides the following connectors: 4-16 © Nautilus Hyosung, Inc. All Rights Reserved. - Page 68 Safety: UL60950/IEC60950 ........................5-4 Input Specification ..........................5-5 Output Specification ..........................5-5 Connector Configuration ........................5-6 Troubleshooting ..............................5-8 Troubleshooting Tools ........................... 5-8 Field Repair Scope (Recommendation) ....................... 5-8 Checking power supply status ........................5-9 © Nautilus Hyosung, Inc. All Rights Reserved. Chapter5-I...
-
Page 69: Chapter5. Power Supply
▶ [Check point] Before turning power on this power supply, make sure that the ground condition of outlet will be satisfied with under 5.0V at installation site. Without complying with this ground condition, power supply as well as other equipments in ATM may cause any unexpected damage. © Nautilus Hyosung, Inc. All Rights Reserved. -
Page 70: Block Diagram
AC IN 100-240V RECTIFIERS RECTIFIERS SWITCHING +24Vdc NOISE FILTER FUSE DEVICE 250V 5A FILTER FILTER RECTIFIERS +12Vdc FILTER CURRENT SENSING DC/DC +5Vdc CONVERTER CONTROL CONTROL (FEED BACK) (P.W.M) OVER VOLTAGE PROTECTION THERMAL PROTECTION (OPTION) © Nautilus Hyosung, Inc. All Rights Reserved. -
Page 71: Disassembly Procedure
▶ 1. Open the rear panel with key and turn power off. 2. Remove all of cables connected to the Power Supply carefully not to hurt connector pins or each cable. Then remove the screws located on the bottom of Power Supply © Nautilus Hyosung, Inc. All Rights Reserved. -
Page 72: Specifications
Cutoff Current: 10mA PRI - F.G AC 1800 V During the Test: 1 min PRI – SEC DC 500 Vdc Insulation Insulation Resistance: Resistance PRI - F.G DC 500 Vdc ≥10Mohm Safety: UL60950/IEC60950 © Nautilus Hyosung, Inc. All Rights Reserved. -
Page 73: Input Specification
SWITCHING Ripple mVp-p Noise Vp-p Shoot ±3 ±3 ±5 5.6 ~ 7.5 13.3 ~15.6 26.5 ~ 31.2 10.0 ~ 16.0 <Note!> 1. Ripple & Noise Test Condition: 20MHz, 150uF(ELEC)/0.1uF(CER) 2. S.C: Short Circuit © Nautilus Hyosung, Inc. All Rights Reserved. -
Page 74: Connector Configuration
Black 18AWG/UL1007 18AWG/UL1007 Black MOLEX (87427-0602) 18AWG/UL1007 +12V 18AWG/UL1007 Yellow 4. SPR Division Configuration Size Color Remark 18AWG/UL1007 18AWG/UL1007 18AWG/UL1007 Black 18AWG/UL1007 Black MOLEX (87427-0802) 18AWG/UL1007 Black +24V 18AWG/UL1007 White +24V 18AWG/UL1007 White © Nautilus Hyosung, Inc. All Rights Reserved. - Page 75 Service Manual Chapter5. Power Supply 5. CDU Division Configuration Size Color Remark BATTERY(+) 16AWG/UL1015 WHITE BATTERY(+) 16AWG/UL1015 WHITE CN14 (350431-1) BECH-N 22AWG/UL1007 BROWN BATTERY(-) 16AWG/UL1015 BLACK BATTERY(-) 16AWG/UL1015 BLACK © Nautilus Hyosung, Inc. All Rights Reserved.
-
Page 76: Troubleshooting
Other items not mentioned above cannot be repaired or inspected on site but must be inspected and repaired at the depot level. © Nautilus Hyosung, Inc. All Rights Reserved. -
Page 77: Checking Power Supply Status
▪ Switch on if a certain time goes by after turning off main switch. ▪ Switch on if a certain time goes by after turning off main switch and disassembling D.C output connector. © Nautilus Hyosung, Inc. All Rights Reserved. - Page 78 Chapter 6 Safe Unit Contents Cencon System S2000 ............................6-1 Initial Operating Instructions ........................6-1 Change Shelved Mode Combination ......................6-2 ELECTRONIC COMBINATION LOCK ........................ 6-4 © Nautilus Hyosung, Inc. All Rights Reserved. Chapter6-I...
-
Page 79: Chapter6. Safe Unit
▪ Turn the Dial right (CW) until it stops. The lock’s bolt is now retracted and the lock is open. ▪ Turning the Dial left (CCW) will extend the lock’s bolt Try this several times until you are comfortable with the operation of the lock. © Nautilus Hyosung, Inc. All Rights Reserved. -
Page 80: Change Shelved Mode Combination
Press the “#” button followed by the “8” button. EcF (Enter current Factory combination) will be displayed. 9. EcF -> Enter Current Shelved Mode Combination -> EnF Enter the current shelved mode combination, “EnF” (Enter new Factory combination) will be displayed. © Nautilus Hyosung, Inc. All Rights Reserved. - Page 81 15. OPr -> Retract Bolt Turn the Dial to the right (CW) to retract the bolt. 16. Close Door 17. Extend Bolt Turn the Dial to the left (CCW) to extend the bolt. © Nautilus Hyosung, Inc. All Rights Reserved.
-
Page 82: Electronic Combination Lock
▪ Uses one (1) 9-Volt Alkaline Battery. LA GARD recommends the use of Duracell™ or Everready™ Alkaline batteries. If battery is depleted and will not allow lock to open, simply follow instructions below. © Nautilus Hyosung, Inc. All Rights Reserved. - Page 83 5) Push the battery and the leads completely up into the battery compartment. 6) Install the battery cover by placing one side of the cover in position and then pressing the other side into position with your finger. © Nautilus Hyosung, Inc. All Rights Reserved.
- Page 84 Chapter6. Safe Unit Service Manual ▶ Changing Batteries © Nautilus Hyosung, Inc. All Rights Reserved.
- Page 85 Service Manual Chapter6. Safe Unit ▶ Changing Batteries (Option) © Nautilus Hyosung, Inc. All Rights Reserved.
- Page 86 Repair and Maintenance .......................... 7-23 Replacing the End Sensor ......................... 7-23 Replacing the JAM Sensor ........................ 7-27 Replacing the Motor (564057-01) ....................... 7-31 Replacing TPH (ATP-82K, 56770000-13) ................... 7-34 Oiling ..............................7-38 © Nautilus Hyosung, Inc. All Rights Reserved. Chapter7-I...
-
Page 87: Receipt Printer : K-Spr1 Type ( 728656-10)
Appearance/Arrangement Plan Appearance ▶ The following figure shows the external appearance of Receipt Printer. Its dimensions are 146.9mm [5.78inch] (W) X 290mm [11.42inch] (H) X 327.9mm [12.91inch] (L). Appearance of Receipt Printer (P/N: 728656-10) © Nautilus Hyosung, Inc. All Rights Reserved. -
Page 88: General Specification
Temperature: 0 ~ 55℃ [32 ~ 131 ] Rate 100mm/s [3.94inch/s] Approximately 3,400 transactions (based on 110mm Paper Roll Capacity [4.33inch] per transaction) <Note!> Paper Roll Capacity is dependent on the user specifications © 2012 Nautilus Hyosung, Inc. All Rights Reserved. -
Page 89: Arrangement Plan Of Sensors And Electromagnetic Components
Internal Switch Identifies cutter regular Cutter Switch Internal Switch position Paper Returning Returns the paper Internal Motor Motor Motor of Nautilus Cutter Motor Drives the cutter Hyosung Paper Returning Returns the paper PM20S Motor © Nautilus Hyosung, Inc. All Rights Reserved. -
Page 90: Repair And Maintenance
1. Insert the key and turn it clockwise. 2. Pull the front panel outward and turn off the power. 3. Unscrew two fixing screws located on front panel’s each side and pull the front panel completely for easy maintenance. © 2012 Nautilus Hyosung, Inc. All Rights Reserved. - Page 91 4. Disocnnect the power & communiction connector from the Receipt Printer. 5. Unscrew Receipt Printer fixing screws (PH(+):S/W:F/W(L):M3X6) using a driver, and remove the mecha from the system. 6. Unscrew four main board (723356-01) fixing screws (BH(+)::M3X6), and remove the board. © Nautilus Hyosung, Inc. All Rights Reserved.
- Page 92 7. Disconnect the end sensor connector from the main board (723356-01). 8. Remove the cable tie binding the end sensor cable with a pair of nippers. 9. Unscew the screw (PH(+):S/W:F/W(S):M3X6) that fixes the end sensor fixing bracket (456820-01). © 2012 Nautilus Hyosung, Inc. All Rights Reserved.
- Page 93 10. Remove the end sensor (216856-01). Remove 11. Remove the end sensor (P-INTERRUPTER: SG405CD, 216856-01) from the bracket (End_Sensor, 456820-01),and install a new end sensor. Replace 12. Assemble in the reverse order of Steps 1 ~ 11. © Nautilus Hyosung, Inc. All Rights Reserved.
-
Page 94: Replacing The Jam Sensor
1. Insert the key and turn it clockwise. 2. Pull the front panel outward and turn off the power. 3. Unscrew two fixing screws located on front panel’s each side and pull the front panel completely for easy maintenance. © 2012 Nautilus Hyosung, Inc. All Rights Reserved. - Page 95 4. Disocnnect the power & communiction connector from the Receipt Printer. 5. Unscrew Receipt Printer fixing screws (PH(+):S/W:F/W(L):M3X6) using a driver, and remove the mecha from the system. 6. Unscrew four main board (723356-01) fixing screws (BH(+)::M3X6), and remove the board. © Nautilus Hyosung, Inc. All Rights Reserved.
- Page 96 7. Disconnect the jam sensor conector from the main board. 8. Cut the tie biding the cable with a pair of nippers. 9. Unscrew the screw (PH(+):S/W:F/W(S):M3X6) that fixes the jam sensor fixing bracket (456822-01). 7-10 © 2012 Nautilus Hyosung, Inc. All Rights Reserved.
- Page 97 Service Manual Chapter7. Receipt Printer 10. Remove the sensor from the bracket (Jam Sensor, 456822-01), and install a new sensor. Replace 11. Assemble in the reverse order of Steps 7 ~ 10. © Nautilus Hyosung, Inc. All Rights Reserved. 7-11...
-
Page 98: Replacing The Motor (564057-01)
2. Pull the front panel outward and turn off the power. 3. Unscrew two fixing screws located on front panel’s each side and pull the front panel completely for easy maintenance. 7-12 © 2012 Nautilus Hyosung, Inc. All Rights Reserved. - Page 99 4. Disocnnect the power & communiction connector from the Receipt Printer. 5. Unscrew Receipt Printer fixing screws (PH(+):S/W:F/W(L):M3X6) using a driver, and remove the mecha from the system. 6. Unscrew four main board (723356-01) fixing screws (BH(+)::M3X6), and remove the board. © Nautilus Hyosung, Inc. All Rights Reserved. 7-13...
- Page 100 9. Unscres the screw (PH(+):M2x6:W/ZN) that fixes the motor on the assembly:guide outlet (728813-01), and replace the motor. Remove and replace 10. Asemble in the reverse order of Steps 1 ~ 9. 7-14 © 2012 Nautilus Hyosung, Inc. All Rights Reserved.
-
Page 101: Replacing Tph (M-T482Af_W/Cutter, 574226-11)
1. Insert the key and turn it clockwise. 2. Pull the front panel outward and turn off the power. 3. Unscrew two fixing screws located on front panel’s each side and pull the front panel completely for easy maintenance. © Nautilus Hyosung, Inc. All Rights Reserved. 7-15... - Page 102 4. Disocnnect the power & communiction connector from the Receipt Printer. 5. Unscrew Receipt Printer fixing screws (PH(+):S/W:F/W(L):M3X6) using a driver, and remove the mecha from the system. 6. Unscrew four main board (723356-01) fixing screws (BH(+)::M3X6), and remove the board. 7-16 © 2012 Nautilus Hyosung, Inc. All Rights Reserved.
- Page 103 7. Disconnect connectors from the board, and remove the mecha and the board. 8. Cut the tie binding the motor (564057-01) and jam sensor cables with a pair of nippers. 9. Unscrew three screws (PH(+):S/W:F/W(S):M3X6), and remove assembly:guide outlet (728813-01). © Nautilus Hyosung, Inc. All Rights Reserved. 7-17...
- Page 104 - Horizontally adjust the TPH assembly to match the inlet with the guide inlet during Step 8. - The assembly/guide outlet shall not move after Step 7. - The TPH laver’s operation shall not interfere with the buide after Step 7. 7-18 © 2012 Nautilus Hyosung, Inc. All Rights Reserved.
-
Page 105: Oiling
Inject Terras oil. 4. Assemble in the reverse order of Steps 1 ~ 3. 5. After asembling, inject a proper amount of white great to the gear teeth. © Nautilus Hyosung, Inc. All Rights Reserved. 7-19... -
Page 106: Option A. Receipt Printer : K-Spr1E Type (70200000-35)
▶ The following figure shows the external appearance of Receipt Printer. Its dimensions are 146.9mm [5.78inch] (W) X 290mm [11.42inch] (H) X 327.9mm [12.91inch] (L). Appearance of Receipt Printer (P/N: 70200000-35) 7-20 © 2012 Nautilus Hyosung, Inc. All Rights Reserved. -
Page 107: General Specification
Approximately 3,400 transactions (based on 110mm [4.33inch] Paper Roll Capacity per transaction) <Note!> Capacity is dependent on the user specifications (DIP S/W SETTING) Setting Usage Baudrate Setting 115200 9600 Black Mark Setting un-use © Nautilus Hyosung, Inc. All Rights Reserved. 7-21... -
Page 108: Arrangement Plan
Jam Sensor Detects paper jam SG 405 Paper Returning Returns the paper Internal Motor Motor Motor of Nautilus Cutter Motor Drives the cutter Hyosung Paper Returning Returns the paper PM20S Motor 7-22 © 2012 Nautilus Hyosung, Inc. All Rights Reserved. -
Page 109: Repair And Maintenance
1. Insert the key and turn it clockwise. 2. Pull the front panel outward and turn off the power. 3. Unscrew two fixing screws located on front panel’s each side and pull the front panel completely for easy maintenance. © Nautilus Hyosung, Inc. All Rights Reserved. 7-23... - Page 110 4. Disocnnect the power & Interface connector from the Receipt Printer. 5. Unscrew Receipt Printer fixing screws (PH(+):S/W:F/W(L):M3X6) using a driver, and remove the mecha from the system. 6. Unscrew four main board (76800000-09) fixing screws (BH(+):M3X6), and remove the board. 7-24 © 2012 Nautilus Hyosung, Inc. All Rights Reserved.
- Page 111 Chapter7. Receipt Printer 7. Disconnect the end sensor connector from the main board (76800000-09). 8. Unscrew the screw (PH(+):S/W:F/W(S):M3X6) that fixes the end sensor fixing bracket (456820-01). 9. Remove the end sensor (216856-01). Remove © Nautilus Hyosung, Inc. All Rights Reserved. 7-25...
- Page 112 Service Manual 10. Remove the end sensor (P-INTERRUPTER: SG405CD, 216856-01) from the bracket (End_Sensor, 456820-01),and install a new end sensor. Replace 11. Assemble in the reverse order of Steps 1 ~ 10. 7-26 © 2012 Nautilus Hyosung, Inc. All Rights Reserved.
-
Page 113: Replacing The Jam Sensor
1. Insert the key and turn it clockwise. 2. Pull the front panel outward and turn off the power. 3. Unscrew two fixing screws located on front panel’s each side and pull the front panel completely for easy maintenance. © Nautilus Hyosung, Inc. All Rights Reserved. 7-27... - Page 114 4. Disocnnect the power & communiction connector from the Receipt Printer. 5. Unscrew Receipt Printer fixing screws (PH(+):S/W:F/W(L):M3X6) using a driver, and remove the mecha from the system. 6. Unscrew four main board (723356-01) fixing screws (BH(+)::M3X6), and remove the board. 7-28 © 2012 Nautilus Hyosung, Inc. All Rights Reserved.
- Page 115 7. Disconnect the jam sensor conector from the main board. 8. Cut the tie biding the cable with a pair of nippers. 9. Unscrew the screw (PH(+):S/W:F/W(S):M3X6) that fixes the jam sensor fixing bracket (456822-01). © Nautilus Hyosung, Inc. All Rights Reserved. 7-29...
- Page 116 Chapter7. Receipt Printer Service Manual 10. Remove the sensor from the bracket (Jam Sensor, 456822-01) and install a new sensor. Replace 11. Assemble in the reverse order of Steps 1 ~ 10. 7-30 © 2012 Nautilus Hyosung, Inc. All Rights Reserved.
-
Page 117: Replacing The Motor (564057-01)
1. Insert the key and turn it clockwise. 2. Pull the front panel outward and turn off the power. 3. Unscrew two fixing screws located on front panel’s each side and pull the front panel completely for easy maintenance. © Nautilus Hyosung, Inc. All Rights Reserved. 7-31... - Page 118 4. Disocnnect the power & communiction connector from the Receipt Printer. 5. Unscrew Receipt Printer fixing screws (PH(+):S/W:F/W(L):M3X6) using a driver, and remove the mecha from the system. 6. Unscrew four main board (723356-01) fixing screws (BH(+)::M3X6), and remove the board. 7-32 © 2012 Nautilus Hyosung, Inc. All Rights Reserved.
- Page 119 9. Unscres the screw (PH(+):M2x6:W/ZN) that fixes the motor on the assembly:guide outlet (728813-01), and replace the motor. Remove and replace 10. Asemble in the reverse order of Steps 1 ~ 9. © Nautilus Hyosung, Inc. All Rights Reserved. 7-33...
-
Page 120: Replacing Tph (Atp-82K, 56770000-13)
2. Pull the front panel outward and turn off the power. 3. Unscrew two fixing screws located on front panel’s each side and pull the front panel completely for easy maintenance. 7-34 © 2012 Nautilus Hyosung, Inc. All Rights Reserved. - Page 121 4. Disocnnect the power & communiction connector from the Receipt Printer. 5. Unscrew Receipt Printer fixing screws (PH(+):S/W:F/W(L):M3X6) using a driver, and remove the mecha from the system. 6. Unscrew four main board (723356-01) fixing screws (BH(+)::M3X6), and remove the board. © Nautilus Hyosung, Inc. All Rights Reserved. 7-35...
- Page 122 Chapter7. Receipt Printer Service Manual 7. Disconnect connectors from the board, and remove the mecha and the board. 8. Remove cable in clamp. 9. Unscrew three screws (PH(+):S/W:F/W(S):M3X6), and remove assembly:guide outlet (728813-01). 7-36 © 2012 Nautilus Hyosung, Inc. All Rights Reserved.
- Page 123 - Horizontally adjust the TPH assembly to match the inlet with the guide inlet during Step 8. - The assembly/guide outlet shall not move after Step 7. - The TPH laver’s operation shall not interfere with the buide after Step 7. © Nautilus Hyosung, Inc. All Rights Reserved. 7-37...
-
Page 124: Oiling
Inject Terras oil. 4. Assemble in the reverse order of Steps 1 ~ 3. 5. After asembling, inject a proper amount of white great to the gear teeth. 7-38 © 2012 Nautilus Hyosung, Inc. All Rights Reserved. - Page 125 Cassette Guide Adjustment for Multiple Denominations ................8-28 The Upper Guide Setting Specification ....................8-28 The Side Guide Setting Specification ....................8-29 Oiling Standard ..............................8-30 Interface Specifications ............................ 8-33 Cleaning Method ............................8-33 Required Tools ..............................8-34 © Nautilus Hyosung, Inc. All Rights Reserved. Chapter8-I...
-
Page 126: Appearance/Functional Diagram
CDU (MX5300-Business hour) ▶ The following figures show the three sectional diagrams of the CDU. CDU is 775.20mm [30.52inch] high and 468.10mm [18.43inch] wide. 331.5 Plane Diagram 468.1 43.1 775.2 Side View (Right) © Nautilus Hyosung, Inc. All Rights Reserved. -
Page 127: Cdu (Mx5300-Level1)
Chapter8. CDU (Cash Dispenser Unit) Service Manual CDU (MX5300-LEVEL1) ▶ The following figures show the three sectional diagrams of the CDU. CDU is 775.20mm [30.52inch] high and 497.00mm [19.57inch] wide. 324.5 775.2 Front View Side View (Right) © Nautilus Hyosung, Inc. All Rights Reserved. -
Page 128: Cassette Box Appearance And Dimension
▶ The following picture shows three sectional diagrams of the cassette. Cassette is 137.50mm [5.42inch] high, 217.00mm [8.54inch] wide and 342mm [13.46inch] long. Plane Diagram 평면도 217.00 342.00 Front View Side View (Right) 정면도 우측면도 © Nautilus Hyosung, Inc. All Rights Reserved. -
Page 129: Actuator Diagram
Chapter8. CDU (Cash Dispenser Unit) Service Manual Actuator Diagram ▶ Six actuators are used. The following figure shows their location. © Nautilus Hyosung, Inc. All Rights Reserved. -
Page 130: Sensor Diagram
Chapter8. CDU (Cash Dispenser Unit) Sensor Diagram ▶ The following figure shows the location of 34 sensors in this system. <Note!> A = Sensor far from the board. B = Sensor close to the board. © Nautilus Hyosung, Inc. All Rights Reserved. -
Page 131: Unit Block Diagram
PWM_CLK EPROM FM_WE (27C256) 7 ramification 7분주 2.29 MHZ 2.28MHZ FLASH ROM (39SF010) PLL DRIVER (TC9242F) DC Return DC 반송 FLASH ROM path Motor MOTOR (39SF010) PWM DRIVER (SG3524) SRAM (62256) SRAM (62256) © Nautilus Hyosung, Inc. All Rights Reserved. -
Page 132: Module And Sensor Replacement
The CDU contains a total of 34 sensors including 24 returning path sensors, 1 gate operation detection sensor, 4 cassette position detection sensors, 4 remaining note detection sensors and 1 encoder sensor. SCR:BH(+):M3x5 (13EA) (P/N : 44660601) © Nautilus Hyosung, Inc. All Rights Reserved. - Page 133 ④ From the removed sensor bracket, remove the M3 sensor screws (1 place each) of the sensor which will be replaced. ⑤ Replace the sensor. ⑥ Assemble the unit in the reverse order - ④~①. CS1D CS15D CS31D CS41D CS41BD CS41AD © Nautilus Hyosung, Inc. All Rights Reserved.
- Page 134 ④ From the removed sensor bracket, remove the M3 sensor screws (1 place each) of the sensor which will be replaced. ⑤ Replace the sensor. ⑥ Assemble the unit in the reverse order - ④~②. CS1T CS15T CS31T CS41T CS41BT CS41AT © Nautilus Hyosung, Inc. All Rights Reserved.
- Page 135 ⑥ Assemble the unit in the reverse order - ④~①. Make sure to fasten the spacer and the screw end is not protruding out to the other side of the bracket. SCREW : M3 44651301 MX5300-XP (P/N : 7310000198) MX5300-CE LEVEL1 (P/N : 7310000581) 8-10 © Nautilus Hyosung, Inc. All Rights Reserved.
- Page 136 ④ Remove the M3 sensor fastening screws from the removed sensor bracket. ⑤ Replace the sensor. ⑥ Assemble the unit in the reverse order - ④~①. SCREW : M3 44651301 MX5300-XP (P/N : 7310000198) MX5300-CE LEVEL1 (P/N : 7310000581) © Nautilus Hyosung, Inc. All Rights Reserved. 8-11...
- Page 137 ⑤ Replace the sensor. ⑥ Assemble the unit in the reverse order - ④~①. Make sure to fasten the spacer and the screw end is not protruding out to the other side of the bracket. 8-12 © Nautilus Hyosung, Inc. All Rights Reserved.
- Page 138 ③ Remove the sensor bracket. ④ Remove the M3 sensor fastening screws of the sensor to replace from the removed sensor bracket. ⑤ Replace the sensor. Assemble the unit in the reverse order ⑥ ④ ① © Nautilus Hyosung, Inc. All Rights Reserved. 8-13...
- Page 139 Assemble the unit in the reverse order ~ . Make sure to fasten the spacer ⑥ ④ ① and the screw end is not protruding out to the other side of the bracket. 8-14 © Nautilus Hyosung, Inc. All Rights Reserved.
- Page 140 Assemble the unit in the reverse order ~ . Make sure to fasten the spacer ⑥ ④ ① and the screw end is not protruding out to the other side of the bracket. © Nautilus Hyosung, Inc. All Rights Reserved. 8-15...
- Page 141 ⑤ Assemble in the reverse order - ③~①. <Note!> When reassembling the CS3, pull the solenoid and adjust the detection bracket to the center of the sensor while the screw is still loose. Then, tighten the screw. 8-16 © Nautilus Hyosung, Inc. All Rights Reserved.
- Page 142 ② Assemble in the reverse order ⑤ ③ ① <Note!> Make sure that the sensor always faces towards the center of the encoder shaft as shown in the following figure. ENCODER 44135304 © Nautilus Hyosung, Inc. All Rights Reserved. 8-17...
- Page 143 ④ Remove the MP3 sensor screws (2 places each) from the removed sensor bracket. ⑤ Replace the sensor. ⑥ Assemble the unit in the reverse order - ④~①. CS17 CS27 CS43 <Note!> Adjust the cassette position when mounting it until a click sound is heard. 8-18 © Nautilus Hyosung, Inc. All Rights Reserved.
- Page 144 Adjust the sensor by running the variable resistance so that it generates a current below 1.0V if there is cash available and above 3.0V if no cash is available. Variable resistance CS42 © Nautilus Hyosung, Inc. All Rights Reserved. 8-19...
-
Page 145: Module Replacement
③ Remove the board M3 screws (4 places in the main board, 8 places in the FM board (6 screws), Dip S/W Setting : 8-25page) ④ Replace the board. ⑤ Assemble in the reverse order - ④ ~ ①. 8-20 © Nautilus Hyosung, Inc. All Rights Reserved. - Page 146 ② Remove the power cable from the main motor. ③ Unscrew the main motor fixing screws (M5, 4 places). ④ Remove the main motor assembly and replace it. ⑤ Assemble in the reverse order - ④ ~ ①. 44135501 56403106 © Nautilus Hyosung, Inc. All Rights Reserved. 8-21...
- Page 147 ⑤ Assemble in the reverse order - ④ ~ ①after replacing a solenoid assembly. Adjust the gate according to the standard (8-27page). Φ2 E-RING 44950404 GATE SOLENOID ASSY (P/N : 72842301) 44531901 8-22 © Nautilus Hyosung, Inc. All Rights Reserved.
- Page 148 ② Remove the M4 screw (1 pace) and E-Ring to remove the clutch as shown in the above figure. Then, remove the M4 screws (3 places) as shown in the figure below. © Nautilus Hyosung, Inc. All Rights Reserved. 8-23...
- Page 149 100g [0.22lb] (①) to the direction and about 200g [0.44lb] ~ 300g [0.66lb] ( ) ② to the direction when the timing belt is pressed by about 3mm [0.12inch] (use the tension gauge). 8-24 © Nautilus Hyosung, Inc. All Rights Reserved.
-
Page 150: Setting Specifications
Remark 2 CASSETTE #1, #6, #7 : ON Default 3 CASSETTE #2, #4, #6 : ON Default 4 CASSETTE #3, #5, #6 : ON Default (Mounting 2, 3 Cassettes) (Mounting 4 Cassettes) © Nautilus Hyosung, Inc. All Rights Reserved. 8-25... -
Page 151: Cable Connection Diagram
Sensor Unit Motor, Clutch, Solenoid Additional Sensor Unit RS-232C Comm. PLD Download POWER (VCC, +12V, +24V, GND) DIP S/W signal DC/DC Power Unit CN10 FM B/D Connection Unit CN12 2 Sheet I/F 8-26 © Nautilus Hyosung, Inc. All Rights Reserved. -
Page 152: Adjustment Standard
M3 STOP SCREW GATE SOLENOID ADJUSTMENT GATE BRACKET When the gate is pulled When the gate is released GATE를 당겼을 때 GATE를 놓았을 때 ④ Fix the solenoid M4 screws (2 places). © Nautilus Hyosung, Inc. All Rights Reserved. 8-27... -
Page 153: The Upper Guide Setting Specification
GUIDE + SCR M3*14 14mm 44621604 US Dollar 68mm [2.68inch] SPACER 3 BLACK [0.55inch] The Upper Guide Setting Specification. GUIDE M3 Flat Screw SPACER Fig.6.1 Example of the Upper Guide Setting (Dollar-66mm [2.60inch]) 8-28 © Nautilus Hyosung, Inc. All Rights Reserved. -
Page 154: The Side Guide Setting Specification
2. Put the hook parts of Side Guide into the holes of Guide Assembly Position, and then push it toward the pick-up assembly direction until you can see the screw hole. (Fig.6.4) In case the bill width is greater than 150mm [5.90inch], © Nautilus Hyosung, Inc. All Rights Reserved. 8-29... - Page 155 : At first, put the Side Guide under the Push-Spring and then insert the hook parts into the holes of Guide Assembly Position – Fig.6.5) M3 SCR Assembly HOLE Fig.6.4 Fig. 6.5 3. Assemble the SCR:PH(+):S/W:F/W(L):M3*6:W/Zn in the M3 Screw Assembly Hole 8-30 © Nautilus Hyosung, Inc. All Rights Reserved.
-
Page 156: Oiling Standard
Service Manual Chapter8. CDU (Cash Dispenser Unit) Oiling Standard GATE SPRING HOOK (4) GATE BUSH (2) GEAR SUPPORT SPRING TENSION HOOK (5) PULLEY (1) GEAR TEETH SURFACE (3) © Nautilus Hyosung, Inc. All Rights Reserved. 8-31... - Page 157 Gear support spring Initial AlbaniaGreaseEP1 hook Oiling Note separate Initial assembly gear teeth AlbaniaGreaseEP1 Oiling surface * Y1: Once a year. * Warning: Be careful not to contaminate the belt with lubricant. 8-32 © Nautilus Hyosung, Inc. All Rights Reserved.
-
Page 158: Interface Specifications
Remove the foreign separate Roller objects and dust using ASS’Y a soft brush M6: Once every 6 months ※ Y1: Once a year <Note!> Check whether each sensor successfully operates after cleaning the sensors. © Nautilus Hyosung, Inc. All Rights Reserved. 8-33... -
Page 159: Required Tools
Chapter8. CDU (Cash Dispenser Unit) Service Manual Required Tools ▶ Required Tools Tool Name Standard Picture (+) Driver No. 2 3 mm (-) Driver [0.12inch] Long Nose 8-34 © Nautilus Hyosung, Inc. All Rights Reserved. - Page 160 How to Open the Safe Door ..........................9-1 How to open the mechanical combination lock .................... 9-1 How to Set the new password ..........................9-2 Mechanical Combination Lock ........................9-2 Key Lock (Optional) ............................9-5 © Nautilus Hyosung, Inc. All Rights Reserved. Chapter9-I...
-
Page 161: Chapter9. Safe Unit
3. Turn to the left (counterclockwise) and stop at “50” on the second time. 4. Turn to the right (clockwise) until the dial does not move any more. <Note!> The center scale mark is used to change the combination. © Nautilus Hyosung, Inc. All Rights Reserved. -
Page 162: How To Set The New Password
4. Turn to the left and stop at “50” on the second time as shown in the Fig.9. 3. Fig.9.1 Fig.9.2 <Note!> The left scale mark is used to change the combination. Fig.9.3 © Nautilus Hyosung, Inc. All Rights Reserved. - Page 163 (target number to change), as shown in the Fig.9.7. 8. Turn the dial to the left, make two complete rounds and position the scale to “70” (target number to change), as shown in the Fig. 9.8. Fig.9.6 Fig.9.7 © Nautilus Hyosung, Inc. All Rights Reserved.
- Page 164 <Warning> If you lost a key, inform Nautilus Hyosung or La Gard of the serial number enclosed with the key. New key will be sent to you. (The key serial number is very important. Please keep it in a safe place.)
-
Page 165: Key Lock (Optional)
2. Turn the setup key to the counterclockwise while the safe door is opened to lock completely. (Do not take out the setup key.) 3. Turn the setup key to the clockwise slowly to make lock case display match with setup key display. (Locking should be maintained.) © Nautilus Hyosung, Inc. All Rights Reserved. - Page 166 Interface Connector Diagram ........................10-7 Details of the Interface Connector ......................10-8 Repair and Maintenance ............................ 10-9 Replacing Magnetic Card Reader Assembly ....................10-9 Replacing the Magnetic Card Reader Board ................... 10-11 © Nautilus Hyosung, Inc. All Rights Reserved. Chapter10-I...
-
Page 167: External Appearance/ Functional Diagram
External Appearance ▶ The following figure shows the external appearance of dip type MCU. Its dimensions are 83.8mm [3.30inch] (W) X 34.2mm [1.35inch] (H) X 114.5mm [4.51inch] (L). ▶ MCU External Appearance Diagram © Nautilus Hyosung, Inc. All Rights Reserved. 10-1... -
Page 168: Functional Diagram
Functional Diagram ▶ Arrangement of Each Part ▶ Name and Description of Each Sensor/Electromagnetic Parts Description Function Status Remark MCR Head Magnetic Card Reader Card Insertion Detects card insertion Inserted:1/Not Sensor status inserted:0 10-2 © Nautilus Hyosung, Inc. All Rights Reserved. -
Page 169: General Specifications
DIP Type Cards Used ISO 1,2 Power Requirements 12V (Head), 5V (End Sensor) Card Read Timing Ejection Recording Method Speed Card Speed : 15~100cm/sec Head : 1,000,000 Passes MTBF (500,000 Insertion Cycles) © Nautilus Hyosung, Inc. All Rights Reserved. 10-3... -
Page 170: Execution Sequence
Chapter10. Magnetic Card Unit Service Manual Execution Sequence ▶ Execution Sequence of the DIP MCR Insert a Card End Detection Waitin Sensor Read Enable Reject Read Card 10-4 © Nautilus Hyosung, Inc. All Rights Reserved. -
Page 171: Unit Block Diagram
▶ The following block diagram shows the H/W overview. ▶ DIP_MCR BLOCK DIAGRAM HOST(PNC) +12V RS232C DIP_MCR CARD 투입검지 Card Insertion 33.0000MH 89C52UB SENSOR Detection Sensor MCR HEAD ENCODER ISO1,2 TRACK LOGIC © Nautilus Hyosung, Inc. All Rights Reserved. 10-5... -
Page 172: Cable Connection Diagram
Detection Sensor SENSOR DIP_MCR B/D ▶ Usage and Description of DIP_MCR Cables PART_NO Usage Remark 321240-03 DIP_MCR Power & RS232 I/F 564239-01 ISO1,2 MCR Head Including I/F cable 321225-01 Insertion Detection Sensor 10-6 © Nautilus Hyosung, Inc. All Rights Reserved. -
Page 173: Interface Specifications
Service Manual Chapter10. Magnetic Card Unit Interface Specifications Interface Connector Diagram ▶ DIP_MCR I/F Connector Arrangement Plan © Nautilus Hyosung, Inc. All Rights Reserved. 10-7... -
Page 174: Details Of The Interface Connector
Chapter10. Magnetic Card Unit Service Manual Details of the Interface Connector ▶ Specification of the DIP_MCR I/F Connector Connector Name Usage Remark PNC I/F Including power MCR Head I/F ISO1,2 Insertion Detection Sensor 10-8 © Nautilus Hyosung, Inc. All Rights Reserved. -
Page 175: Repair And Maintenance
1. Insert the key and turn it clockwise. 2. Pull the front panel outward and turn off the power. 3. Unscrew two fixing screws located on front panel’s each side and pull the front panel completely for easy maintenance. © Nautilus Hyosung, Inc. All Rights Reserved. 10-9... - Page 176 6. Assemble the magnetic card reader in the reverse order of Steps 1 ~ 5 above. <Note!> After finishing Step 5, insert a card and check if the card is smoothly inserted. If it is not, assemble again. 10-10 © Nautilus Hyosung, Inc. All Rights Reserved.
-
Page 177: Replacing The Magnetic Card Reader Board
3. Remove 2 screws from the Magnetic Card Reader Board and disconnect the cables. 4. Replace the board and assemble again. 5. Note: Be careful not to damage the head cable when performing Step 3. © Nautilus Hyosung, Inc. All Rights Reserved. 10-11...
Need help?
Do you have a question about the MX5300CE and is the answer not in the manual?
Questions and answers