Table of Contents
Advertisement
Advertisement
Table of Contents

Related Manuals for TCL Alto 8e


Summary of Contents for TCL Alto 8e
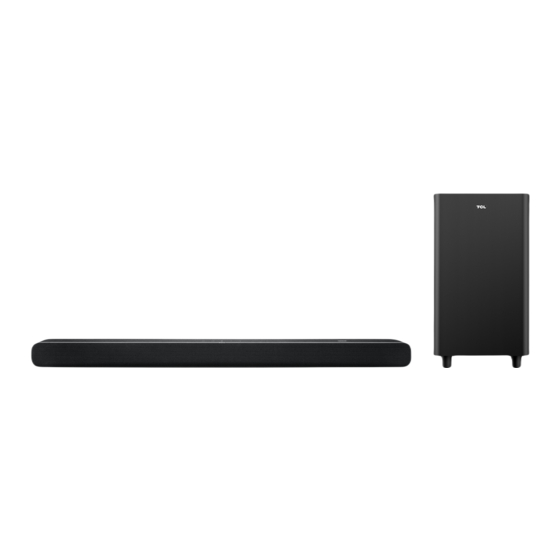
- Page 1 3.1.2 Channel Dolby Atmos Sound Bar with Wireless Subwoofer Alto 8e User Manual...
-
Page 2: Table Of Contents
Contents 1 Before you begin ..........2 Welcome ............. 4 What’s in the box ............4 Overview of the Sound Bar .......... 6 Overview of the wireless subwoofer ......8 Set up your Sound Bar system ........9 Position Your Sound Bar and Subwoofer ..... Mount your Sound Bar on the wall ....... - Page 3 4 Use your Sound Bar system ......25 Use your Sound Bar with the top panel or remote control ................25 Listen to music from your Bluetooth device ....28 Use the USB cable or device for music playback ..29 Specifications ............
-
Page 4: Before You Begin
1 Before you begin • • • • • • • • for your listening comfort. -
Page 5: Welcome
2 Welcome Congratulations on the purchase of your new TCL Sound Bar! After it is set up and connected, you can experience a superb sound quality and state-of-the-art design to best fit your home entertainment system. You are recommended to read through this user manual which helps you set up, connect and operate the product easily and properly. - Page 6 Optical cable HDMI cable Wall mount bracket x 2 Wall anchor x 2 Wall mounting screw x 2 Sleeve x 2 Warranty Safety card instructions Warranty card Safety leaflet Quick Start Guide Wall mount template...
-
Page 7: Overview Of The Sound Bar
Overview of the Sound Bar HELLO Short press to enter Sleep or Standby mode. Long press to enter Standby mode. Press to switch the audio source among HDMI ARC/HDMI IN/OPT/BT/USB modes. Press to select the Bluetooth function. Press and hold to enter the pairing mode. - Page 8 Press to increase or decrease the volume level. It indicates the Sound Bar status (e.g. volume level, sound bar status). White LED: It indicates standby/sleep mode.
-
Page 9: Overview Of The Wireless Subwoofer
Overview of the wireless subwoofer AC input power connector Amber LED indicator • flashes slowly when the subwoofer is in standby mode. • flashes quickly when pairing is in progress. • remains on solidly when pairing is successful. Press and hold button on the Sound Bar main unit for 5 seconds. -
Page 10: Set Up Your Sound Bar System
Sound Bar main unit on the wall. Make sure you use screws provided or specified by the authorized manufacturer. TCL Overseas Marketing Limited bears no responsibility for accidents or damage caused by improper wall mounting and screws installation or insufficient wall strength, etc. -
Page 11: Mount Your Sound Bar On The Wall
< 9.8' Mount your Sound Bar on the wall Place the supplied wall mount template on the wall. Make sure the wall mount template is at least 2 inches (5cm) below the center of the TV. Use a level to make sure the wall mount template is positioned accurately. - Page 12 Mark on the wall using each marking on the template through the mounting holes. Take away the wall mount template. Drill a screw hole at each marking on the wall. > 2" 30.7" Screw off the rubber cushions from the soundbar. (Reserve the rubber cushions for future use) * The rubber cushions can be used as soundbar mats when you put the soundbar on the table...
- Page 14 Fix and tighten the wall bracket screws on the wall. Hang the Sound Bar on the screws. Check the installation location before you mount the Sound Bar on the wall (see ‘Mount your Sound Bar on the wall’ on page 10). You may consider to connect the cables first before mounting the Sound Bar on the wall.
-
Page 15: Install/Replace The Remote Control Batteries
Install/replace the remote control batteries The battery contains perchlorate material, handle it with care. For information, refer to www.dtsc.ca.gov/hazardouswaste/perchlorate Open the battery compartment, remove the old batteries if necessary. Place two new AAA batteries into the battery compartment with the correct polarity (+/-). Close the battery compartment. -
Page 16: Overview Of The Remote Control
Overview of the Remote Control Short press to enter Sleep or Standby mode. Long press to enter Standby mode. Press to adjust the lightness of the display. Press and hold for 3 seconds to enter Night mode or close Night mode. Press to turn on/off Dolby vertical surround. - Page 17 Press to switch the audio source to HDMI OUT (ARC) source. Press to switch the audio source to USB source. Press to switch the audio source to Bluetooth mode. Press and hold to enter pairing mode. Press to switch on/off Pass Through function. Press to select the equalizer (EQ) effect when you are watching or listening to...
-
Page 18: Connect Your Sound Bar System
3 Connect your Sound Bar system After you have fixed the position of the Sound Bar, you can start connecting it to your TV or other devices and listen to the audio through your Sound Bar. Make sure you have muted the audio of your TV or device. - Page 19 Connect your Sound Bar to HDMI input marked ( on your TCL TV. Press the button on your TCL TV remote. Navigate to System options. Set T-Link to (This feature may be called, Anynet+, SimpLink, BRAVIA Link, EasyLink or VIERA Link*.) All technology names mentioned are the trademarks or registered trademarks of their respective companies.
-
Page 20: Optional: Connect Your Blu-Ray Player
Optional: Connect your Blu-ray player For ease of use, you are advised to connect a Blu-ray player to the TV and enjoy the Sound Bar through HDMI-ARC. However, in order to enjoy Dolby TrueHD based Atmos content that not all TVs may support through HDMI-ARC, you can optionally connect your Blu-ray player directly to the Sound Bar using the HDMI-in port. -
Page 21: Connect With The Optical Cable
Connect with the optical cable Remove the protective caps from the optical cable when necessary. Connect one end of the optical cable to the optical input connector on your Sound Bar and another end to the optical output connector of your TV or device. If there is no sound output from the Sound Bar, try to activate the PCM signal output on your TV or device. -
Page 22: Direction For Setting Up Your Sound Bar Using An Optical Cable
Do not bend or kink the optical cable (SPDIF) as it is fragile and can easily get damaged and broken. To get the best possible audio experience using the optical cable: Press the Home button on your TCL TV Remote. Navigate to under Uncheck the “... -
Page 23: Connect Your Sound Bar To Power Supply
Connect your Sound Bar to power supply Make sure that you have completed all other connections before connecting the Sound Bar to power supply. Make sure the power supply voltage complies with your country’s safety standards (see ‘Specifications’ on page Connect one end of a supplied AC power cord to the AC input connector on your Sound Bar and another end to the power socket on the wall. -
Page 24: Connect The Sound Bar With Your Bluetooth Device
Connect the Sound Bar with your Bluetooth device Make sure your wireless device supports the Bluetooth function. The operational range between the Sound Bar and your Bluetooth device is approximately 394” (without any obstacle between the Bluetooth device and the Sound Bar). Press on the top panel of your Sound Bar or remote control to power on the Sound Bar. -
Page 25: Connect Your Wireless Subwoofer To The Sound Bar
Your Sound Bar system is now set up and ready to be used. To disconnect the Bluetooth function, you can: • press on the Sound Bar or remote control to switch to another source; or • disable the Bluetooth function on your device; or •... -
Page 26: Use Your Sound Bar System
The Sound Bar will pair with the subwoofer automatically. The amber LED will flash when pairing is in progress. The amber LED will remain on solidly when pairing is successful. If you have devices more than one to be connected, please connect the next one after connecting the previous one successfuly. - Page 27 Sound Bar status LED display HELLO Power Power on STDBY Standby Sleep Sleep • Sleep mode White LED flashes slowly • White LED Standby mode HDMI1 IN HDMI IN HDMI2 ARC HDMI ARC Source BLUETOOTH OPTICAL Bluetooth Normal PAIR Pairing mode Normal NOUSB Plug off USB device...
- Page 28 ARC(eARC) Normal PCM AUDIO/DOLBY AUDIO/ Audio format DOLBY ATMOS V 22 Audio Setting Volume display V MAX/V MIN Max & Min Volume MUTE Mute TRE-3 ~ TRE+3 Treble BAS-3 ~ BAS+3 Bass SURR ON/SURR OFF Vertical Surround MOVIE/MUSIC/TV EQ Setup NIGHT Night Setup DIM 1(100%)/DIM 2(50%)
-
Page 29: Listen To Music From Your Bluetooth Device
Listen to music from your Bluetooth device Make sure that your device supports A2DP and/or AVRCP. For information, check the specification of your device. Pair your Bluetooth device with the Sound Bar (see ‘Connect the Sound Bar with your Bluetooth device’ on page 23). -
Page 30: Use The Usb Cable Or Device For Music Playback
Use the USB cable or device for music playback • Press on the remote control to listen to/pause/ resume the music. • Press or on the remote control to skip to the previous or next track. • Press to increase or decrease the volume level. AC IN This Sound Bar can support USB devices of up to 64GB memory and the supported file format is MP3. -
Page 31: Specifications
5 Specifications 3.1.2 Channel Dolby Atmos Sound Bar with Wireless Subwoofer • Power Supply: AC 100-240V~50/60Hz • Power consumption: 30W • Power consumption at standby mode: 0.5W • Impedance: 6 • Frequency response: 160Hz-20KHz • Dimensions (WxHxD): 39.4"x2.6"x4.8" / 1000x65x122mm •... -
Page 32: Notice
Frequency range 2.4 GHz band (1-11 ch)/5 GHz band For USA 2412 MHz to 2462 MHz 5180 MHz to 5320 MHz 5550 MHz to 5580 MHz 5660 MHz to 5720 MHz 5745 MHz to 5825 MHz Maximum power(EIRP) 20 dBm 6 Notice Notice for USA FCC Information... -
Page 33: Notice For Canada
Supplier Name: TTE Technology, Inc. (dba TCL North America) Supplier Address: 1860 Compton Ave, Corona, CA 92881, USA Supplier phone number and internet contact information: 1-877-300-9223 https://support.tclusa.com FCC Radiation Exposure Statement: This equipment complies with FCC radiation exposure limits set forth for an uncontrolled environment. -
Page 34: Trademarks
Trademarks The Bluetooth® word mark and logos are registered trademarks owned by Bluetooth SIG, Inc. and any use of such marks by TTE Corporation is under license. Other trademarks and trade names are those of their respective owners. Dolby, Dolby Atmos, and the double-D symbol are registered trademarks of Dolby Laboratories Licensing Corporation. -
Page 35: Faq
7 FAQ No power Make sure the AC power cord and AC input connector are connected properly. Make sure there is power supply. Make sure the Sound Bar has turned on. No sound Make sure the audio cable is connected to the Sound Bar and your device. - Page 36 Or call 1-877-300-9223 WE ARE READY TO HELP contact us first with any questions Copyright © 2020 TCL. All rights reserved. TS8132_NA_EN_UM_V0.6...
- Page 37 Make sure you read all the safety information before you use this product. • Unplug this apparatus during lightning storms or when unused for long periods of time. TCL Entertainment Solutions Limited bears no responsibility for accidents or damages caused by • Refer all servicing to qualified service personnel.
- Page 38 • Débranchez cet appareil lors d’orages ou lors de non-utiliser pendant une longue temps. TCL Entertainment Solutions Limited ne prendra aucune responsabilité pour tous accidents ou endommages • Confiez tout entretien au personnel qualifié. Un entretien est requis lorsque l’appareil a été...
Need help?
Do you have a question about the Alto 8e and is the answer not in the manual?
Questions and answers