Advertisement
Quick Links
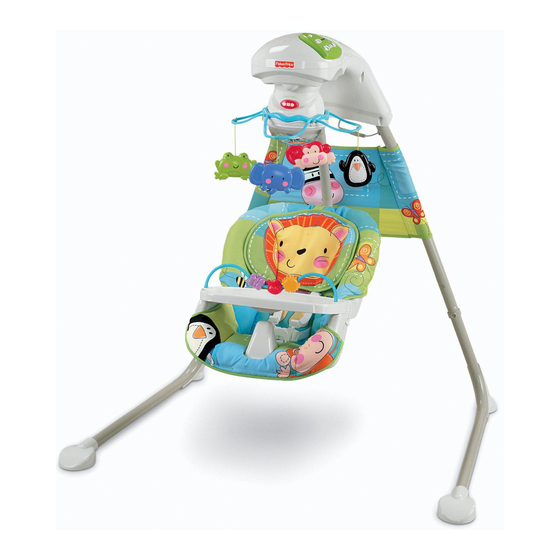
Quick Start
1
Turn power on
select speed
2
Push seat to start
swinging
PUSH
3
Select music
, sounds
or mobile
Inicio rápido
and
1
Prender la unidad
y seleccionar la velocidad
del columpio
2
Empujar la silla para
empezar el movimiento
3
Seleccionar música
sonidos
fisher-price.com
Démarrage rapide
1
2
EMPUJAR
3
,
o móvil
1
W9507
Mettre en marche
et sélectionner la vitesse
désirée
Pousser le siège pour
amorcer le balancement
POUSSER
Actionner la musique
les sons
ou le
mobile
,
Advertisement

Subscribe to Our Youtube Channel
Related Manuals for Fisher-Price W9507


Summary of Contents for Fisher-Price W9507
- Page 1 W9507 Quick Start Inicio rápido Démarrage rapide Turn power on Prender la unidad Mettre en marche select speed y seleccionar la velocidad et sélectionner la vitesse del columpio désirée Push seat to start swinging Empujar la silla para Pousser le siège pour...
- Page 2 WARNING Prevent death: Keep seat fully reclined until child is at least 4 months old AND can hold head up without help. Young infants have limited head and neck control. If seat is too upright, infant’s head can drop forward and compress the airway, resulting in DEATH.
- Page 3 Consumer Information Información para el consumidor Renseignements pour les consommateurs IMPORTANT! Please keep these instructions for future reference. • Please read these instructions before assembly and use of this product. • Adult assembly is required. • Tools needed for assembly: Allen Wrench (included) and Phillips screwdriver (not included). •...
- Page 4 Consumer Information Información para el consumidor Renseignements pour les consommateurs IMPORTANT! Conserver ce mode d’emploi pour s’y référer en cas de besoin. • Lire toutes les instructions avant d’assembler le produit et de l’utiliser. • Le produit doit être assemblé par un adulte. •...
- Page 5 Parts Piezas Pièces Motorized Frame Armazón motorizado Allen Wrench Boîtier du moteur Llave hexagonal Clé hexagonale 2 Upper Legs 2 patas superiores Tray 2 sections supérieures Bandeja Pad with Headrest de montants Plateau Almohadilla con cabezal Coussin avec appuie-tête Lower Seat Tube Tubo de asiento inferior Tube inférieur du siège Seat with Restraint System...
- Page 6 NE PAS l’utiliser si des pièces manquent ou sont endommagées. Communiquer avec Fisher-Price pour obtenir des pièces de rechange et des instructions au besoin. N’utiliser que des pièces du fabricant.
- Page 7 Assembly Montaje Assemblage Upper Leg Pata superior Section supérieure de montant PRESS PRESIONAR APPUYER • While pressing the button on the lower leg, insert the lower leg into an upper leg. Make sure the button on the lower leg “snaps” into the hole in the upper leg. •...
- Page 8 Assembly Montaje Assemblage • Colocar las patas de modo que las extremidades apunten en dirección opuesta a Ud. • Ajustar el extremo libre del panel de tela en la pata superior, tal como se muestra. • Placer les sections inférieures de montant de façon que les pieds soient en direction opposée à...
- Page 9 Assembly Montaje Assemblage Button Button Botón Botón Bouton Bouton Feet Feet Extremidades Extremidades Pieds Pieds • Stand the assembly upright. • Pull the legs out so that the buttons “snap” into the holes in the motorized frame. • When standing behind the product, all four feet should be flat upon the floor. And, check for an L marking on the left foot and an R marking on the right foot.
- Page 10 Assembly Montaje Assemblage • Plug the power cord from the motor assembly into the power cord in the frame assembly. • Enchufar el cable eléctrico de la unidad del motor en el cable eléctrico de la unidad del armazón. • Brancher le cordon d’alimentation du boîtier du moteur sur le cordon d’alimentation de la structure.
- Page 11 Assembly Montaje Assemblage Clavija Hole Hole Cheville Orificio Orificio Elastic Loops Elastic Loops Trou Trou Ganchos elásticos Ganchos elásticos Boucles élastiques Boucles élastiques Elastic Loops Elastic Loops Ganchos elásticos Ganchos elásticos Boucles élastiques Boucles élastiques • Fold the top of the pad down. •...
- Page 12 Assembly Montaje Assemblage Waist Belts Cinturones de la cintura Courroies abdominales Slots Ranuras Fentes • Turn the seat upright. • Fold the top of the pad down. Insert the waist belts through the slots in the pad. Make sure the waist belts are not twisted. •...
- Page 13 Assembly Montaje Assemblage Upper Slots Ranuras superiores Fentes supérieures Shoulder Belts Cinturones de hombro Courroies d’épaule Larger Baby • Insert the ends of the shoulder belts through the upper slots in the seat pad back. Bebé más grande • Insertar los extremos de los cinturones de hombro en las ranuras superiores de la parte trasera de la almohadilla.
- Page 14 Assembly Montaje Assemblage Tray Bandeja Plateau • Insert the tray tabs into the slots in each side of the seat. • Introducir las lengüetas de la bandeja en las ranuras de cada lado del asiento. • Insérer les pattes du plateau dans les fentes de chaque côté du siège. Lower Seat Tube Tubo de asiento inferior Tube inférieur du siège...
- Page 15 Assembly Montaje Assemblage • Insert an M5 x 40 mm bolt into the short tube. Fully tighten the bolt with the Allen wrench. • Insertar un perno M5 x 40 mm en el tubo corto. Apretar bien el perno con la llave hexagonal. •...
- Page 16 Assembly Montaje Assemblage • Insert an M5 x 40 mm bolt into the upper seat tube. Fully tighten the bolt with the Allen wrench. • Insertar un perno M5 x 40 mm en el tubo de asiento superior. Apretar bien el perno con la llave hexagonal.
- Page 17 Battery Installation Colocación de las pilas Installation des piles Hint: Install batteries if you need to use this swing away from an outlet. We recommend using alkaline batteries for longer battery life. Nota: instalar las pilas para usar este columpio donde no haya tomacorrientes eléctricos. Se recomienda usar pilas alcalinas para una mayor duración.
- Page 18 Battery Safety Information Información de seguridad sobre las pilas Conseils de sécurité concernant les piles In exceptional circumstances, batteries may leak fluids that can cause a chemical burn injury or ruin your product. To avoid battery leakage: • Do not mix old and new batteries or batteries of different types: alkaline, standard (carbon-zinc) or rechargeable (nickel-cadmium).
- Page 19 WARNING Prevent death: Keep seat fully reclined until child is at least 4 months old AND can hold head up without help. Young infants have limited head and neck control. If seat is too upright, infant’s head can drop forward and compress the airway, resulting in DEATH.
- Page 20 Set-Up and Use Preparación y uso Installation et utilisation Button Button Botón Botón Bouton Bouton Pata Pata Montant Montant To Unfold • Firmly pull the legs outward. Make sure the buttons snap into the notches in the motorized frame. • Check to be sure the legs are locked into position. Para desplegar •...
- Page 21 Set-Up and Use Preparación y uso Installation et utilisation Waist Belt Waist Belt Cinturón de la cintura Cinturón de la cintura Courroie abdominale Courroie abdominale Crotch Belt Cinturón de la entrepierna Courroie d’entrejambe Restraint Belts • Place your child in the seat. Position the crotch belt between your child’s legs. •...
- Page 22 Set-Up and Use Preparación y uso Installation et utilisation Restraint System Sistema de sujeción Système de retenue • Tighten each waist/shoulder belt so that the restraint system is snug against your child. Please refer to the next section for instructions to tighten the waist/shoulder belt. •...
- Page 23 Set-Up and Use Preparación y uso Installation et utilisation Adjusters Ajustadores Boucles de réglage TIGHTEN LOOSEN APRETAR AFLOJAR SERRER DESSERRER • To tighten the waist belts: Feed the anchored end of the belt up through the buckle to form a loop .
- Page 24 Set-Up and Use Preparación y uso Installation et utilisation PRESS PRESIONAR APPUYER Seat Tube Seat Tube Button Tubo del asiento Botón del tubo del asiento Tube du siège Bouton du tube du siège TURN TURN GIRAR GIRAR TOURNER TOURNER You can adjust the motion of the swing: side to side or front to back. •...
- Page 25 Set-Up and Use Preparación y uso Installation et utilisation Upright Upright Vertical Vertical Redressée Redressée Recline Recline Reclinada Reclinada Inclinée Inclinée PRESS Seat Position Buttons PRESIONAR los botones de posición de asiento APPUYER sur les boutons de positionnement du siège You can adjust the seat to two different positions: Recline or Upright.
- Page 26 Set-Up and Use Preparación y uso Installation et utilisation Adults Note: If you use this product with the AC adaptor, periodically examine the AC adaptor for damage to the cord, housing or other parts that may result in the risk of fire, electric shock or injury. If the AC adaptor is damaged, do not use the product with the AC adaptor.
- Page 27 Set-Up and Use Preparación y uso Installation et utilisation Remarque : Si ce produit est utilisé avec l’adaptateur c.a., vérifier régulièrement l’adaptateur pour s’assurer que le cordon d’alimentation, le boîtier et les autres éléments ne sont pas abîmés car cela pourrait provoquer un incendie, un choc électrique ou des blessures.
- Page 28 Set-Up and Use Preparación y uso Installation et utilisation AC Power Use • Place the swing near a standard wall outlet. • Plug the AC adaptor into the power cord extending from the back of a leg. • Plug the AC adaptor into the wall outlet. •...
- Page 29 Set-Up and Use Preparación y uso Installation et utilisation Utilisation de l’adaptateur c.a. • Placer la balancelle à proximité d’une prise de courant standard. • Brancher l’adaptateur c.a. sur le cordon d’alimentation à l’arrière du produit. • Brancher l’adaptateur c.a. sur la prise de courant. •...
- Page 30 Set-Up and Use Preparación y uso Installation et utilisation Lower Leg Buttons Botones de las patas inferiores Boutons des sections inférieures de montant • Lean the swing frame against a wall for storage. IMPORTANT! Remove the batteries for long-term storage. Hint: The legs may be disassembled for long-term storage.
- Page 31 Swing Use Uso como columpio Utilisation de la balancelle Power Switch Interruptor de encendido Swing Speed Buttons Bouton de mise en marche Botones de velocidad de columpio Boutons de vitesse de balancement Mobile Button Botón del móvil Bouton du mobile Sound Button Volume Buttons Botón de sonido...
- Page 32 Swing Use Uso como columpio Utilisation de la balancelle Consejos: • Después de activar el producto, quizá este no produzca movimiento a menos de que esté un niño sentado en el asiento. • Como sucede con la mayoría de columpios accionados por pilas, la cantidad de movimiento se reducirá...
- Page 33 Care Mantenimiento Entretien • Remove the tray from the seat. • Unbuckle the restraint system. • Remove the pad elastic loops from the pegs and unfasten the pad fasteners from the seat. • Remove the pad from the restraint system. •...
- Page 34 Consumer Information Información para el consumidor Renseignements pour les consommateurs FCC Statement (United States Only) This equipment has been tested and found to comply with the limits for a Class B digital device, pursuant to Part 15 of the FCC Rules. These limits are designed to provide reasonable protection against harmful interference in a residential installation.
- Page 35 Consumer Information Información para el consumidor Renseignements pour les consommateurs Énoncé de la FCC (États-Unis seulement) Cet équipement a été testé et jugé conforme aux limites de Classe B pour un appareil numérique en vertu de l’article 15 de la réglementation de la FCC. Ces limites ont été instaurées pour fournir une protection raisonnable contre toute interférence nuisible dans une installation résidentielle.
- Page 36 CONSUMER ASSISTANCE AYUDA AL CONSUMIDOR SERVICE À LA CLIENTÈLE 1-800-432-5437 (US & Canada) Fisher-Price, Inc., 636 Girard Avenue, East Aurora, NY 14052. Hearing-impaired consumers/Clientes con problemas auditivos/ Pour les malentendants : 1-800-382-7470. Centro de Servicio México: 59-05-51-00 Ext. 5206 ó 01-800-463-59-89 CANADA Mattel Canada Inc., 6155 Freemont Blvd., Mississauga, Ontario L5R 3W2.
Need help?
Do you have a question about the W9507 and is the answer not in the manual?
Questions and answers