Advertisement
Quick Links
Please Contact Moen First
For Installation Help, Missing or Replacement Parts
(USA)
1-800-BUY-MOEN (1-800-289-6636)
Mon - Fri 8:00 AM to 7:00 PM, Eastern
Sat. 9:00 AM to 3:00 PM Eastern
WWW.MOEN.COM
(Canada)
1-800-465-6130
Mon - Fri 7:30 AM to 7:00 PM, Eastern
WWW.MOEN.CA
Por favor, contáctese primero con Moen
Para obtener ayuda de instalación, piezas
faltantes o de recambio
011 52 (800) 718-4345
Lunes a viernes de 8:00 a 20:00 hs.
(Costa Este)
Sáb. 8:00 a 18:30 hs. (Costa Este)
WWW.MOEN.COM.MX
Veuillez d'abord contacter Moen
En cas de problèmes avec l'installation, ou
pour obtenir toute pièce manquante ou de
rechange
1-800-465-6130
Du lundi au vendredi :
de 7 h 30 à 19 h, HE
WWW.MOEN.CA
HELPFUL TOOLS
For safety and ease of faucet replacement, Moen recommends
the use of these helpful tools.
Installation Guide
Guía de Instalación
Guide d'installation
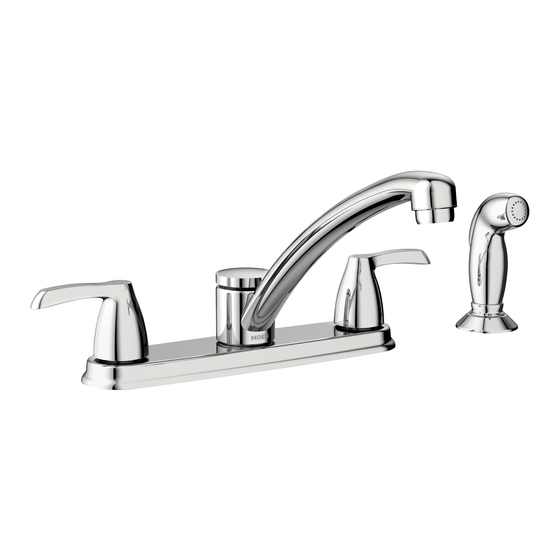
TWO-HANDLE KITCHEN FAUCET WITH
OPTIONAL KNOBS
Note: Style varies by model.
MEZCLADORA PARA COCINA DE DOS
MANERALES CON PERILLAS OPTATIVAS
Nota: El estilo varía por el modelo.
ROBINET DE CUISINE À 2 POIGNÉES AVEC
BOUTONS OPTIONNELS
Note : Le style varie selon le modèle.
HERRAMIENTAS ÚTILES
Para que el cambio de la llave sea fácil y seguro, Moen le
recomienda usar estas útiles herramientas.
INS10516 - 2/16
OUTILS UTILES
Par mesure de sécurité et pour faciliter l'installation, Moen
suggère l'utilisation des outils suivants.
Advertisement

Related Manuals for Moen Adler 87046


Summary of Contents for Moen Adler 87046
- Page 1 HERRAMIENTAS ÚTILES OUTILS UTILES For safety and ease of faucet replacement, Moen recommends Para que el cambio de la llave sea fácil y seguro, Moen le Par mesure de sécurité et pour faciliter l’installation, Moen the use of these helpful tools.
-
Page 2: Parts List
Parts List * Not included A. Knob Handle (x2) (Optional) J. Aerator No incluidos B. Faucet Body K. Hose Guide Non incluses C. Lever Handle (x2) L. Hose Guide Gasket D. Protective Sleeve M. Hose Guide Nut E. Deck Gasket N. - Page 3 INS10516 - 2/16 Install Deck Gasket (E) face up onto Faucet Body (B) as shown. Install Faucet Body (B) into sink openings. Instale el empaque de cubierta (E) cara arriba en el cuerpo de la mezcladora (B) como se muestra. Instale el cuerpo de la mezcladora (B) en las aberturas en el fregadero.
- Page 4 1. Insert Hose Guide (K) and Hose Guide Gasket (L) into sink opening. Insert Side Spray (I) through Hose Guide (K) until Side Spray is fully seated. 2. Secure Hose Guide with Hose Guide Nut (M) underneath sink. Tighten by hand. Inserte el rociador lateral (I) a través de la guía de la manguera (K) hasta que asiente bien.
- Page 5 INS10516 - 2/16 1. Remove Protective Sleeve (D) from Faucet Body (B). 2. Remove cap from Side Spray Plug (O). 3. Install Side Spray Plug (O) into Quick Connect Adapter (N). Push in as far as possible till a click is heard. Tug downward to test engagement. 4.
- Page 6 Aerator Flushing Aerator Flushing Enjuague del aireador Enjuague del aireador Rinçage de l’aérateur Rinçage de l’aérateur Sec. 1. Unthread Aerator (J) by hand. 1. Turn on both hot and cold handles and run water for 15 seconds. 2. Remove from Faucet Body (B). 2.
- Page 7 INS10516 - 2/16 Changing from lever to knob handles (optional) / Cambio de manerales de palanca a manerales de perilla (optativo) / Changement des poignées à manette pour des poignées à bouton (optionnel) Using Hex Wrench (F), loosen set screw of Handle (C). 1.
- Page 8 Il suffit d’ é crire à Moen inc. à l’adresse address, area code and telephone number. a otro o de una provincia o nación a otra. Moen lo asesorará en el indiquée ci-dessous, pour expliquer le défaut, d’inclure une preuve procedimiento a seguir para hacer válida esta garantía.
Need help?
Do you have a question about the Adler 87046 and is the answer not in the manual?
Questions and answers