Table of Contents
Advertisement
Advertisement
Table of Contents

Related Manuals for G-Lab GSC-2


Summary of Contents for G-Lab GSC-2
-
Page 3: Table Of Contents
Version 2.0 Table of contents IMPORTANT SAFETY INSTRUCTIONS EMC/EMI & CERTIFICATE OF CONFORMITY PACKAGE CONTENT STRUCTURE SIGNAL’S PATH DIAGRAM BANKS, PRESETS AND MODIFIERS PRESET SELECTION BANK SELECTION SILENT TUNING (MUTE) PRESET PROGRAMMING LOOPS (LOOP1 TO LOOP6) PROGRAMMING AMP SETTINGS PROGRAMMING MIDI PROGRAM NUMBERS PROGRAMMING PRESET’S COPYING BANK COPYING... -
Page 4: Important Safety Instructions
ELZAB S.A., ul. Kruczkowskiego 39, 41-813 Zabrze, Poland, hereby declares on own responsibility that the following product: GSC-3, GSC-2 – Guitar System Controller that is covered by this certificate and marked with CE 07 label conforms with following standards: Safety requirements for mains operated electronic and related... -
Page 5: Package Content
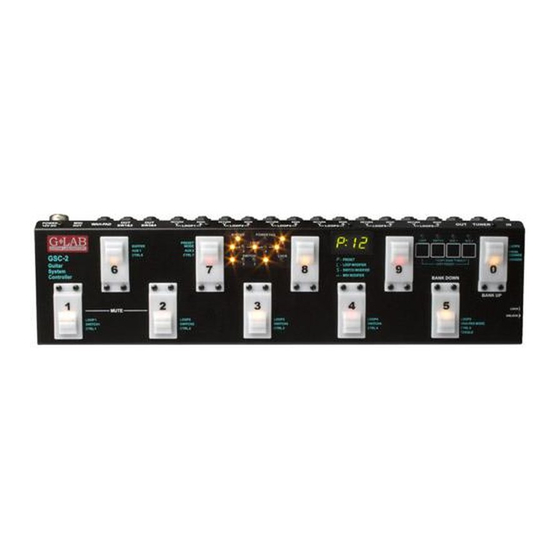
To avoid the incidental changing of the presets’ settings the controller is equipped with the memory access lock. There are available two versions of the controller with different footswitches. The GSC-3 model posses metal footswitches with backligthed descriptions and the GSC-2 model posses silent, backlighted footswitches. Basic characteristics: –... -
Page 6: Structure
Structure On the inner side of the instruction cover are placed the pictures with elements numerated below. 1 - IN – guitar signal input 2 - TUNER – guitar tuner connector 3 - OUT – amp’s signal output connector 4 - SEND – effect’s loop output connector 5 - RETURN –... -
Page 7: Signal's Path Diagram
Signal’s path diagram Guitar signal, thru very high impedance (>10 MΩ) tuner buffer, is transmitted to TUNER output. It enables using of the tuner during playing. Controller features a switchable, true bypass input buffer circuit. Buffer which’s input impedance is consistent with tube amps boost the guitar signal power (without the voltage increase). -
Page 8: Banks, Presets And Modifiers
Banks, presets and modifiers Controller enables to program 10 presets (or 8 ones) in each of its 10 banks. There is information on the display about the bank and preset numbers. Banks and presets have got numbers from 0 to 9 range. bank number 2 preset mode preset number 3... -
Page 9: Silent Tuning (Mute)
To escape from the bank selecting function press and hold 0 or 5 footswitch longer then 1 second. At the cb3 mode (directly by using BANK UP/BANK DOWN footswitches for firmware 2.20 and higher). At this mode BANK UP and BANK DOWN footswitches cause correspondingly lowering and increasing bank number with immediate preset recalling (preset number in bank remains unchanged). -
Page 10: Midi Program Numbers Programming
MIDI program numbers programming The controller enables to control three MIDI devices (MIDI 1, MIDI 2 and MIDI 3) by the Program Change command. Before programming, the MIDI channels should be set (see: MIDI channel setting). a) Connect MIDI cable between MIDI OUT output connector and MIDI IN input connector of the controlled device. -
Page 11: Sending Additional Program Change Commands
d) Short pressing footswitches numbered from 1 to 7 will effect in short displaying text CC and the controllers No. e.g. 81 and after actual value of the controller will be displayed. Pressing No. 0 footswitch displays the actual program No. transmitted to the MIDI 3 device by Program Change command. -
Page 12: Tap Tempo
For a SWITCH modifier you should enter Amp settings programming function and set states of lines SW1 to SW4 to achieve the desired amp settings. SWITCH modifier recalls desired amp settings so to switch e.g. between two channels it is needed to program two footswitches as SWITCH modifiers. For a MIDI modifier you should apply the same procedure considering that you can program footswitch to control one of MIDI devices (or more) and by Control Change commands one of the function of selected MIDI device. -
Page 13: Switch Button Settings
one time mode 0 – mode of transmitting Program Change commands always when a preset footswitch is pressed one time mode 1 - mode of transmitting Program Change commands only when a given preset footswitch is pressed for the first time tap tempo 0 –... -
Page 14: Midi Channels Setting
MIDI channels setting Controller enables to control (by a Program Change command) three MIDI devices marked as MIDI 1, MIDI 2 and MIDI 3. To set the connection between desired device at the GSC and connected device should be set the same MIDI channel. -
Page 15: G Lab Tbwp True Bypass Wah-Pad Connecting
other effects and amp by placing a foot on the wah-pad. It is recommended to use “changing preset” mode only for presets, or presets and modifiers with exclusion of modifiers transmitting Control Change type com- mands. G LAB TBWP True Bypass Wah-Pad connecting The TBWP is equipped with SEN (mini Jack) output which enables to connect it to the GSC (see diagram below). -
Page 16: Technical Parameters
Scheme of extending GSC with two effect loops Two stereo effects’ switcher (TRUE BYPASS) Technical parameters Dimensions: width 441 mm depth 125 mm (without connectors) height 60 mm Weight 1.9 kg Buffer input impedance 1 MΩ Buffer transmitted signal 15 dBu Buffer output impedance 3 kΩ... -
Page 17: Midi Implementation Chart
MIDI implementation chart G LAB Guitar System Controller GSC-3 and GSC-2 rev. 2.11 Function Transmitted Recognised Basic Channel Default 1,2,3 Changed 1-16 Mode Default Messages Altered Note Number True Voice Velocity Note ON Note OFF After Touch Keys Channels Pitch Bend... - Page 18 DO NOT PLACE THIS PRODUCT INTO THE WASTE CONTAINER ! This device is marked with a cross-lined waste container symbol according to 2002/96/EU Directive on Waste Electric and Electronic Equipment. Such marking informs that after usage equipment can not be trashed together with other household waste.
Need help?
Do you have a question about the GSC-2 and is the answer not in the manual?
Questions and answers