Table of Contents
Advertisement
Quick Links
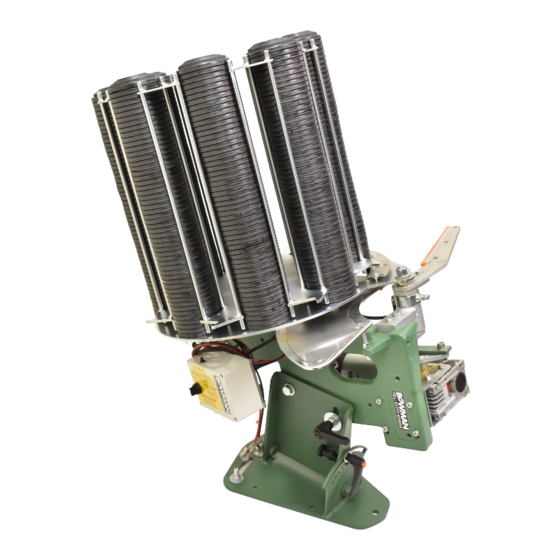
SUPERMATCH 6&8
Key Points:
Check your contents
•
Read thoroughly before
•
attempting to assemble or
operate.
Do not attempt to fit the battery
•
until all three assembly tasks
have been completed!
Thank you for your purchase, please call if you need any help or advice. Your support online would be
much appreciated. Kind Regards Andrew Davidson Managing Director of WJ Bowman (1984) LTD.
Check Contents
Having moved the protective card from around the clay pigeon trap, check its contents to ensure they are
all present. You should have included:
•
Trap fixed to a pallet
•
1 carousel
•
Coil of 50m cable and button unit / or wireless radio remote (if purchased)
•
Bowman barrow (if purchased with the trap)
•
Yellow Safety Ring
Positioning and fixing clay pigeon trap
Your clay pigeon trap can be fixed onto and operated from a pallet however, we could recommend a more
permanent bolted position or a Bowman barrow. If you have purchased a barrow position the trap onto the
barrow and line up the 3 bolt holes. Use the 12mm bolts provided to secure your trap to the barrow. A
washer should be placed on either side, a spring washer goes on before the nut to secure.
INSTRUCTIONS
Think! Safety First!
These machines can cause serious injury, read these
instructions prior to assembly and use.
If you are missing any contents, are unsure or concerned
about the use of your clay pigeon trap then please don't
hesitate to call bowman's directly on 01777 870243.
Tools Required: 2 x 17mm spanners, 2 x 19mm spanners, 1
x 24mm ring spanner & wire cutters / scissors.
WJ Bowman
High Street East Markham
Nottinghamshire NG220RE
01777 870243
www.bowmantraps.co.uk
@bowmantraps
01
Advertisement
Table of Contents

Related Manuals for BOWMAN SUPERMATCH 6/8 Series

Summary of Contents for BOWMAN SUPERMATCH 6/8 Series
- Page 1 Your clay pigeon trap can be fixed onto and operated from a pallet however, we could recommend a more permanent bolted position or a Bowman barrow. If you have purchased a barrow position the trap onto the barrow and line up the 3 bolt holes. Use the 12mm bolts provided to secure your trap to the barrow. A...
- Page 2 1. First task: fit your safety ring Align the holes and secure by Remove the ‘R’ clips from the Screw the 10mm studding into pushing the ‘R’ clips through the sockets underneath the clay the front of the casting and socket and safety ring.
- Page 3 3. Third task: fit the carousel Remove nut and clutch washers. Position the carousel on the shaft and re-fit the washers in the order they were removed. The domes of the clutch washers pointing towards each other and positioned between the 2 flat washers (see photograph). Tighten the nut until carousel offers moderate resistance when rotating.
- Page 4 Adjusting advance and retard limit switch The Limit Switch is set to stop the throwing arm just before it goes ‘over centre’ and fires. We set this at the factory however if the arm stops too far from the clay or too close to the centre causing ‘auto fir- ing’, please follow these instructions to re-set it.
- Page 5 Adjusting the timing of the carousel The timing of the your carousel is set at the Bowman factory. We set is so that when the trap is switched to ‘on run’, the carousel indexes around and places a stack of clays over the hole in the main plate. The knives are responsible for splitting the clays and allowing 1 clay to fall through while the rest remain supported.
- Page 6 Servicing - Lubrication continued... Lubricate the limit switch roller regularly to avoid it ceasing up. This column of moving parts that is powered by the motor and gear box is important to keep lubricated. Lubricate the rod end bearing and moving joints at the rear of the trap to ensure they continue to move freely.
- Page 8 Variations Supermatch 6/8 ABT Your trap is fitted to a Automatic Ball Trap (left, right, up and down movement) base. It will have been supplied with a 200m wireless radio control and receiver. Connect the radio receiver to the green six pin circular socket on the ABT control Box.
- Page 9 Variations Supermatch 6/8 DTL Your trap is fitted to a Down the Line (left to right movement) base. It will have been supplied with a 200m wireless radio control and receiver. Connect the radio receiver to the green six pin circular socket on the DTL control Box. The notch in the radio receivers plug should face north as you push it into the socket and then screw the collar on to secure the connection.
- Page 10 Variations Supermatch 6/8 Multi-Clay Our Multi-Clay variation has all the features of the standard Supermatch 6 model except for 1 key change that allows you to throw a combination of clay sizes from the same carousel! This is achieved by a new clay separating system and adding inserts into the hoppers of the carousel. With NO inserts in the carousel your trap will throw all standard (110mm) clays.
- Page 11 – this trap alone could occupy a stand on a sporting layout. At Bowman we like to make our traps as versatile as possible therefore, our battue trap can be converted to throw standard and midi clays.
- Page 12 In higher elevations and incorporating tilt, it offers a battue style clay when shot from right to left (going out flat then, turning and dipping towards the ground) and a curling away looper when shot from left to right. At Bowman we like to make our traps as versatile as possible therefore the trap can be converted back to fire standard clays if required.
Need help?
Do you have a question about the SUPERMATCH 6/8 Series and is the answer not in the manual?
Questions and answers