
Related Manuals for Image Engineering Vega

Summary of Contents for Image Engineering Vega
- Page 1 Vega User Manual August, 6th 2021 Image Engineering GmbH & Co. KG · Im Gleisdreieck 5 · 50169 Kerpen-Horrem · Germany T +49 2273 99991-0 · F +49 2273 99991-10 · www.image-engineering.com...
-
Page 2: Table Of Contents
2.2 Commissioning ......................5 OPERATING INSTRUCTIONS HARDWARE ..............6 3.1 Overview ........................6 3.2 Connecting the Hardware..................6 VEGA CONTROL SOFTWARE ..................7 4.1 Installation ......................... 7 4.2 Connection ........................ 7 4.3 Operation ........................8 4.3.1 Module Controls ....................8 4.3.2 Presets ....................... -
Page 3: Introduction
Keep these instructions in a safe place and pass them to any future user. 1.1 Conformity We, Image Engineering GmbH & Co. KG, hereby declare that the Vega corresponds to the essential requirements of the following EC directive: •... -
Page 4: Getting Started
The scope of delivery depends on the selected kit. The following kits are available. Vega Starter Kit: • 1 x Vega controller • 1 x Vega illumination unit 1 x CAN cable (screw-in connector to plug-in connector) • 1 x Low voltage power cable (screw-in connector to plug-in connector) •... -
Page 5: Commissioning
1 x Low voltage power cable (screw-in connector to plug-in connector) • • User manual • Acceptance protocol Optional: • Vega C++ API. 2.2 Commissioning Keep all ventilation slits of the Vega illumination unit free of foreign objects. The minimum clearance is 10 cm. Image Engineering Seite 5 von 11... -
Page 6: Operating Instructions Hardware
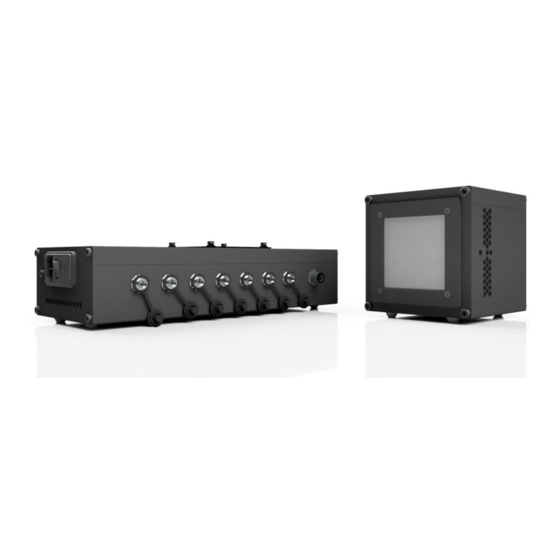
2. Fan guard 3. 12 V power input 4. CAN ID selector (DIP switch) 5. CAN IN/OUT (interchangeable) 6. Status LEDs 7. Test button 3.2 Connecting the Hardware Figure 2: Connecting the Vega hardware Image Engineering Seite 6 von 11... -
Page 7: Vega Control Software
Start the installer ‘setup_vega_winXX_1.0.0.exe’ and follow the instructions. 4.2 Connection Turn on the Vega controller, connect it to the PC via USB and start the software. If no Vega device is found, the following panel is displayed. Figure 3: No Device Connected If the software cannot detect the devices, you can try to add them manually. -
Page 8: Operation
CAN IDs. Select a device to make it controllable in the control panels at the bottom. The Vega modules can work in flicker or continuous mode. If you want to work in continuous mode, set the “Flicker” slider to 0.0Hz. If not, set them to your desired flicker frequency by adjusting the slider or entering the value directly. -
Page 9: Presets
A right-click into the free space of ② provides the following options. Figure 7: Presets Free Line Context Menu 4.3.3 Calibration The Vega has a stabilized intensity output. The system needs to be calibrated to use the output feedback in cd/m² or lux. The Vega provides two calibration modes. •... - Page 10 Open the context menu of the module you want to calibrate to start the calibration process. Figure 8: Module Context Menu Figure 9: Calibration - Reference The internal Sensors of the Vega perform a reference measurement. This measurement can take up to a minute. Figure 10: External Measurement Device needed Take your reference measurement on a suitable region with your external measurement device and select OK.
-
Page 11: Additional Information
Store and transport the Vega only in the delivered hard case. 5.3 Disposal Instructions The Vega must be disposed of properly after the service life is over. Vega includes electrical and electromechanical components. Observe your national regulations. Make sure that third parties cannot use Vega after disposing of it.
Need help?
Do you have a question about the Vega and is the answer not in the manual?
Questions and answers