Table of Contents
Advertisement
Quick Links
Advertisement
Table of Contents

Related Manuals for BCN3D ignis


Summary of Contents for BCN3D ignis
- Page 1 Instruction Manual...
-
Page 3: Table Of Contents
Contents Compliance Information General Product Components Technical Specifications General description General dimensions BCN3D IGNIS main systems Technical characteristics sheet Processable materials Security Team of allowed users Safety components Warnings Safety pictograms Transport - Storage - Installation Transport Storage conditions Installation conditions... -
Page 4: Compliance Information
Conformity Information The compliance label including regulations can be found on the back of the machine. Instruction Manual... -
Page 5: General
General This instruction manual aims to: • Inform users of the machine, its operating modes and operating limitations; • Present the product’s technical specifications; • Warn on the safety requirements of the machine and its components; • Establish modes for installation and start-up; •... -
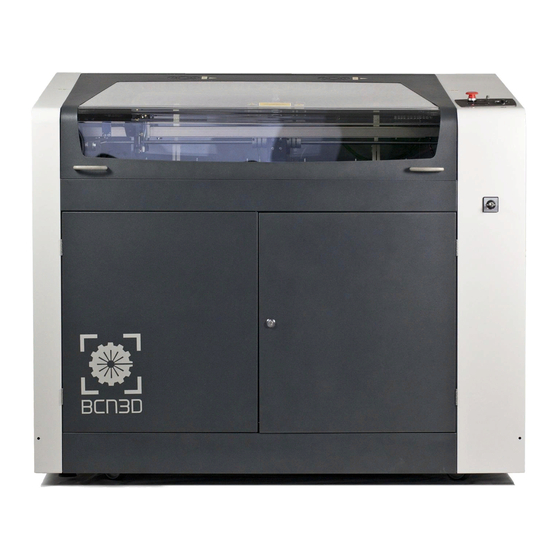
Page 6: Product Components
Product Components BCN3D Ignis Instruction manual “Honeycomb” metal mesh Network cable Power supply cable PC-USB cable Pen drive - Software Electronic panel access key Machine connection key 2 lens-cleaning cloths Instruction Manual... -
Page 7: Technical Specifications
Technical Specifications General description BCN3D IGNIS has been designed for cutting, marking and engraving specific materials listed in this document (Pro- cessable materials, page14). For more information: https:/ /www.bcn3dtechnologies.com/es/ignis-downloads/ General dimensions 1575,50 DESCRIPTION DIMENSION UNIT Maximum width 1576 Maximum depth... -
Page 8: Bcn3D Ignis Main Systems
Primary Systems for the BCN3D IGNIS To better understand this instructions manual, the following describes the three fundamental systems of the BCN3D IGNIS: Optic system and X-Y axis 1 Tube laser The optic system is created with the tube, its mirrors, the 2 Mirror grouping lens and the beam combiner. - Page 9 This system is located in the interior of the machine and is controlled by the system itself. BCN3D Ignis has air vents on the upper case, thus creating a continuous flow for extracting air. The ventilation system guarantees an efficient extraction of dust and gases that are formed while operating a cut, mark and scanning.
-
Page 10: Technical Characteristics Sheet
Technical characteristics sheet Physical properties Exterior dimensions 1576x997x1248mm Packaging dimensions 160x1160x11411 (+-10)mm Weight 300kg Noise (weighted in A) 70-71dB (A) Maximum operating temp. 70ºC Machine properties Maximum cutting area 995x575mm Maximum piece size 1000x600x290mm Repeatability +-0.01mm Resolution 0.0231mm (1100DPI) Minimum text font 1,7mm alphanumeric characters Laser type Power... - Page 11 Technical characteristics sheet Electronics Controller Ruida RD6442G Drivers 3xleadshine M880A Motorisation 3xNema 23 Connection Ethernet (LAN) (máx. 200m) USB (máx 5m) Autónomo (Pen drive USB) Software Operating Systems Windows 7, Windows 10 Software RDWORKS V8.01.18 File input formats *.ai; *.dxf; *.plt; *.dst; *.dsb; *.eps; *.nc; *.bmp; *.gif;...
-
Page 12: Processable Materials
Processable materials MATERIAL MARKING ENGRAVING CUTTING Wood Acrylic Glass Coated metals Ceramic Delrin Leather Melamine Methacrylate Paper Agglomerate Rubber Cardboard Plywood Painted metals Tile Cork Anodised aluminium PVC (or Vinyl chloride derivatives) Vinyl More information: https:/ /www.bcn3dtechnologies.com/es/ignis-downloads/ Instruction Manual Manual d’Instruccions... -
Page 13: Security
BCN3D or SAT and adjustments Security components BCN3D IGNIS is equipped with a security anchoring system, whose function is to prevent any radiation from accessing the danger area during the entire process when the laser is active and guarantee that the machine does not cause any risk during the tasks of supplying and handling pieces. -
Page 14: Warnings
Warnings Correct use of the machine The repair, calibration, revision and start-up tasks must be performed by official BCN3D • Any use not contemplate in this manual will be personnel and autorized BCN3D distributors. considered as misuse. • Misuse of the machine can lead to risks of body injuries and/or material damage. - Page 15 Warnings Unauthorised handling operation indicates that the cooling system has been activated. This whistling should stop after a • There must be authorised personnel responsible few seconds. for controlling the correct operation and handling • Check the machine’s movements when there are of the equipment by the rest of the operators.
- Page 16 Warnings The machine must be maintained Operators are not allowed to process correctly and kept clean following the materials which are not included in the instruction contained in this manual. Processable Materials list of this manual. Missing or worn signs Trapping •...
- Page 17 Warnings Improper removal of residues and Modifications in the vender settings productions materials • The improper removal of residues may cause The basic functioning parameters, or vender settings, environmental damages. which are set by the manufacturer, guarantee the pro- per functioning and safety. •...
-
Page 18: Safety Pictograms
Safety pictograms 1 Laser radiation 2 Electrical hazard emission hazard 3 Trapping hazard 4 Fire hazard Instruction Manual... -
Page 19: Transport - Storage - Installation
Transport - Storage - Installation Transport The machine will be transported by the manufacturer or, otherwise, by an authorised distributor. The manufacturer is responsible for unloading, adjusting and tuning the components. In the event of damage or missing parts, the machine shall not be released. The procedure for checking compo- nents and inspecting damage shall be carried out by the manufacturer or, otherwise, by an authorised distributor. -
Page 20: Assembly And Installation
Assembly and Installation The machine will be assembled by an authorised dis- tributor, which may be the transport company itself or BCN3D personnel. The assembly activities must be performed by professionals qualified in completing this task and never by the user. -
Page 21: Pc Configuration
PC Configuration Installing RDWorks In order to use BCN3D IGNIS, it is necessary to download and install RDWorks. 1 Download the latest version of the RDWorks 4 The following screen will appear: installer at: https:/ /www.bcn3dtechnologies.com/es/ignis- downloads/ 2 Install the software... - Page 22 Installing RDWorks 9 Once this checklist is complete, press the “Install” button. 10 The program will already be installed at this time. 11 Open RDWorks. 12 Press the “port setting” button on the bottom right. 13 Double click with the left button of the mouse on 14 Following this, press the test button.
- Page 23 IP of the machine has not changed on the display, when you press the test button “port test success” the BCN3D-IGNIS from the computer, as well as how will appear. If this does not occur, test the connection of the to modify, add or erase the previously set settings, this cable Ethernet and the IP that appears on the display.
-
Page 24: Using Rdworks
Using RDWorks Interface Image Aligning Control System Menu Panel Editing Layers Menu: In this area you will find the primary functions Editing Bar: The editing bar is where the user can place commands that are frequently used to make editing easier. -
Page 25: Configuring The Laser's Parameters
If blowing: This option allows us to control the extractor that is integrated with the machine. This option must always be in the “yes” position (Activated in BCN3D IGNIS as a default) Processing mode: This option allows us to select the process to be carried out: •... - Page 26 Configuring the laser’s parameters Sub-Menus: Scan mode: This dropdown menu allows us to choose the type of scanning that will be completed. You can 1. If a cutting task is selected, the following sub-menu select in which axis the scanning is done in and if it will will appear be done in only one direction (unilateralism) or back and forth (swing).
-
Page 27: Sending Tasks To Bcn3D-Ignis
BCN3D- be made. Allows to easily see if the figure is located in IGNIS. Following this the user may start the task from the correct position and if the material that you wish to the control panel on the machine. -
Page 28: Function Of The Control Panel
Function of the control panel Control panel: Enter Origin Frame Min- Max- Start- Reset Pulse Speed File Power Power Pause Introduction to the buttons Defines the minimum power Min- Resets the controller Reset Power for the task set set Start- Defines the relative origin Start or stop a task Origin... -
Page 29: Introduction To The General Interface
Introduction to the general interface After turning the machine on, the display will show the following interface. Graphic Work parameters representation Coordinates Layer Parameters for the graphic & warning Task Process bar Dimensions Network status Work Work of the file status number Graphic Representation: On this part of the panel,... - Page 30 Introduction to the general interface Speed selector: Options for layer parameters Press the “speed” button when you are in the main After choosing a file to preview on the main menu, the menu and this will appear: user may press the “enter” menu to move the cursor to the first layer, following this you can use the keys to select the layer that you wish to modify or see its values.
-
Page 31: Z/U Menu
“U move” one, but the difference is that it refers to the amount This functionality is not activated on the BCN3D IGNIS of time that the laser will emit radiation. If the user chooses the continuous mode by pressing the “pulse”... - Page 32 Z/U Menu “Origin set+” • Set origin 1/2/3/4: If the “enter” button is pressed, When this function is selected, the following menu will it will define the origin number by selecting the appear: point x,y where the head is found. •...
- Page 33 “enter” key. If this section of the menu is pressed, the following information will appear: “Auto focus” Press “enter” for the IGNIS to set the focal distance automatically. “Language settings” In this section, the language can be chosen between the options that appear on the following image: “Screen Origin”...
-
Page 34: File Key
File Key Memory file If the option “other+” is activated, the following menu will appear: Press the “file” key on the main menu and the following menu will appear: The system will first read the file from the memory, If the option “other+” is activated, the following menu then show the files in the upper left part of the screen will appear: and preview the task in the lower right part of the... - Page 35 • Delete: To erase a file from the pen drive. So that the BCN3D IGNIS can read the files from the pen drive, they should be exported through the “SavetoUfile” option on the control panel. Instruction Manual...
-
Page 36: Operation
Operation Control Panel 1 Cooling Indicates that the cooling and ventilation are operating correctly. 2 Enable Push button which enables the laser and the motors 3 Display Display 4 USB port Allows the user to connect a pen drive with the tasks that they wish to complete 5 Air regulator Controls air pressure at the head of the laser 6 Emergency button... -
Page 37: Initial Adjustments
Starting Settings Starting Verifications 1 Ensure that the 4 legs are in the correct position and in contact with the floor and that the machine is stable in a definite location. 2 Connect the supply cable and the network cable or USB cable to the computer. - Page 38 Starting Settings Starting a task with BCN3D-IGNIS 1 Close the lid COOLING ENABLE 2 Switch the key to on position. OPEN 3 Verify the unblocking of the UFILE CLOSED emergency stop 4 Verify that the COOLING indicator is lighted and the display screen is on and the audio signal stops.
-
Page 39: Stops And Emergency Stops
Stopping and emergency stops A stop by raising the cover There are three types of stops while completing a task or when the machine is processing. The following will describe the functions of each one of them and actions When the cover is raised in the middle of a task, to be complete once activated. - Page 40 This must only be completed when finished using the UFILE CLOSED BCN3D IGNIS. To start using this after a complete stop from the key This emergency stop will inhibit the laser and discon- switch, follow the steps that appear on the display nect the motors.
- Page 41 Instruction Manual...
-
Page 42: Maintenance
Maintenance Maintenance Plan COMPONENT MANTENIMENT Check: LASER Mirrors and lenses - That they are clean and clean them if they are not clean - That the position is correct according to the manufacturer’s instruction. Work base Clean the base for suction TRANSMISSION Belts Check they are working correctly... -
Page 43: Maintenance Operations
Maintenance operations Mirros, beam combiner and lense The optic system for the BCN3D IGNIS is comprised of With each connection for the machine, z and before three mirrors, on beam combiner and one lens. Mirror A completing any task, it is necessary to test the mirrors,... - Page 44 Maintenance operations Removing mirrors and lenses The mirrors are fixed to their supports by means of a securing piece screwed to the base of the head. The lens is houses in the laser head and is secured by means of a threaded retainer. Fixation piece Goma Eva Mirror...
- Page 45 Maintenance operations Unscrew the fixation piece using a flat Remove the mirror. screwdriver. Uncouple the air tube by pressuring the hose connection and pulling on the tube. Instruction Manual...
- Page 46 Maintenance operations Unscrew the support anti-clockwise as Remove the support. seen in the image. Remove the bottom conical part by Using a flat screwdriver, unscrew the unscrewing anti-clockwise. retainer from the lens positioned on the support. Instruction Manual...
- Page 47 Maintenance operations Cleaning mirrors and lenses Clean carefully using a clean lens cloth. The machine comes with a specific set for cleaning the lens. Assembling mirrors and lenses Position the mirror and the fixation piece Screw the mirror support using a flat in their place.
- Page 48 Maintenance operations Insert the lens into the support with the Screw the retainer using a flat screwdriver. convex part facing inwards. Screw the bottom conical part. Insert the support inside the head undercvvzv it reaches the end. Instruction Manual...
- Page 49 Maintenance operations Screw the support as seen in the image. Couple the air tube by pressuring the tube inside the hose connection. Instruction Manual...
- Page 50 Maintenance operations Work base The work base must be vacuumed at the end of the working day. Paying special attention to ensure the mirrors, guides and head do not suffer any blows. Work table ERemove the metal mesh (honeycomb) and vacuum all residue deposited at the bottom of the table.
- Page 51 Instruction Manual...
-
Page 52: Frequent Problems
These For more information on the starting point for the task, measures will not allow the laser be able to cut or move look at the “sending tasks to Ignis” section and the the head from the display. “position” sub-section. - Page 53 Instruction Manual...
- Page 54 We would like to thanks all users for the trust they have deposited in BCN3D Technologies, for helping us materialise our dream of creating a better product each day. That is why we provide you with a team of experts who...
- Page 55 MI-2015-1...
Need help?
Do you have a question about the ignis and is the answer not in the manual?
Questions and answers