Table of Contents
Advertisement
Quick Links
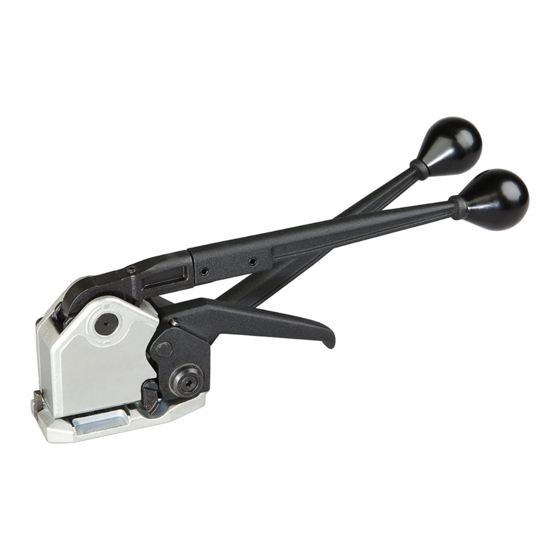
MUL-16
Sealless Combination Tool
for Steel Strapping
60
80
35
78
53
47
18
72
58
17
19
07
21
73
34
15
63
61
04
37
25
85
62
21
22
57
73
24
72
02
64
34
66
54
59
43
41
31
48
08
28
69
38
32
36
05
09
For Parts & Service 1-877-862-6699
29
33
50, 53, 54 5/8" , 3/4"
44; 47; 48 1/2" , 5/8"
50
10
26
11
67
44
36
(16 , 19 mm)
(13 , 16 mm)
01
30
55
06
66
80
42
23
43
41
45
Advertisement
Table of Contents

Related Manuals for Teknika MUL-16


Summary of Contents for Teknika MUL-16
- Page 1 MUL-16 Sealless Combination Tool for Steel Strapping 50, 53, 54 5/8" , 3/4" (16 , 19 mm) 44; 47; 48 1/2" , 5/8" (13 , 16 mm) For Parts & Service 1-877-862-6699...
- Page 2 MUL-16 PARTS LIST Sealless Combination Tool for Steel Strapping No KEYNo16 DESCRIPTION QTY. 16-01 TENSION HANDLE 16-02 SEALING HANDLE 16-04 FRAME 16-05 SIDE COVER 16-06 FEED WHEEL SUPPORT HANDLE 16-07 STRAP LIFTER 16-08 PAWL SHAFT 16-09 GUIDE ARM PIN 16-10...
- Page 3 MUL-16 Sealless Combination Tool for STEEL Operation Manual Strap Type Regular Duty Steel Strap Width Adjustable 1/2", 5/8", 3/4" (13, 16, 19 mm) Strap Thickness Up to 0.025" (0.64 mm) Joint Type Sealless Weight 8.5 lbs (3.8 kg) Footprint L: 4.5"; W: 2.2"...
- Page 4 Fig. 1 – Starting Position 1. Pull up on Feed Wheel Support Handle 06 to raise Feed Wheel 26. Load both straps 100 and 101 under Dies 21, under Cutter Blade 22 and under Feed Wheel 26 and release the Feed Wheel Support Handle 06 as shown on Fig.
- Page 5 2. Apply tension by ratcheting Tension Handle 01 as shown on Fig. 3. Fig. 3 3. Once satisfactory tension is achieved return Tension Handle 01 back and push Sealing Handle 02 forward to seal the joint and cut the excess strap as shown on Fig.4 Fig.
- Page 6 3. FEEDWHEEL CLEARANCE ADJUSTMENT The MUL-16 is adjusted from the factory so that there is approximately .010" clearance between the Feedwheel and the Clutch Plug (Bottom Gripper). Setting them close together insures that there is enough pressure to enable the Feedwheel and Gripper to bite into the strapping and operate without slipping.
Need help?
Do you have a question about the MUL-16 and is the answer not in the manual?
Questions and answers