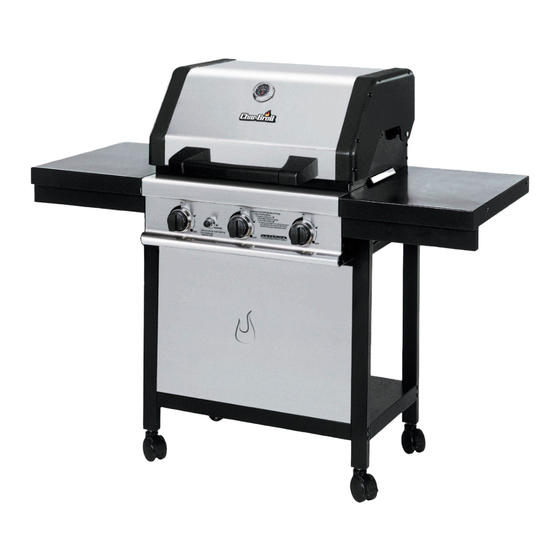
Char-Broil COMMERCIAL Series Quick Start Manual
Hide thumbs
Also See for COMMERCIAL Series:
- Operating instructions manual (60 pages) ,
- Use and care manual (24 pages) ,
- Assembly, use and care manual (16 pages)

Related Manuals for Char-Broil COMMERCIAL Series


Summary of Contents for Char-Broil COMMERCIAL Series
- Page 1 THIS GRILL IS FOR OUTDOOR USE ONLY ® If you have any questions or need assistance during assembly, please call 18002417548, U.S. 1 800 3876057, CAN 466231103 / P80111081A (041503) 466231103 • 1...
-
Page 2: For Your Safety
Installation Safety Precautions WARNING WARNING WARNING WARNING WARNING • Use grill only with LP (propane) gas and the regulator/valve assembly supplied. • Grill installation must conform with local codes, or in their FOR YOUR SAFETY absence with National Fuel Gas Code, NFPA 54 / ANSI 1. Do not store or use gasoline or other Z223.1 or CAN/CGAB149.2 Propane Installation flammable vapors and liquids in the Code. Handling and storage of LP cylinders must conform vicinity of this or any other appliance. to LP Gas Code NFPA/ANSI 58. Grill is not for use in or on 2. An LP Tank not connected for use recreational vehicles and/or boats. shall not be stored in the vicinity of ... -
Page 3: Table Of Contents
Table of Contents Warranty CharBroil warrants to the original consumerpurchaser that For Your Safety ................. 2 this product shall be free from defects in workmanship and Call Grill Service Center For Help And Parts ......2 materials under normal and reasonable use and correct Installation Safety Precautions ..........2 assembly (if assembled by consumerpurchaser), from date of Safety Symbols ................. 2 purchase. Table of Contents ..............3 Stainless steel and die cast parts 99 years Warranty ..................3 Electronic ignition and burners 10 years Before Beginning Assembly ............. -
Page 4: Before Beginning Assembly
Before Beginning Assembly Parts List 466231103 Description NEW PART# • Necessary tools for assembly of your grill include: Lid Plate P00118036A ® Phillips screwdriver, pliers and adjustable wrench. "Lid Side Panel, Left" P00105037K "Lid Side Panel, Right" P00106037K Heat Indicator P00601181A Plastic Lid Handle P00202012A Logo Plate P00403003H Warming Rack P01505007E Cooking Grid... -
Page 5: Exploded View
Exploded View 466231103 466231103 • 5... -
Page 6: Assembly
5. Screw the 4 casters into the caster seats in the bottom of Assembly 466231103 each cart leg. Turn the threaded caster stem by hand, clockwise until it stops. Fully tighten with the wrench provided. See Fig. 2. • Unpack and remove all protective packaging. 6. Install the front panel to the cart by using 4 of the 3/16x3/8" Phillipshead screws. Leave screws loose. See Fig. 2. 1. Position bottom shelf with holes for the tank holder to the left side. See Fig. 1. 7. Attach the 4 side shelf brackets to the tops of the carts legs using 8 of the 1/4x1/2" Phillipshead screws. Be sure the VERY IMPORTANT: The labels on the cart legs flat side of each bracket faces outward. Secure firmly. indicate their assembly position to the bottom shelf. LF LF=Left See Fig. 2. Front, ... - Page 7 11. Attach grill head to all cart legs using 4 of the 1/4x21/2" To reduce the weight of the grill head, open the grill lid and remove the packed components. This step requires 2 people Phillipshead screws and 1/4" lock nuts. See Fig. 5. to lift and position the grill head onto the cart. After the grill 12. Fully tighten all leg screws, panel screws, and grill head is positioned on the cart, one person needs to support the head screws. grill head while the other person assembles the screws as ...
- Page 8 15. Unscrew the ignitor cap located on the control panel and FIGURE 9 remove the contact and spring from the ignitor slot. See Fig. 7. 16. Place the supplied AA battery into the ignitor slot with the positive pole facing toward you. 17. Place the spring with contact over the battery. Screw the ignitor cap back onto the control panel. FIGURE 7 Panel lip Shelf Before Your First Cookout Ignitor – • Perform the leak test as indicated in the use and care section. • Wash the cooking grids, griddle, cooking rack, and all stainless steel surfaces with warm, soapy water. Rinse and Contact Spring AA Battery dry thoroughly. 18. Place the 3 flame tamers on the lower ledge above • Light burners. Check to make sure they are lit, then close burners. See Fig. 8. They should meet in the center. the lid and warm the grill on HI for 15 minutes. Curing of ...
-
Page 9: Use And Care
LP Tank Leak Test Use and Care For your safety • Leak test must be repeated each time LP tank is exchanged or LP Tank refilled. • The LP tank used with your grill must meet the • Do not smoke during leak test. following requirements: • Do not use an open flame to check for gas leaks. • Purchase LP tanks only with these required measurements: • Grill must be leak checked outdoors in wellventilated area, away 12" (30.5cm) (diameter) x 18" (45.7 cm) (tall) with 20 lb. (9 from ignition sources such as gas fired or electrical appliances. kg.) capacity maximum. During leak test, keep grill away from open flames or sparks. • Be constructed and marked in accordance with Use a clean paint brush and 50/50 soap and water ... - Page 10 5. Hold regulator, insert nipple (B) into LP tank valve. Hand tighten coupling nut, holding regulator in a straight line (C) D D D D D ANGER ANGER ANGER ANGER ANGER with LP tank valve so as not to cross thread the connection. • NEVER store a spare LP tank under or near grill or in enclosed areas.
- Page 11 4. Brush soapy WARNING WARNING WARNING WARNING WARNING solution onto following connections: For Safe Use Of Your Grill: • Do not let children operate or play near grill. • Keep grill area clear and free from materials that burn. • Do not block holes in bottom or back of grill. • Check burner flames regularly. • Use grill only in wellventilated space. NEVER use in enclosed space such as carport, garage, porch, covered patio, or under a surface that can catch fire. • Use grill at least 3 ft. from any wall or surface. Maintain 10 ft. clearance to objects that can catch fire or sources of ignition such as pilot lights on water heaters, live electrical appliances, etc. • Do not use charcoal, briquets or lava rock in this grill. Apartment Dwellers: • Check with management to learn the requirements and fire codes for using an LP Gas Grill in an apartment com plex. If allowed use outside on the ground floor with a three (3) foot clearance from walls or rails. Do not use on or under balconies made of wood. 5. "If growing" bubbles appear, •...
- Page 12 Ignitor Lighting Valve Check Do not lean over grill while lighting. • Important: Make sure gas is OFF at LP tank before checking valves. Knobs lock in OFF position. To check 1. Open lid during lighting 2. To ignite any burner, turn knob to HI, push and hold valves, first push in knobs and release, knobs should spring ELECTRONIC IGNITOR button for 5 seconds. back. If knobs don't spring back, replace valve assembly before using grill. Turn knobs to LOW position then turn back 3. If ignition does not take place within 5 seconds, turn all to OFF position. Valves should turn smoothly. ...
-
Page 13: Storing Your Grill
General Grill Cleaning Indirect Cooking • Do not mistake brown or black accumulation of grease and Poultry and large cuts of meat cook slowly to perfection on the smoke for paint. Interiors of gas grills are not painted at the grill by indirect heat. The heat from selected burners circulates factory (and should never be painted). Apply a strong gently throughout the grill, cooking meat or poultry without the solution of detergent and water or use a grill cleaner with touch of a direct flame. This method greatly reduces flareups scrub brush to insides of grill lid and bottom. Rinse and allow when cooking extra fatty cuts because there is no direct flame to to completely air dry. Do not apply a caustic grill/oven ignite the fats and juices that drip during cooking. cleaner to painted surfaces. • Plastic parts: wash with warm soapy water and wipe dry. Indirect Cooking Instructions Do not use citrisol, abrasive cleaners, degreasers or a • Always cook with the lid closed. concentrated grill cleaner on plastic parts. Damage to and • Due to weather conditions, cooking times may vary. During failure of parts can result. -
Page 14: Food Safety
Food Safety • Food safety is a very important part of enjoying the outdoor cooking experience. To keep food safe from harmful bacteria, follow these four basic steps: Clean: Wash hands, utensils, and surfaces with hot soapy water before and after handling raw meat and poultry. Separate: Separate raw meats and poultry from readytoeat foods to avoid cross contamination. Use a clean platter and utensils when removing cooked foods. Cook: Cook meat and poultry thoroughly to kill bacteria. Use a thermometer to ensure proper internal food temperatures. Chill: Refrigerate prepared foods and leftovers promptly. How To Tell If Meat Is Grilled Thoroughly • Meat and poultry cooked on a grill often browns very fast on the outside. Use a meat thermometer to be sure food has reached a safe internal temperature, and cut into food to check for visual signs of doneness. • Whole poultry should reach 180 0 F; breasts, 170 0 F. Juices should run clear and flesh should not be pink. • Hamburgers made of any ground meat or poultry should 0 reach 160 F, and be brown in the middle with no pink juices. Beef, veal and lamb steaks, roasts and chops can be cooked 0 0 to 145 ... -
Page 15: Troubleshooting
Troubleshooting Problem Possible Cause Prevention/Cure Burner will not Clean wires and/or electrode with rubbing alcohol and clean swab. Wires and/or electrode covered with light using ignitor. cooking residue. Replace electrode(s). Electrode cracked or broken "sparks at crack" Tip of electrode should be pointing toward tip of collector box. The Electrode tip not in proper position distance should be 1/8" to 1/4", adjust if necessary. Reconnect wires or replace electrode/wire assembly. Wires are loose or disconnected. Replace ... - Page 16 A Division of W.C. Bradley Co. P. O. Box 1240 Columbus, GA 319021240 16 • 466231103...
Need help?
Do you have a question about the COMMERCIAL Series and is the answer not in the manual?
Questions and answers