Table of Contents
Advertisement
Quick Links
................................................................................................ 1
................................................................................................
3-1 Unpacking and Checking..................................................................................
3-2 Installing Components .....................................................................................
3-3 Leveling the Scale...........................................................................................
4-1 Specifications & General Features ..........................................................................
4-2 Front Panel ..................................................................................................
4-2-1 LCD display................................................................................................
4-2-2 Keyboard...................................................................................................
4-3 Power Supply................................................................................................
5.
5-1 Function Setting ............................................................................................
5-2 Description of Parameter Values
................................................................................................ 8
7-1 weighing ......................................................................................................
7-3 check weighing..............................................................................................
7-4 Simple Counting.............................................................................................
7-5 Accumulation, Accumulation Display and Accumulation Clearing..............................
7-6 Printer initialization by the indicator operation........................................................
7-7 Input commands............................................................................................
8-1 Diagram........................................................................................................
CONTENTS
....................................................................
...
......................................................
1
1
1
1
2
3
3
4
5
5
5
9
9
10
10
11
12
12
12
13
0
Advertisement
Table of Contents

Related Manuals for Hengx CYD-W8+-3K


Summary of Contents for Hengx CYD-W8+-3K
-
Page 1: Table Of Contents
CONTENTS ………………………………….……………………………………………….. 1 1. Introduction …………………………………….…………………………………………….. 2. Precautions 3. Before Using the Product 3-1 Unpacking and Checking………………………………………………………………………. 3-2 Installing Components ………………………………………..……………………………….. 3-3 Leveling the Scale………………………………………………..…………………………….. 4. Product Introduction 4-1 Specifications & General Features …………………………………........4-2 Front Panel …….………………………………………………………………………………. 4-2-1 LCD display…………………………………………………………………………………… 4-2-2 Keyboard………………………………………………………………………………………... -
Page 2: Introduction
1. Introduction This manual contains installation and operation instructions for the CYD-W8+ Series weighing scale. Please read the manual completely before installation and operation. 2. Precautions ◎ Place the scale on a flat and stable surface. ◎ Verify that the input voltage and the plug type matches the local AC power supply (Refer to Section 4-3). -
Page 3: Product Introduction
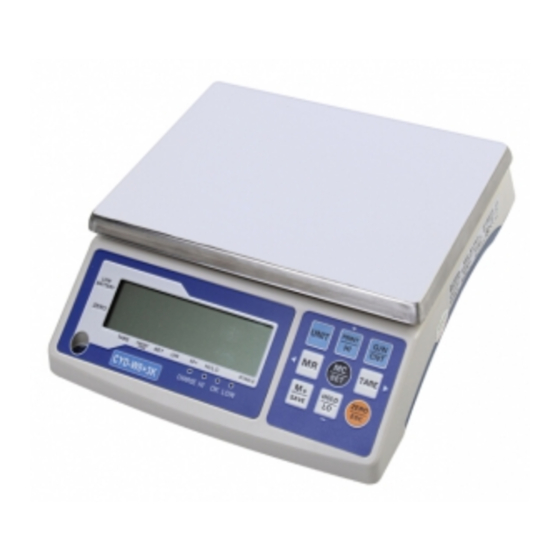
⑥ On/Off switch ③ Adjusting feet ⑦ Transport protection screws ④ Plastic weighing pan ⑧ Power socket 4-1 Specifications & General Features Specifications Model CYD-W8+-3K CYD-W8+-6K CYD-W8+-15K CYD-W8+-30K Capacity (Kg) Display LCD(liquid crystal display), digits 31mm high, with back lighting Pan size 294 x 228 x 13.5mm... -
Page 4: Front Panel
4-2 Display 4-2-1 LCD Display Low battery indication Tare or Preset Tare Indication Center of Zero Indication.The zeroing range is ±2﹪of weighing capacity. Auxiliary display (parameter, accumulated number of weighments) Symbol “ ” points at “TARE” when manual Tare action is done. TARE PRESET TARE Symbol “... -
Page 5: Keyboard
4-2-2 Keyboard Short press steps through activated weighing units, release on desired one. Displays gross and net weight by turns 1. Tares the weight of the container or accepts the keypad tare entries 2. Preset Tare and Cancel the tare 3. -
Page 6: Power Supply
1. During setting value, deduct 1 to the current value 2. Set the lower limit of the check weighing 3. Hold function 4-3 Power supply Please verify the local power source before plugging into the power outlet, and use the individual power socket and original adaptor. - Page 7 seconds (N=2s, 5s, 10s, 20s, ever) with no action. It is always on when the weights Ever= over 9e On: Backlight on 3. P02: current using units setting Unit Init : Press key to select the default unit when powering on the scale: pcs, 斤, lb. oz, g, kg, final .(final=keep the final being used unit when power off ) Unit Use: Press key...
- Page 8 the weight is equal or more than 20d LO: There will be a warning sound when the weight of articles exceeds the lower limit, and the weight is equal or more than 20d ok:There will be a warning sound when the weight of articles is between the upper and lower limit (including the upper and lower limits), and the weight is equal or more than 20d out:There will be a warning sound when the weight of articles is beyond the upper lower limit, and the weight is equal or more than 20d...
-
Page 9: Calibration
13. P12: Filtering setting: 1,2,3,4 Set the filtering level in which the stable indication turns on. The higher the setting, the slower stabilization time 14. P13: Precondition for zeroing or taring setting: stable, auto, always stable : Taring or zeroing can be not action without stable indication after pressing the key TARE ZERO always:Taring or zeroing can be action without stable indication after pressing the key... -
Page 10: Operation
for the other point calibration, move to step 6 to finish the calibration procedure. 5. Add another mass to the current weight. The window will show the total weight. Press TARE to complete. “ ”appears at the left bottom. M+/SAVE 6. -
Page 11: Check Weighing
pre-tare. 7-3 Check Weighing Lower limit setting HOLD/LO/- 1. Begin by pressing down key The scale is now in digital inputting mode with the right-most digit blinking. TARE/ 2. To set the value of lower limit, press key to shift leftwards, key to shift +/PRINT/HI HOLD/LO/-... -
Page 12: Accumulation, Accumulation Display And Accumulation Clearing
+/PRINT/HI HOLD/LO/- 3. Use key to choose the sampling amount. Available options are10、20、50、100、200、500、1000( pieces) TARE/ 4. Put the corresponding samples on the weighing pan, and then press key is displayed momentarily before the display reverts to the sample quantity. “ ”... -
Page 13: Printer Initialization By The Indicator Operation
ZERO/ESC. and return to normal weighing mode , press key 7-6 Printer initialization by the indicator operation M-/SET TARE/ 1. Press while powering on to enter parameter setting. Use key to shift to P09 M-/SET TARE/ 2. Press to enter the external device setting. Press to choose the printer model M-/SET... -
Page 14: Troubleshooting And Error Message
9. Troubleshooting and Error Message Error Message Problem shootings Exceed the zero range The item should be within 2% of full load ERR0 1. Check whether there are other alien articles on the scale pan, remove those Exceed the initial zero point articles. - Page 15 ST GW + 100.00 kg UT GW + 100.00 kg prt-04 UT NW - 200.00 kg ST NW - 200.00 kg ST: stable; UT: unstable; NW: net weight; GW: gross weight ST,GS,+ 100.00kg US,GS,+ 100.00kg prt-05 US,NT,- 200.00kg ST,NT,- 200.00kg ST: stable;...
-
Page 16: Appendix 2:Exporting Data To Pc In The Form Of Excel
G.W.: 100.00 kg T.W.: prt-02 0.00 kg N.W.: 100.00 kg (01) 1.765 kg When appear under (02) 1.760 kg display of accumulation, (03) 1.760 kg press key PRINT to the print ---------------- out. (03) 5.285 kg NOTE: The printing sample could be of different kinds of formats. When there is specific demand about the format, conduct as follows 1) As for BRICH/GODEX/ZEBRA/GP printers, the factory designs the format as planned and email to the user. - Page 17 Enable the function of “Use Serial Keys” in the computer Set Windows XP as a example: 1. Press “Start” ->"Run", and enter “access.cpl” ->”OK”. 2. In the dialog box ”Accessibility Options”, enter General option, choose “Use Serial Keys” and press “Settings”. In the dialog box ”Settings for SerialKeys”...
- Page 18 Export weighing data to Excel 1. Open Excel. 2. Press [Print], then Excel will show Weighing data. 3. Use “Format Cells” to beautify Excel: Troubleshooting 1. Enable “Fast User Switching” function will disable “Use Serial Keys” in the computer. Note: Start->"Control Panel "->"User Account"-> “Fast User Switching” function. 2.
-
Page 19: Appendix 3:U.key Connector
Appendix 3:U.KEY Connector 一、Introduction Connect the scale with PC and set the parameter of external device as “U.KEY” on the scale, then you could export the weighing data to PC in the form of EXCEL. With this function, you could record/accumulate/average/data statistical analysis the testing data, which we could call it as scale-computer data management function. - Page 20 2.ERP System:...
Need help?
Do you have a question about the CYD-W8+-3K and is the answer not in the manual?
Questions and answers