Table of Contents
Advertisement
Advertisement
Table of Contents

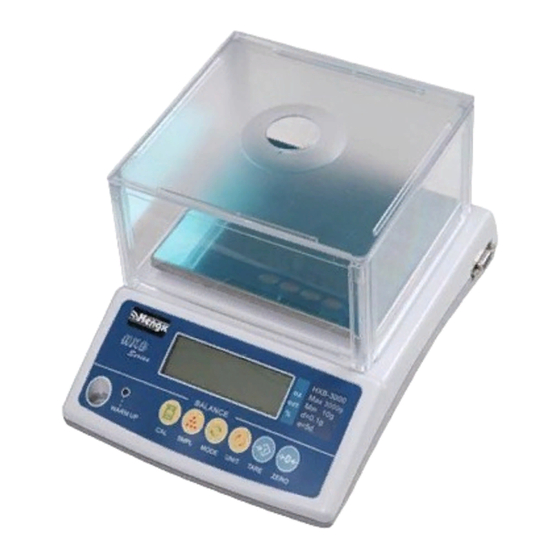
Summary of Contents for Hengx HXB series
- Page 1 PRECISION BALANCE USER’S MANUAL MODEL-X 2007-V2.0...
-
Page 2: Table Of Contents
Contents Fixing the Weighing Pan ----------------------------------------------- Protection Device Disassembly Steps ----------------------------------------------- Precautions ----------------------------------------------- Descriptions of Keys ----------------------------------------------- Functional Operation of Keys ----------------------------------------------- Panel Illustration ----------------------------------------------- Single Point Calibration of Weight ----------------------------------------------- Single Point Calibration of Weight when ----------------------------------------------- Power on Linearity Calibration of Weight ----------------------------------------------- Parameter Setting... -
Page 3: Protection Device Disassembly Steps
Weighing Pan Fixing Steps 1. When installing the weighing 2. Unscrew and remove the 3. After removing the shipping pan, tighten the fixing screw in shipping protection screw on the protection screw on the side of the centre of the plastic weighing side of the scale. -
Page 4: Functional Operation Of Keys
Functional Operation of Keys Weighing: Press 「 ON/OFF 」 key, the screen will have full display and start counting down. When the screen displays , you can start weighing. If you need backlight, press key. Counting: Press key, the screen will show , then press key, and the screen will show . -
Page 5: Single Point Calibration Of Weight
Single Point Calibration of Weight Steps Operation Display Step I Power off while holding down key, and then press 「ON/OFF」to switch on the scale. Step II Press Step III Press key to start zero point calibration. Make sure there is nothing on the weighing pan. Place 1/3 of load Step IV Please place weights of equivalent weight onto the pan Place 2/3 of load... -
Page 6: Single Point Calibration Of Weight When Power On
Single Point Calibration of Weight when Power on Steps Operation Display Step I Hold down Step II Then press key to start zero point calibration. Make sure there is nothing on the weighing pan. Place 1/3 of load Step III Please place weights of equivalent weight onto the pan Place 2/3 of load Place full load Wait for a beep sound... -
Page 7: Linearity Calibration Of Weight
Linearity Calibration of Weight Step I Power off while holding down keys, and then press 「ON/OFF」to switch on the scale. Step II Clear the weighing pan, then press key, (zero point calibration) Step III Wait for a beep sound Step IV Place 1/3 of load on the weighing pan and press perform 1/3 load calibration. -
Page 8: Parameter Setting
Parameter Setting Hold down key, then press「ON/OFF」key to enter the setting mode. The screen will show key: To switch functions; key: To enter or exit function setting selection; key: To end setting. LCD Display Function Selection Selection Page key: key: key: Internal value Item 1,... -
Page 9: Parameter Functional Description
Item 10, Display range Zero0/1/2/3/4/5 Page 10 Parameter Function Description When the screen shows press the key, the current internal value will be 。 displayed. Press key to return to the display When the screen shows , press key to enter into unit selection mode, the screen , “on”... - Page 10 When the screen shows , press to enter auto zero range selection. LCD display represents the auto zero range. Press to select the desired auto zero range, 『 、 、 、 、 、 』 then press to return to the display (The higher the value is, the wider auto zero range is.) When the screen shows...
- Page 11 When the screen shows , press to enter external device selection mode. LCD display represents external device. Press to select the desired external device, 『 then press key to return to the display -PC-- external PC, SH-24 - external dot 』...
-
Page 12: Units Conversion Table
Units Conversion Table 1 ct [MET.CARAT] =0.1999694 1 lb [AVORIRDUPOIS POUND] =453.59237 1 oz [AVORIRDUPOIS OUNCE] =28.349523125 g 1 dr [AVOIRDUPOIS DRAM] =1.7718451 1 GN [GRAIN](U.K) =0.06479891 1 ozt [TROY OUNCE] =31.1034768 1 dwt [PENNY WEIGHT] =1.55517384 1 MM [MOMME] (JPN) =3.749996 1 tl.j [HONG KONG JEWELRY TAEL]... -
Page 13: Rs-232 Serial Interface
RS-232 Serial Interface The 9 connector at the right back is a RS-232 standard interface. Pin 3 is for output, Pin 5 is for grounding and the rest have no functions. BAUD RATE:9600 bps DATA BIT:8 PARITY BIT:N﹝NONE﹞ STOP BIT:1 CODE:ASCII BIT FORMAT:... - Page 14 2007/5/22 - 13 - Precision Balance...


Need help?
Do you have a question about the HXB series and is the answer not in the manual?
Questions and answers