Table of Contents
Advertisement
Advertisement
Table of Contents

Related Manuals for Absen Absenicon3.0 Series


Summary of Contents for Absen Absenicon3.0 Series
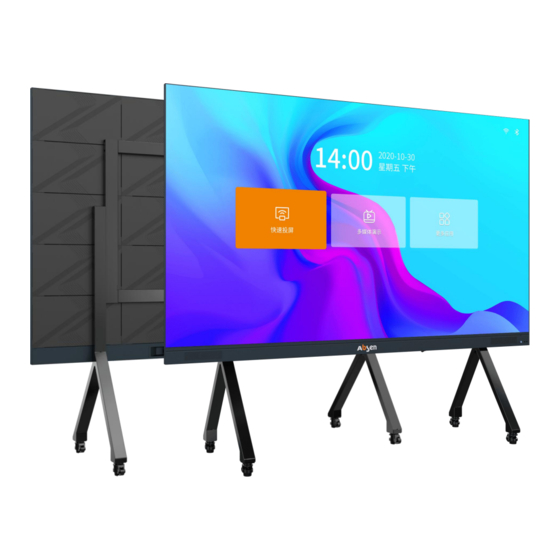
- Page 1 Absenicon3.0 Series C138 User Manual...
-
Page 2: Table Of Contents
Absenicon3.0 C138 User Manual catalogue Safety Information ................................2 1. Product introduction ..............................5 1.1 Product features ..............................6 1.2 Product specification ............................8 1.3 Screen Dimension Figure (mm) ........................9 1.4 standard packaging ............................10 2. Product Installation ..............................11 2.1 Installation guide ............................... -
Page 3: Safety Information
Follow safety instructions in this manual and on the product. If you have any questions, please seek help from Absen. Beware of Electric Shock! • To prevent electric shock the device must be properly grounded during installation. Do not ignore using the grounding plug, or else there is a risk of electric shock. - Page 4 Absenicon3.0 C138 User Manual • Do not modify the product, do not add or remove parts. • Do not use the product in case ambient temperature is over 55 ℃. Beware of Injury! • Warning: Wear a helmet to avoid injury. •...
- Page 5 Absenicon3.0 C138 User Manual Warning: Changes or modifications to this unit not expressly approved by the party responsible for compliance could void the user’s authority to operate the equipment. NOTE: This equipment has been tested and found to comply with the limits for a Class A digital device, pursuant to part 15 of the FCC Rules.
-
Page 6: Product Introduction
, exhibitions and so on. Absenicon3.0 series conference screen solutions will create a bright, open, efficient and intelligent conference environment, enhance audience's attention, strengthen speech influence and improve conference efficiency. -
Page 7: Product Features
Absenicon3.0 C138 User Manual 1.1 Product features 1. The front of the screen adopts an integrated minimalist design, and the ultra-high percentage of display area for 94%. The front of the screen has no redundant design except for the switch button and the commonly used USB*2 interface. - Page 8 Absenicon3.0 C138 User Manual welcome templates, quickly and efficiently improve the welcome atmosphere; 15. Support remote control, can adjust brightness, switch signal source, adjust color temperature and other operations, one hand can control various functions; 16.All kinds of interfaces are available, and peripheral devices can access; 17.
-
Page 9: Product Specification
Absenicon3.0 C138 User Manual 1.2 Product specification 项目 型号 Absenicon3.0 C138 Product size (Inch) Display area(mm) 3050*1715 Screen size(mm) 3060*1830*28.5 Display Pixel Per Panel(Dots) 1920x1080 Parameters Brightness(nit) 350nit Contrast Ratio 5000:1 colour space NTSC 110% power supply AC 100-240V Power average power consumption(w) Parameters Maximum power consumption(w) -
Page 10: Screen Dimension Figure (Mm)
Absenicon3.0 C138 User Manual 1.3 Screen Dimension Figure (mm) Front view Rear view... -
Page 11: Standard Packaging
Absenicon3.0 C138 User Manual 1.4 standard packaging The product packaging of the all-in-one machine is mainly composed of 4 parts: cabinet packaging (1*5 modular packaging), module packaging, installation structure packaging (movable bracket or wall-mounted), edging installation. Cabinet packaging: honeycomb carton 1870*760*500; Module packaging: honeycomb carton 950*810*680;... -
Page 12: Product Installation
Absenicon3.0 C138 User Manual 2. Product Installation This product can realize wall-mounted installation and movable bracket installation. 2.1 Installation guide This product is calibrated by the whole machine. In order to ensure the best display effect, it is recommended to install it according to the identification sequence number of our company. Diagram of installation number (front view) Number description: The first digit is the screen number, the second digit is the cabinet number, from top to bottom, the... - Page 13 Absenicon3.0 C138 User Manual The side of the beam with screw holes is facing up 横梁 vertical beam The vertical beam has a gap on the side facing inward 2.2.2 Install support legs Confirm the the front and back of the support leg and height of the bottom of the screen from the ground.
- Page 14 Absenicon3.0 C138 User Manual The front of the frame is in the same direction as the front of the support leg, and a total of 6 M8 screws on both sides are installed. 2.2.3 Install cabinet Hang the middle row of cabinet first, and hook connecting plate on the back of the cabinet into the notch of the cross beam of the frame.
- Page 15 Absenicon3.0 C138 User Manual Cabinet safety screws Hook connecting plate cross beam Note: The internal structure is subject to the actual product. Hang the cabinets on the left and right sides in turn, and lock the left and right connecting bolts on the cabinet.
- Page 16 Absenicon3.0 C138 User Manual Fix the lower edging to the bottom row of cabinets, tighten 6 M6 screws, and connect the power and signal wires of the lower edging and the bottom cabinet; Note: The internal structure is subject to the actual product. Install the left, right and top edging using M3 flat head screws;...
- Page 17 Absenicon3.0 C138 User Manual 2.2.5 Install module Install the modules in order of number.
-
Page 18: Installation Method Of Wall-Mounted
Absenicon3.0 C138 User Manual 2.3 Installation method of wall-mounted 2.3.1 Assemble frame Take out the frame from the packing box, including the cross beam and vertical beam. Place it on the ground with the front facing upwards (the side with the silk-printed logo on the beam is the front); Assemble the four sides of the frame, including two beams, two vertical beams and 8 M8 screws. - Page 19 Absenicon3.0 C138 User Manual After confirming the installation position of the frame fixed connecting plate and the position of the screen, Holes in the wall to install frame fixed connecting plate (only 4 connecting plate on four sides can be installed when the wall bearing capacity is good); 2.3.3 Fixed the frame After the frame fixed connecting plate is installed, install the frame, fix it with 2 M6*16 screws at each position, and clamp it up and down.
- Page 20 Absenicon3.0 C138 User Manual 2.2.4 Install cabinet Hang the middle row of cabinet first, and hook connecting plate on the back of the cabinet into the notch of the cross beam of the frame. Move the cabinet to the center and align the marking line on the beam;...
- Page 21 Absenicon3.0 C138 User Manual Hang the cabinets on the left and right sides in turn, and lock the left and right connecting bolts on the cabinet. The four-corner hook connecting plate of the screen are flat connecting plate. Left and right connecting bolts Note: The internal structure is subject to the actual product.
- Page 22 Absenicon3.0 C138 User Manual Note: The internal structure is subject to the actual product. Install the left, right and top edging using M3 flat head screws; Note: The internal structure is subject to the actual product. 2.2.6 Install module Install the modules in order of number.
-
Page 23: Power On And Off Guidance
Absenicon3.0 C138 User Manual 3. Power on and off Guidance 3.1 Power-on steps Use 100~240V 50/60Hz alternating current as the power supply of Absenicon3.0 conference screen. 1. Turn the power switch at the bottom of the Absenicon3.0 conference screen (next to the power interface) to the "ON"... -
Page 24: Power-Off Steps
Absenicon3.0 C138 User Manual 3.2 Power-off steps When the Absenicon3.0 conference screen is turned on and working normally: Method 1: Press the switch button on the lower right corner of the panel, the screen will display "Shutdown countdown (5S)" and "Press the shutdown button again to cancel" (the switch button status indicator lights up in red);... -
Page 25: Standby Steps
Absenicon3.0 C138 User Manual Completely power off: Turn the power switch at the bottom of the conference screen (next to the power interface) to the "OFF" position; 3.3 Standby steps When the Absenicon3.0 conference screen is turned on and working normally: Press the power button on the remote control, the screen displays "Standby (5S)"... -
Page 26: Remote Control Matching Guide
Absenicon3.0 C138 User Manual 4.2 Remote control matching guide 4.2.1 Method one Press button of remote control at the same time to match;... -
Page 27: Initial Setup
Absenicon3.0 C138 User Manual 4.2.2 Method two 1. On the main interface of the conference screen system, select "More Applications" to enter the APP application interface; 2. Click "Settings" to open the menu interface, select "Network-Bluetooth" to enter the Bluetooth settings interface;... - Page 28 Absenicon3.0 C138 User Manual Step 2: Match the remote control with Bluetooth, press "Menu button" and "Home button" on the remote control at the same time to match;...
- Page 29 Absenicon3.0 C138 User Manual Step 3: Select the Wi-Fi to be connected, and input the corresponding password;...
- Page 30 Absenicon3.0 C138 User Manual Step 4: Customize the device name to be conveniently searched by other devices; Step 5: The wireless display adapter is matched. Insert the wireless display adapter into the USB port on the screen to automatically match;...
- Page 31 Absenicon3.0 C138 User Manual After the initial settings are completed, you can view the novice guide or directly start using the Absenicon conference screen system.
-
Page 32: Novice Guide
Absenicon3.0 C138 User Manual 6. Novice Guide 6.1 Remote control guide 6.2 Wireless display adapter guide 6.3 IOS/MAC display guide... -
Page 33: Software Display Guide
Absenicon3.0 C138 User Manual 6.4 Software display guide 7. Display Guide 7.1 Wireless display 7.1.1 Wireless display by adapter Foreign customers recommend purchasing Barco's “Click Share”as wireless display adapter. For specific steps, please refer to Barco's equipment operating instructions. - Page 34 Absenicon3.0 C138 User Manual 7.1.2 PC display Use the PC open the browser, enter "https://www.absen.com/absenicon/", and download the correspo nding client according to different operating platforms. 7.1.2.1 Windows system display Connect to the Absenicon conference screen hotspot on the PC (the default name is: Absenicon_XXXX, and the default password is: 12345678);...
- Page 35 Absenicon3.0 C138 User Manual 7.1.2.2 MAC OS system display Use screen mirroring directly. Connect to the Absenicon conference screen hotspot on the PC (the default name is: Absenicon_XXXX, and the default password is: 12345678); Click the "Screen mirroring" icon in the upper right corner and select the corresponding device name to complete the screen display;...
- Page 36 Absenicon3.0 C138 User Manual 7.1.3.2 Transcreen of android features 1. Steps to connect the conference screen Open the Transcreen software, the first page of the screen is as follows, indicating that it is not connected to an authorized device; Open the phone "Settings" to connect to the conference screen wifi, enter Transcreen and click "Connect Device"...
- Page 37 Absenicon3.0 C138 User Manual 1. Photos Display / Audio and Video Display/Files Display Click " Photos Display" to upload the stored photos in the phone to the conference screen; Click "Video Display" to upload the stored video and audio in the phone to the conference screen; Click "Submit File"...
- Page 38 Absenicon3.0 C138 User Manual 4.Wireless Screenshot Support wireless screenshot function, listeners can take a complete screenshot of the content of the speaker through the mobile phone, and transfer it back to their mobile phone and store it in a designated location. (1) On the conference system interface, click "Display Master Control Ball"...
- Page 39 Absenicon3.0 C138 User Manual 7.1.3.3 IOS system display (1) Use iphone to connect to the Absenicon conference screen hotspot (the default name is: Absenicon_XXXX, and the default password is: 12345678); (2) Slide from top of the screen to open the control center; (3) Click "Screen Mirroring"...
- Page 40 Absenicon3.0 C138 User Manual Open the phone "Settings" to connect to the conference screen wifi, enter Transcreen and click "Connect Device" to select the conference screen to be connected; Screen Mirroring Click "Screen Mirroring", the following prompt appears, click "Start now" to upload the displayed signal on the phone to the conference screen;...
- Page 41 Absenicon3.0 C138 User Manual Photos Display / Audio and Video Display/Files Display Click " Photos Display" to upload the stored photos in the phone to the conference screen; Click "Video Display" to upload the stored video and audio in the phone to the conference screen; Click "Submit File"...
- Page 42 Absenicon3.0 C138 User Manual Wireless Screenshot Support wireless screenshot function, listeners can take a complete screenshot of the content of the speaker through the mobile phone, and transfer it back to their mobile phone and store it in a designated location. 7.1.4 Multi-split display The Absenicon conference system supports multi-split display function, which can set multi-split screen freely, and supports up to four screens.
- Page 43 Absenicon3.0 C138 User Manual Press the confirm key on the remote control or select the icon in the upper right corner of the interface, and slide in the pop-up menu to select "Set the quantity of split-screen";...
- Page 44 Absenicon3.0 C138 User Manual Select the split screen display mode in the "Mirror Setting" window, and you can choose "single split screen", "dual split screen" and "four split screen"; Click "Display main control ball" on the interface to enter the wireless central control interface, and click to select the connected device to complete multi-split display;...
- Page 45 Absenicon3.0 C138 User Manual iOS system devices can only click "Screen Mirroring" on the client to complete screen sharing. In multi-split screen mode, only one split screen can play sound, but each split screen can independently switch the sound. Split screens can exchange positions with each other, and double-click to display in full screen.
- Page 46 Absenicon3.0 C138 User Manual 7.1.6 Connection code setting On the wireless display guide interface, press the confirm key on the remote control or select the icon in the upper right corner of the interface, and slide in the pop-up menu to select "Connection code setting".
-
Page 47: Signal Source Access
Absenicon3.0 C138 User Manual 7.2 Signal source access Connect one end of the HDMI cable to the HDMI port of the Absenicon conference screen and the other end to the PC. 8. Signal Source Switching Users can switch between multiple signal sources in the following 3 ways. 8.1 Presentation On the main interface of the conference screen system, click "Presentation"... -
Page 48: Remote Control Signal Source Switching
Absenicon3.0 C138 User Manual (1) Click "Source", the source switching interface will pop up at the bottom of the screen; (2) Select the source that needs to be displayed and press the confirm button on the remote control to switch successfully. -
Page 49: Display Effect Settings
Absenicon3.0 C138 User Manual 9. Display Effect Settings If you need to adjust the display effect to obtain a more comfortable viewing effect, you can do the following operations. 9.1 Scene mode Absenicon conference screens are specially designed for different meeting application scenarios, providing 4 scene modes, whether it is document presentation, video playback, or remote meeting, it can match the best display effect. -
Page 50: Custom Display Effect
Absenicon3.0 C138 User Manual Click "Effect Adjustment" to enter the effect adjustment interface; Choose the corresponding mode according to your actual needs. 9.2 Custom display effect... -
Page 51: Eye Protection Mode
Absenicon3.0 C138 User Manual The user can make fine adjustments after selecting the scene mode to meet individual requirements. Short press the menu button on the remote control to enter the menu ; Click "Effect Adjustment" to enter the effect adjustment interface; Customize the display effect by adjusting "brightness", "saturation", "contrast", "color temperature"... -
Page 52: Settings
Absenicon3.0 C138 User Manual Click the "eye protection mode" button to turn on/off the effect of eye protection mode Note: When the eye protection mode is turned on, the screen display will be slightly yellow. 10. Settings On the main interface of the conference screen system, select "More Applications" to enter the "Settings" application interface. -
Page 53: Network Settings
Absenicon3.0 C138 User Manual 10.1 Network settings In the setting interface, select "Network" to enter the "Network Settings" interface. 10.1.1 Wired network... - Page 54 Absenicon3.0 C138 User Manual Select "Wired Network" to enter the wired network setting interface, and select "Auto" for "Wired Setting" to automatically obtain the IP address. When the icon is displayed in the upper right corner of the main interface, it indicates that the network connection is successful. 10.1.2 Wireless network Select "Wireless Network"...
- Page 55 Absenicon3.0 C138 User Manual automatically search for surrounding wireless networks, select an available Wi-Fi network, and a password input window will pop up. After entering the password, click "OK" to connect to Wi-Fi. 10.1.3 Local hotspot...
- Page 56 Absenicon3.0 C138 User Manual Select "Hotspot" to enter the local hotspot setting interface. The hotspot switch is turned on; Set the password of the wireless hotspot, click "OK" to turn on the hotspot; Note: After modifying the hotspot name or password of the machine, you need to connect the wireless display adapter to the USB port of the conference card and re-pair.
- Page 57 Absenicon3.0 C138 User Manual 10.1.4 Bluetooth Select "Bluetooth" to enter the local hotspot setting interface.
-
Page 58: Effect Settings
Absenicon3.0 C138 User Manual Turn on the Bluetooth switch to automatically scan for devices; Select the device to be paired; According to the pop-up "Bluetooth Pairing Request", enter the corresponding number and click "Pair". 10.2 Effect settings In the setting interface, select "Picture" to enter the "Effect Settings" interface. 10.2.1 Mode selection "Standard Mode", "Soft Mode", "Movie Mode"... - Page 59 Absenicon3.0 C138 User Manual 10.2.2 Eye protection mode The bottom button (Eye Comfort) can turn on the eye protection mode.
-
Page 60: Sound Settings
Absenicon3.0 C138 User Manual 10.3 Sound settings In the setting interface, select "Sound" to enter the "Sound Settings" interface. Set the sound of the Absenicon conference screen, including adjusting the volume and turning on/off the system sound. 10.4 General settings In the main setting interface, select "General"... - Page 61 Absenicon3.0 C138 User Manual 10.4.1 Source settings In the main interface of general settings, select "Signal" to enter the signal source settings interface. Perform the following settings and management of the connected signal source. Remember signal: Set the power-on signal source, select "Last Used", "Home" (default), "HDMI1", "HDMI2", "HDMI3"...
- Page 62 Absenicon3.0 C138 User Manual "16:9" and "pixel-to-pixel". 10.4.2 Application management In the main interface of general settings, select "APP" to enter the app settings interface. Perform the following management for the installed APP. Force stop: Force the APP to be stopped.
- Page 63 Absenicon3.0 C138 User Manual Open app: run the selected APP. Uninstall: uninstall the selected APP. Clear data: Clear the data cache of the selected APP. 10.4.3 Data&Time On the main interface of general settings, select "Time and Date" to enter the time and date setting interface. Set the time and date of the Absenicon conference screen as follows.
- Page 64 Absenicon3.0 C138 User Manual...
- Page 65 Absenicon3.0 C138 User Manual 10.4.4 Language & keyboard In the main interface of general settings, select "Language and keyboard" to enter the language and keyboard setting interface. Set the language of the Absenicon conference screen and the input method of the keyboard.
- Page 66 Absenicon3.0 C138 User Manual Language: "Chinese (Simplified)" (default), "English", "Chinese (Traditional)" and "Japanese" can be selected. Keyboard: Optional "Android keyboard (AOSP)", "remote control input method" (default). 10.4.5 Wallpaper In the main interface of general settings, select "Wallpaper" to enter the wallpaper setting interface. Set the desktop wallpaper of the Absenicon conference screen.
- Page 67 Absenicon3.0 C138 User Manual The system comes with wallpaper: select the target wallpaper and click "set as wallpaper". Custom wallpaper: Click "Custom wallpaper", select the local picture that needs to be set as wallpaper in the ES file browser, and click.
- Page 68 Absenicon3.0 C138 User Manual 10.4.6 Assistive touch On the main interface of general settings, select "Assisitive Touch" to enter the setting interface. Turn on "Assistive Touch " and click the small icons on both sides of the interface to open the sidebar.
-
Page 69: System Settings
Absenicon3.0 C138 User Manual : Return key, click to return to the previous step. : Home button, click to return to the main interface. : Paintbrush button, click to open the paintbrush tool. : Whiteboard button, click to open the whiteboard tool. : Menu key, click to open the menu bar. - Page 70 Absenicon3.0 C138 User Manual Set the time for the Absenicon conference screen to switch on and off. Set the startup time and shutdown time of the conference screen respectively.
- Page 71 Absenicon3.0 C138 User Manual 10.5.2 Reset factory In the main interface of the system settings, select "Factory Reset " to enter the factory settings interface. Click " Factory reset" to restore the Absenicon conference screen to the factory state.
- Page 72 Absenicon3.0 C138 User Manual Description: The local documents, photos, videos, applications and other data will be cleared after the factory settings are restored and cannot be restored. 10.5.3 Android system update In the main interface of system settings, select "System Update" to enter the Android system update interface.
- Page 73 Absenicon3.0 C138 User Manual Insert the U disk containing the upgrade package into the USB port of the Android card. (The upgrade package file name is: update.zip, and the upgrade package must be placed in the root catalog of the mobile device).
- Page 74 Absenicon3.0 C138 User Manual Android card version Sending card version Receiving card version Memory information Storage information The name of the machine can be modified 10.5.5 Novice guide...
- Page 75 Absenicon3.0 C138 User Manual In the main interface of system settings, select "Beginner’s guide" to enter the novice guidance interface. See section 7 for details. 10.5.6 Network Port Switch On the main interface of the system settings, select "Network Port Switch".
-
Page 76: File Explorer
Absenicon3.0 C138 User Manual Switch the status of the network port, select "LCT" (default), "wired network". When you need to connect to the host computer through the network port, please switch to the "LCT" state. When you need to connect to the wired network through the network port, please switch to the "wired ... - Page 77 Absenicon3.0 C138 User Manual Select the folder where the target file is located, select the target file and confirm to open it. Long press the confirm button on the remote control or the left mouse button to perform operations such as "copy/cut/delete/rename"...
-
Page 78: 12.Product Maintenance
Absenicon3.0 C138 User Manual 12.Product Maintenance 12.1 Tool preparation The preparation tools include: a maintenance tool before the module, a Phillips screwdriver, a multimeter, etc. 12.2 Cabinet accessories replacement guide 12.2.1 Module maintenance Press the front module maintenance tool button, get close to the module, suck out the module, and then release the front module maintenance tool button after holding the module with your hand. - Page 79 Absenicon3.0 C138 User Manual First remove the 4 modules on the cabinet with the front maintenance tools and put them away, then use a Phillips screwdriver to remove the fixing screws of the HUB, and the HUB can be removed from the cabinet. 12.2.3 Receiving card maintenance Receiving card 12.2.4 Maintenance before power supply...
-
Page 80: Maintenance Instructions
Absenicon3.0 C138 User Manual Power supply 、 12.3 Maintenance instructions When you cannot determine the cause of the fault or do not understand the method of updating the accessories, please contact Absen! - Page 81 Absenicon3.0 C138 User Manual Shenzhen Absen Optoelectronic Co., Ltd. 18-20F Building 3A, Cloud Park, Bantian, Longgang District, Shenzhen 518129, P.R.China T: +86-755-89747399 absen@absen.com W: www. absen.com...
Need help?
Do you have a question about the Absenicon3.0 Series and is the answer not in the manual?
Questions and answers