Advertisement
Quick Links
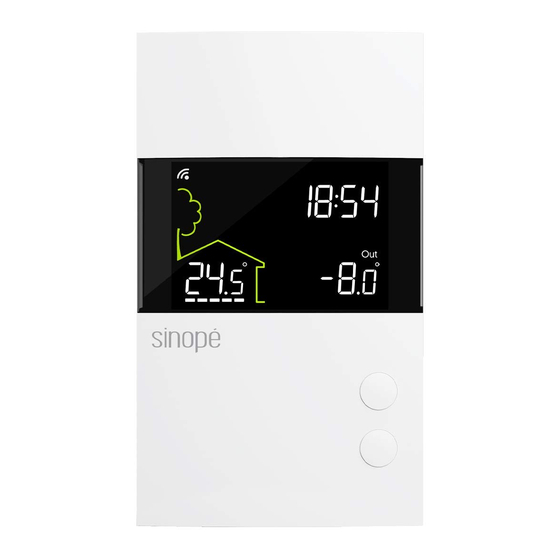
TH1310WF
Installation Guide
Smart floor heating
thermostat (3600 W)
Increasing or lowering the temperature
To adjust the temperature, press
or
. The requested temperature
will blink to confirm the new setpoint.
Leaving the standby mode
When the thermostat is on standby, press any button to turn back ON the
thermostat. The thermostat will resume operation under its last program
settings.
A thermostat that is placed on standby before a power failure will be on
standby by default when power is restored.
USER SETTINGS (continued)
Settings which can be modified directly on the device:
Name
Parameters & settings
Load power
Load
0 watt to 3600 watt
Temperature format
Display
°C or °F (default: °C)
Control mode
Control
A (Air), F (Floor) (default: F)
Maximum limit of the ambient
Max Air
(Only visible in F mode)
5 °C to 36 °C (default: OFF)
Maximum floor temperature
Max Floor
(Only visible in A mode)
5 °C to 36 °C (default: OFF)
Minimum floor temperature limit
Min Floor
(Only visible in A mode)
5 °C to 36 °C (default: OFF)
7
Assignment of auxiliary output
Aux
OFF, EXP, 15 sec, 15 min (default: OFF)
Floor sensor
8
Sensor
10K or 12K (default: 10K)
3) The thermostat offers 2 temperature regulation modes:
F mode (default): Regulates the floor temperature by means of an
external temperature sensor with the possibility to limit ambient
temperature.
A mode: Regulates ambient temperature with the possibility to limit floor
temperature by means of an external temperature sensor.
Warnings
The installation of this thermostat must be performed by a
certified electrician and comply with the national and local
electrical codes and regulations.
1
Unlock and lift the thermostat
cover.
4
Use the screws to secure
the thermostat to the
electrical box.
USER SETTINGS
All of the thermostat's settings can be set through the Neviweb app.
However, if you have not created your account and wish to change the
temperature format or the control cycle, you need to:
Get the setpoint to its minimum and hold the
to access the menu.
Press the
or
button to change the setting.
4) Maximum limit of the ambient temperature (F mode)
Thermostat limits floor heating so as not to exceed the set ambient
temperature limit
Display
5) Maximum floor temperature limit (A mode)
The thermostat limits floor heating to the set temperature to ensure it does
not exceed the selected limit. Ideal for protecting engineered wood floors.
6) Minimum floor temperature limit (A mode)
The thermostat limits the minimum temperature of the floor in order to
keep it at a comfortable temperature.
This parameter can only be used when a floor sensor is connected to the
thermostat.
7) Assigning the auxiliary output (A mode):
The thermostat provides an auxiliary output that has three functions which
are set from the user settings.
15 sec function: Short cycle auxiliary output (15 seconds). Used for a heater
controlled through an electronic relay (SSR).
15 min function: Long cycle auxiliary output (15 minutes). Used for a heater
controlled through an electromechanical relay or equipped with a fan.
In the 15 sec and 15 min functions, the thermostat controls the ambient
temperature with the floor. Once the floor temperature has reached its
limit, if the desired ambient temperature is not reached, the auxiliary output
activates the heating device to reach the set temperature. (The auxiliary
output acts as a second heating stage.)
EXP function: Auxiliary output to connect several heating floors
(TR1310 sold separately).
OFF function (default): Disables the auxiliary output.
Before starting the installation of your new thermostat, please
make sure that the breakers for your heating system are off at
the main electrical panel!
INSTALL YOUR THERMOSTAT
2
Connect the heating floor by using the
wire connectors load / line located on
the back of the thermostat. Connect the
ground wire to the screw in the
electrical box intended for this purpose.
Load
Floor heating
Line
5
Replace the cover and lock.
Press the
to the next parameter. Continue to press until the end of the
list to exit the menu.
button for 10 seconds
10 sec.
The following table lists the settings that can be changed directly on
the thermostat.
You can change more settings through the Neviweb application.
** To disconnect a thermostat from a network, refer to the disconnection
procedure on the back of this guide.
3
Connect the sensor.
(Only for control applications in
F mode or with floor limit.)
6
Power up the thermostat.
After performing a test sequence,
the thermostat should display the
floor temperature. If not, refer to
the trouble- shooting guide in
this manual.
and
buttons simultaneously to save and go
When installing your floor heating system: add a second
sensor in the floor whose tip can be stored in the
thermostat housing. This additional sensor can be
plugged in and used as a replacement without
altering your floor heating system.
Sensor
Sensor
Advertisement

Related Manuals for Sinope TH1310WF


Summary of Contents for Sinope TH1310WF
- Page 1 INSTALL YOUR THERMOSTAT TH1310WF Unlock and lift the thermostat Connect the heating floor by using the Connect the sensor. cover.
- Page 2 3-year limited warranty up as a home hub. It is recommended that you update to the SINOPE TECHNOLOGIE INC. warrants the components of their products against defects in material and workmanship for a 3-year period from the date of purchase, latest software and operating system.
Need help?
Do you have a question about the TH1310WF and is the answer not in the manual?
Questions and answers